Troubleshooting No Amplification in Digital PCR for ctDNA Analysis: A Comprehensive Guide for Researchers
This article provides a detailed framework for researchers and scientists troubleshooting the critical challenge of no amplification events in digital PCR (dPCR) assays for circulating tumor DNA (ctDNA).
Troubleshooting No Amplification in Digital PCR for ctDNA Analysis: A Comprehensive Guide for Researchers
Abstract
This article provides a detailed framework for researchers and scientists troubleshooting the critical challenge of no amplification events in digital PCR (dPCR) assays for circulating tumor DNA (ctDNA). Covering foundational principles to advanced applications, it systematically addresses pre-analytical variables, assay design, robust methodological protocols, and root-cause analysis for failed reactions. The content further explores validation strategies against other sensitive platforms like next-generation sequencing and discusses the future clinical implications of optimized dPCR for minimal residual disease monitoring and personalized therapy in oncology.
Understanding ctDNA and Digital PCR: Foundations for Effective Troubleshooting
Frequently Asked Questions (FAQs)
Q1: Why is there no amplification signal in my digital PCR experiment for ctDNA detection?
No amplification in digital PCR can result from several factors related to the unique biology of ctDNA. The most common causes and solutions are summarized in the table below.
| Possible Cause | Underlying Biology | Recommended Solution |
|---|---|---|
| Insufficient ctDNA input | ctDNA can constitute <0.01% of total cfDNA, falling below the detection limit. [1] | - Concentrate cfDNA from a larger plasma volume.- Increase the number of PCR cycles or reaction replicates. |
| Poor DNA Integrity | ctDNA is highly fragmented (~145 bp); standard DNA isolation may lose these short fragments. [2] | - Use a cfDNA-specific extraction kit optimized for short fragments.- Assess DNA integrity with a high-sensitivity bioanalyzer. |
| PCR Inhibition | Co-purified contaminants from plasma (hemoglobin, heparin, etc.) can inhibit polymerase. [3] | - Re-purify DNA to remove inhibitors.- Use a DNA polymerase with high tolerance to inhibitors.- Dilute the template to reduce inhibitor concentration. |
| Suboptimal Primer/Probe Design | The short length of ctDNA limits the available binding sites. [3] | - Design short amplicons (<100 bp) to favor amplification of degraded ctDNA.- Validate primer specificity using in silico tools. |
Q2: How does the short half-life of ctDNA impact sample collection and handling?
The short half-life of ctDNA (less than 2 hours) makes preanalytical steps critical. [2] The table below outlines the key considerations to ensure sample integrity.
| Step | Key Consideration | Best Practice |
|---|---|---|
| Blood Collection | Choice of blood collection tube is crucial to prevent cell lysis and genomic DNA contamination. | Use cell-free DNA blood collection tubes, which stabilize nucleated blood cells for several days. If using EDTA tubes, plasma must be separated within 2-4 hours. [2] |
| Plasma Separation | Improper centrifugation can lead to contamination with genomic DNA from white blood cells. | Perform a double centrifugation protocol to ensure platelet-free plasma is obtained. [2] |
| Sample Transport & Storage | Temperature fluctuations and agitation can degrade ctDNA. | Avoid agitation and extreme temperatures during transport. For long-term storage, freeze plasma at -80°C and avoid repeated freeze-thaw cycles. [2] |
Q3: What is "fragmentomics" and how can it be used in cancer detection?
Fragmentomics is the study of fragmentation patterns of cell-free DNA, which reflect the chromatin structure and nuclease activity of their cell of origin. [4] Cancer cells have distinct chromatin organization, leading to measurable differences in ctDNA fragment characteristics compared to DNA from healthy cells.
Key fragmentomic features include:
- Fragment Size Distribution: ctDNA is typically more fragmented than non-cancer cfDNA, with a peak around 145 bp. [2] The ratio of short to long fragments can be aberrant in cancer. [4]
- End Motifs & Preferred End Sites: The sequences at the ends of DNA fragments and their genomic locations are non-random and can be tumor-specific. [4]
Machine learning models like DELFI and xDELFI use these patterns to distinguish between cancer patients and healthy individuals with high accuracy, offering a powerful approach for non-invasive cancer screening. [4]
Troubleshooting Guide: No Amplification in ctDNA dPCR Experiments
The following workflow provides a systematic approach to diagnosing and resolving issues of no amplification.
Experimental Protocol: ctDNA Extraction and Fragment Size Analysis
This protocol details the steps for obtaining high-quality ctDNA for downstream digital PCR applications.
The Scientist's Toolkit: Key Research Reagent Solutions
The following table lists essential materials and their functions for ctDNA research, based on methodologies from the search results.
| Item | Function in ctDNA Research |
|---|---|
| Cell-Free DNA Blood Collection Tubes | Tubes containing preservatives that prevent white blood cell lysis, stabilizing the cfDNA profile for up to several days at room temperature and preventing dilution by genomic DNA. [2] |
| cfDNA Extraction Kits | Manual or automated kits specifically designed to efficiently recover short DNA fragments (as low as 50 bp) from plasma, maximizing ctDNA yield. [2] |
| Hot-Start DNA Polymerase | A modified enzyme that remains inactive until a high-temperature activation step, preventing non-specific amplification and primer-dimer formation at lower temperatures, which is crucial for assay specificity. [3] |
| Digital PCR (dPCR) Reagents | Specialized master mixes, probes, and primers formulated for partitioning-based PCR, allowing for the absolute quantification of rare mutant alleles in a background of wild-type DNA. [5] |
| Fragment Analysis Kits | High-sensitivity assays (e.g., Bioanalyzer, TapeStation) used to evaluate the size distribution of extracted cfDNA, confirming the presence of the characteristic ~166 bp peak and a shift towards shorter fragments indicative of ctDNA. [2] |
Digital PCR (dPCR) is a novel method for the absolute quantification of target nucleic acids, representing a significant evolution from traditional quantitative real-time PCR (qPCR) [6]. Unlike qPCR, which relies on relative quantification against a standard curve, dPCR provides a direct count of target molecules by combining sample partitioning, end-point PCR amplification, and Poisson statistical analysis [6] [7]. This technology has proven particularly valuable in applications requiring high sensitivity and precision, such as circulating tumor DNA (ctDNA) analysis for cancer research, rare mutation detection, and copy number variation studies [7] [8]. The fundamental shift dPCR brings is the conversion of a continuous, analog measurement into a discrete, digital count, hence its name [6].
Core Principles of Digital PCR
Sample Partitioning
The foundational first step in digital PCR is the physical partitioning of a PCR reaction mixture into thousands to millions of individual reactions [7]. This division creates what is effectively a matrix of independent microreactors.
- Purpose of Partitioning: Partitioning serves two critical functions. First, it dilutes the template nucleic acid molecules across many compartments so that each contains zero, one, or a few molecules [6]. Second, it creates an artificial enrichment of low-abundance sequences by isolating them from competing background DNA, thereby significantly enhancing detection sensitivity for rare targets [7].
- Partitioning Technologies: Several microfluidic technologies enable this partitioning:
End-Point Analysis
After partitioning, each compartment undergoes a standard PCR amplification [6]. However, unlike qPCR, which monitors the amplification in real-time, dPCR uses end-point detection [6] [7].
- Fluorescence Detection: Following the completion of PCR, each partition is analyzed for fluorescence using dyes or sequence-specific probes (e.g., TaqMan probes or molecular beacons) [7] [9].
- Binary Reading: Partitions that contain the target sequence will fluoresce above a set threshold and are scored as "positive" (1). Those without the target remain dark and are scored as "negative" (0) [6] [7]. This binary outcome is the "digital" readout that gives the technique its name.
Absolute Quantification via Poisson Statistics
The final core principle is the use of Poisson statistics to determine the absolute concentration of the target in the original sample without the need for a standard curve [6] [7].
- The Poisson Model: The random distribution of molecules across a large number of partitions is accurately described by the Poisson distribution [6]. The probability that a partition contains at least one target molecule is calculated based on the fraction of negative partitions.
- Concentration Calculation: The absolute concentration of the target sequence (in copies per microliter) is calculated using the formula
λ = -ln(1 - k/n), whereλis the average number of target molecules per partition,kis the number of positive partitions, andnis the total number of partitions [6]. This calculation is typically performed automatically by the instrument's software.
Key Differences Between dPCR and qPCR
The table below summarizes the fundamental methodological differences between digital PCR and quantitative real-time PCR.
Table 1: Core Differences Between dPCR and qPCR
| Feature | Digital PCR (dPCR) | Quantitative Real-Time PCR (qPCR) |
|---|---|---|
| Quantification Basis | Absolute, via direct counting | Relative, requires a standard curve |
| Signal Measurement | End-point fluorescence | Real-time fluorescence during exponential phase |
| Sample Handling | Partitioned into numerous reactions | Analyzed as a single, bulk reaction |
| Data Output | Binary (0/1) for each partition | Continuous fluorescence curve (Cq value) |
| Tolerance to Inhibitors | Higher, due to sample partitioning [6] | Lower, inhibitors affect overall reaction efficiency |
| Primary Application | Absolute quantification, rare allele detection, copy number variation | Gene expression analysis, rapid diagnostics |
Digital PCR Troubleshooting Guide
Frequently Asked Questions (FAQs)
1. Why is there no amplification in my dPCR experiment? No amplification (a complete lack of positive partitions) can stem from several issues. First, verify the integrity and concentration of your input DNA, especially when working with degraded samples like cfDNA, which requires short amplicon designs (<100 bp) for efficient detection [9]. Check the activity of your enzyme master mix and the stability of your fluorescent probes. Ensure that the thermal cycler block is calibrated to the correct temperatures and that partitions are stable throughout the cycling process without merging or breaking.
2. My positive and negative clusters are poorly separated. How can I improve data quality? Poor cluster separation makes accurate binary calling difficult. To address this, manually adjust the fluorescence threshold in your analysis software to better distinguish between positive and negative populations [5]. Check for potential fluorescent contaminants in your buffers or sample. If using probes, ensure they are designed for high specificity and that the PCR conditions (e.g., annealing temperature) are optimized to minimize non-specific amplification.
3. What is the "digital range," and why is it important? The digital range refers to the optimal concentration of target molecules in a partition where some wells contain the template and others do not [5]. If the sample is too concentrated, most partitions will be positive, providing little information for Poisson calculation. If it is too dilute, almost all partitions will be negative. For confident quantification, the fraction of positive partitions should be in a range that maximizes precision (theoretically optimal at a λ of ~1.6, or about 20% empty partitions) [6]. This often requires diluting your sample prior to partitioning.
4. How do I calculate the copies/µL in my original stock solution using the software?
The analysis software calculates the stock concentration by incorporating all dilution factors. You must enter the total dilution factor from your stock to the partitioned reaction. For example, if you add 1 µL of a sample that was pre-diluted 1:10 into a final reaction volume of 16 µL, the total dilution factor is (1 µL / 16 µL) * (1/10) = 0.00625 (equivalent to a 1:160 dilution) [5]. Entering this value into the software allows it to back-calculate the copies/µL in your undiluted stock.
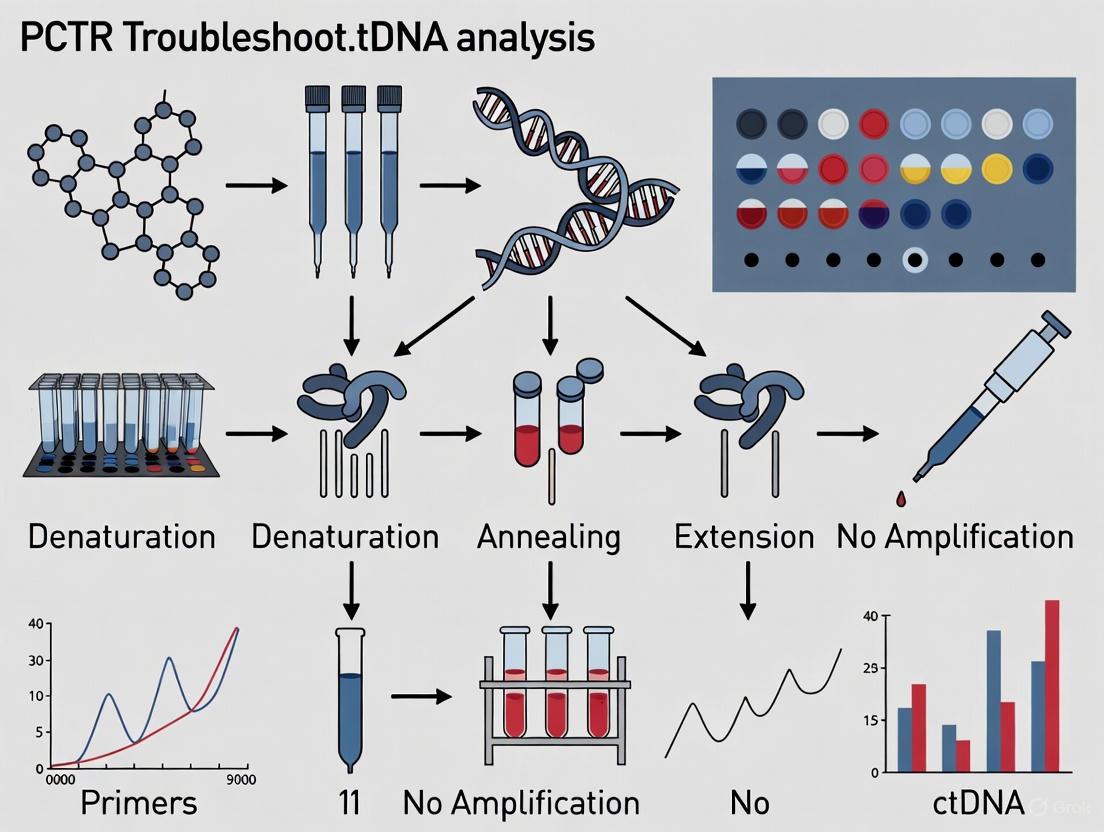
Troubleshooting Flowchart for 'No Amplification'
Experimental Protocol: Detecting KRAS Mutations in ctDNA via dPCR
The following protocol is adapted from a study on KRAS genotyping for pancreatic cancer research, which showcases dPCR's application in liquid biopsy [9].
Sample Preparation and cfDNA Extraction
- Plasma Collection: Collect 10 mL of peripheral blood in specialized ccfDNA blood collection tubes (e.g., PAXgene Blood ccfDNA Tubes) [8].
- Plasma Isolation: Centrifuge the collected whole blood twice at 1900 × g (first for 15 minutes, then the supernatant for 10 minutes) to obtain clear plasma. Store the plasma at -80°C until use [8].
- cfDNA Extraction: Extract cell-free DNA (cfDNA) from plasma using a dedicated kit (e.g., QIAamp Circulating Nucleic Acid Kit) according to the manufacturer's instructions [8].
dPCR Reaction Setup
- Prepare a 14.5 μL dPCR reaction mixture containing:
- For ctDNA, use short amplicon designs (~66 bp) to maximize the detection efficiency of fragmented DNA [9].
Partitioning and Amplification
- Load the dPCR reaction mixture into a partitioning device (e.g., a microfluidic chip using a specialized chip loader) [8].
- Seal the chip and perform PCR amplification on a flat-block thermal cycler (e.g., ProFlex 2X Flat PCR System) using the following cycling conditions [8]:
- Initial Denaturation: 96°C for 10 minutes.
- 39 cycles of:
- Denaturation: 96°C
- Annealing/Extension: 55-60°C
- Final Hold: 4-10°C.
Fluorescence Reading and Data Analysis
- Place the cycled chip into a digital PCR instrument reader.
- The instrument will measure the end-point fluorescence of each partition.
- Use the instrument's analysis software to set the fluorescence threshold and automatically calculate the absolute concentration of the target mutant alleles and reference genes based on Poisson statistics.
- Calculate the mutant allele frequency as a ratio of mutant copies to reference gene copies.
Table 2: Key Reagents and Materials for dPCR ctDNA Analysis
| Item | Function/Description | Example Product/Catalog Number |
|---|---|---|
| ccfDNA Blood Collection Tube | Stabilizes cell-free DNA in blood samples for transport and storage | PAXgene Blood ccfDNA Tube (Qiagen 768115) [8] |
| cfDNA Extraction Kit | Isulates and purifies cell-free DNA from plasma | QIAamp Circulating Nucleic Acid Kit (Qiagen 55114) [8] |
| dPCR Master Mix | Contains enzymes, dNTPs, and buffers necessary for PCR | Varies by platform (e.g., Questgenomics Master Mix) [8] |
| Mutation Detection Assay | Contains primers and probes specific to the target mutation | HER2 Amplification Detection Kit (Questgenomics Q0137365402) [8] or custom assays [9] |
| Digital PCR Chip | Microfluidic device for partitioning the PCR reaction | QuantStudio 3D dPCR Chip [9] |
Digital PCR, with its core principles of partitioning, end-point analysis, and absolute quantification, provides a powerful and direct method for nucleic acid quantification that is increasingly indispensable in modern molecular biology, particularly in challenging fields like ctDNA research [6] [7] [8]. Its ability to precisely count DNA molecules without a standard curve offers superior accuracy for detecting rare mutations and small copy number changes. By understanding these principles and systematically applying the troubleshooting guidelines and protocols outlined in this article, researchers can effectively overcome common experimental hurdles, thereby unlocking the full potential of dPCR in their scientific and diagnostic endeavors.
For Research Use Only. Not for use in diagnostic procedures.
In the context of a broader thesis on digital PCR (dPCR) troubleshooting for circulating tumor DNA (ctDNA) research, this guide addresses the critical need for meticulous experimental execution. The analysis of ctDNA presents a significant technical challenge because these tumor-derived fragments exist at very low concentrations within a high background of wild-type cell-free DNA (cfDNA) [10]. The absolute quantification provided by dPCR is particularly valuable for this application, but its accuracy is highly dependent on proper technique throughout the entire workflow, from sample collection to final data interpretation [11]. This technical support center provides targeted troubleshooting guides and FAQs to help researchers, scientists, and drug development professionals identify, mitigate, and correct common sources of error, thereby ensuring the reliability of their dPCR data in critical ctDNA studies.
Troubleshooting Guides & FAQs
Sample Quality and Preparation
Q: My dPCR run shows poor amplification efficiency or unexpected negative results. What could be wrong with my sample?
This is often traced to issues with sample quality, integrity, or input amount. ctDNA samples are particularly susceptible to these problems due to their fragmented nature and low abundance.
- A: Investigate the following potential sources of error:
- Sample Purity (Inhibitors): Contaminants carried over from the sample collection or DNA extraction process can inhibit the PCR reaction. These include:
- Sample Integrity: Strongly degraded template DNA or RNA can lead to a discrepancy between the expected and actual number of copies amplified. This is a key consideration for fragmented ctDNA and FFPE-derived DNA [12].
- Sample Input Amount: Using a DNA copy number that is too high or too low for the dPCR system's dynamic range will lead to inaccurate quantification. The ideal average number of copies per partition should be between 0.5 to 3, and must not exceed 5, to avoid saturation and ensure Poisson distribution accuracy [12].
Experimental Protocol: Assessing Sample Quality
- Quantification: Accurately quantify DNA using a fluorescence-based method (e.g., Qubit Fluorometer) rather than UV spectrophotometry, as the latter is sensitive to contaminants.
- Purity Check: Check the A260/A280 and A260/A230 ratios via Nanodrop to assess potential contamination from proteins or solvents.
- Integrity Analysis: For gDNA, run an aliquot on an agarose gel to confirm high molecular weight and lack of degradation. For ctDNA, a bioanalyzer trace is recommended to confirm the expected fragment size of ~160-200 bp [10].
Table 1: Common Sample Contaminants and Their Effects
| Contaminant | Source | Effect on dPCR |
|---|---|---|
| Salts (K+, Na+) | Extraction kits, EDTA blood tubes | Impairs primer/probe annealing, reduces PCR efficiency [12] [3] |
| Ethanol | DNA precipitation steps | Inhibits enzymatic reaction, can cause poor partition generation [12] |
| Phenol | Phenol-chloroform extraction | Denatures Taq polymerase [12] |
| Hemoglobin | Hemolyzed plasma samples | Acts as a PCR inhibitor [3] |
| Humic Acids | Environmental samples | Quenches fluorescence of dsDNA-binding dyes [12] |
Partitioning and Run Setup
Q: I have inconsistent results between replicates or my data analysis software has difficulty setting thresholds between positive and negative clusters. What should I check?
This problem frequently originates from issues during reaction setup, partitioning, or the assay chemistry itself.
- A: Focus on the following areas:
- Pipetting and Homogeneity: Inaccurate pipetting or improper mixing of the PCR reaction mix can lead to variability in reagent concentration between replicates, causing inconsistent amplification [3]. Non-homogeneous reagents can create density gradients that affect partitioning.
- Primer and Probe Design/Storage: While dPCR primer design follows qPCR rules, optimal primer concentrations tend to be higher (e.g., 0.5–0.9 µM) to increase fluorescence amplitude [12]. Probes dissolved in water instead of a buffered solution like TE buffer (pH 8.0, or pH 7.0 for Cy5 dyes) can degrade faster, leading to a weak signal [12].
- Detection Chemistry:
- For DNA-binding dyes (e.g., EvaGreen): Nonspecific products and primer-dimers will generate a fluorescent signal, creating intermediate clusters that complicate analysis. High PCR specificity is essential [12].
- For Hydrolysis probes (e.g., TaqMan): Avoid fluorophore-quencher combinations with overlapping emission spectra, as this creates background noise and poor peak resolution [12].
Experimental Protocol: Optimizing Assay Conditions
- Master Mix Preparation: Create a single, master mix for all replicates to minimize pipetting error. Mix the solution thoroughly by pipetting up and down or brief vortexing, then centrifuge to collect liquid [13].
- Primer/Probe QC: Aliquot primers and probes upon receipt to avoid repeated freeze-thaw cycles. Confirm concentrations by spectrophotometry [12].
- Thermal Gradient: Use a gradient thermal cycler to determine the optimal annealing temperature for your assay, even if using pre-validated qPCR conditions [3].
Data Analysis and Quantification
Q: My calculated DNA concentration is unexpectedly high or low. Are there factors in the data analysis that could cause this?
Errors in quantification often arise from improper application of the Poisson distribution or incorrect software settings.
- A: Key considerations for accurate quantification:
- The Digital Range: The fundamental requirement for dPCR is that the sample must be sufficiently diluted so that some partitions contain the target molecule and others do not. Running a chip with too many copies per partition (saturation) leads to inaccurate quantification [5]. The optimal range is 0.5 to 3 copies per partition [12].
- Threshold Setting: Software typically sets a fluorescence threshold to distinguish positive from negative partitions. In cases of poor cluster separation (e.g., due to non-specific amplification or high background), manual threshold setting may be required [5].
- Dilution Factor Accounting: All dilution factors of the stock sample must be correctly entered into the analysis software for it to report the correct copies/µL in the original stock solution [5].
- False Positives/Negatives: Always run non-template controls (NTCs) to determine the false-positive rate. For ctDNA detection, use wild-type-only controls to establish a threshold for true positive mutant detection [14].
Table 2: dPCR Platform Comparison: Key Characteristics
| Platform Type | Primary Partitioning Method | Pros | Cons |
|---|---|---|---|
| Chip-based dPCR | Microfluidic chips/chambers | Automated sample handling, lower risk of cross-contamination [15]. | Less precise control over partition uniformity; potentially higher upfront cost [15]. |
| Droplet Digital PCR (ddPCR) | Water-in-oil emulsion | Exceptional sensitivity and precision for low-abundance targets; mitigates PCR inhibitors [15]. | Higher consumable costs; manual droplet generation can risk cross-contamination [15]. |
Workflow Visualization
dPCR Troubleshooting Workflow
Optimal dPCR Workflow with Critical Control Points
The Scientist's Toolkit: Essential Reagents and Materials
Table 3: Research Reagent Solutions for dPCR Experiments
| Item | Function/Benefit | Application Note |
|---|---|---|
| cfDNA Extraction Kits | Optimized for recovery of short, fragmented DNA from plasma. Essential for efficient ctDNA capture [14]. | Kits like the QIAamp Circulating Nucleic Acid Kit are specifically designed for this purpose. |
| Hot-Start DNA Polymerase | Reduces non-specific amplification and primer-dimer formation by remaining inactive until the high-temperature initial denaturation step [3]. | Crucial for achieving clean cluster separation in both probe-based and EvaGreen assays. |
| Nuclease-Free TE Buffer | The recommended storage buffer for primers and probes. Maintains stability and prevents degradation, especially for sensitive dyes like Cy5 [12]. | Avoid resuspending oligonucleotides in water, as it offers lower stability. |
| PCR Additives (DMSO, BSA, Betaine) | Co-solvents that help amplify difficult targets such as GC-rich sequences by reducing secondary structures and lowering melting temperatures [13]. | Use at the lowest effective concentration (e.g., DMSO at 1-3%) as they can inhibit the polymerase at high levels. |
| Digital PCR Plates/Cartridges | The consumables that create the nanoscale partitions (wells or droplets) where individual PCR reactions occur. | The choice is platform-specific (e.g., 26k vs. 8.5k nanoplates, droplet generator chips). |
FAQs on Specific ctDNA Research Challenges
Q: For detecting very low-frequency mutations in ctDNA (e.g., <0.1%), what specific steps can I take to minimize false positives?
A: This is a central challenge in ctDNA research for early cancer detection or monitoring minimal residual disease. To minimize false positives:
- Establish a False-Positive Threshold: Run multiple (e.g., n=5) wild-type control samples to determine the background level of your assay. Set a threshold for a positive sample that is statistically significant above this background level [14].
- Use Duplex Assays: Design assays that co-amplify the mutant and wild-type targets in the same reaction. This allows for a more accurate calculation of the fractional abundance.
- Optimize Probe Specificity: Ensure your mutant-specific probe has high discrimination power. This may involve placing the mutation at the 5' end of the probe or using modified bases to enhance specificity.
- Replicate Measurements: Analyze samples in multiple technical replicates to confirm that the mutation is consistently detected.
Q: How does the quality of DNA from FFPE tissue differ from ctDNA, and how should my dPCR assay account for this?
A: Both present challenges, but of different natures. FFPE DNA is often cross-linked and fragmented, with abasic sites that can induce unspecific amplification [12]. In contrast, ctDNA is uniformly fragmented (~160-200 bp) but exists in a very low fractional abundance amidst wild-type DNA [10].
- For FFPE DNA: Keeping amplicons short (<100 bp) is advisable. Restriction digestion may be recommended to break up cross-linked DNA and reduce viscosity, ensuring more even partitioning [12].
- For ctDNA: The amplicon length should be designed to be within the natural size range of ctDNA to ensure efficient amplification. The primary challenge is assay sensitivity and specificity to distinguish the rare mutant allele.
Q: When should I choose dPCR over qPCR for my ctDNA project?
A: dPCR is superior to qPCR in the following scenarios [10] [11]:
- Absolute Quantification without a Standard Curve: When you need to know the exact copy number without constructing a standard curve.
- Detection of Rare Events: When the target sequence (e.g., a somatic mutation) is present at a very low frequency (<1%) in a background of wild-type DNA.
- Small Fold-Change Detection: When you need to detect small (e.g., <2-fold) but biologically significant changes in copy number with high precision.
- Analyzing Complex Samples: dPCR is generally more tolerant to PCR inhibitors due to the partitioning of the reaction, which dilutes the effect of inhibitors in individual positive partitions [15].
In circulating tumor DNA (ctDNA) research using digital PCR, a result of "no amplification" presents a fundamental interpretive challenge. Is it a true negative, accurately reflecting the absence of a tumor-derived molecular target in the patient's sample? Or is it a technical failure, where the target was present but failed to amplify due to experimental error? For researchers, clinicians, and drug development professionals, distinguishing between these possibilities is critical for ensuring data integrity and making correct clinical interpretations. This guide provides a systematic framework for troubleshooting no-amplification results in digital PCR experiments, with specific focus on the unique requirements of ctDNA analysis.
Understanding Digital PCR and Its Application in ctDNA Analysis
Digital PCR (dPCR) represents a transformative advancement in nucleic acid detection technology. Unlike quantitative PCR (qPCR), which relies on relative quantification against a standard curve, dPCR enables absolute quantification of target molecules without the need for external references [15]. This is achieved through partitioning a PCR reaction into thousands of individual nanoliter-scale reactions, following the principle that some partitions will contain no target molecules while others will contain one or more [16]. After endpoint amplification, the fraction of negative partitions is counted and the original target concentration is calculated using Poisson statistics.
In the specific context of ctDNA analysis, droplet digital PCR (ddPCR) has emerged as a particularly powerful tool due to its exceptional sensitivity and ability to detect rare mutant alleles amid a high background of wild-type DNA [10]. ctDNA fragments are typically short (predominantly <200 base pairs) and exist in low concentrations in blood plasma, especially in early-stage cancers [10]. The digital PCR workflow for ctDNA analysis involves sample collection, plasma separation, cell-free DNA extraction, assay preparation, droplet generation, thermal cycling, and droplet reading [17] [14].
Comprehensive Troubleshooting Guide for No-Amplification Results
When faced with no amplification in digital PCR experiments, researchers should systematically investigate potential failure points across the entire workflow. The following troubleshooting guide addresses the most common causes of technical failures.
Pre-PCR Phase: Sample and Assay Quality
Q1: How can I verify the quality and quantity of my extracted ctDNA?
- Problem: Inadequate quantity or poor quality of input DNA is a primary cause of amplification failure.
- Solutions:
- Quantification: Use fluorescence-based quantification methods (e.g., Qubit fluorometer) rather than spectrophotometry, as they are more accurate for low-concentration DNA and provide better sensitivity for dilute ctDNA samples [17] [14].
- Quality Assessment: Evaluate DNA integrity using fragment analyzers (e.g., TapeStation) to confirm the expected size distribution of cell-free DNA (typically 160-200 bp) [17].
- Inhibition Testing: Spike a known positive control into your sample to check for PCR inhibitors that may have co-purified during extraction.
- Extraction Protocol: Use specialized kits designed for circulating nucleic acid extraction (e.g., QIAamp Circulating Nucleic Acid kit) to optimize recovery of short DNA fragments [17] [14].
Q2: How do I validate that my assay design is appropriate for my target?
- Problem: Poorly designed assays or assays incompatible with the dPCR platform can cause complete amplification failure.
- Solutions:
- In Silico Validation: Use primer design tools to ensure primers have appropriate melting temperatures, lack secondary structures, and are specific to the target sequence.
- Positive Control: Always include a positive control sample containing the target sequence to verify assay functionality.
- Amplicon Length: Design assays with amplicon lengths ≤100 bp when possible, as this matches the fragmented nature of ctDNA and improves amplification efficiency [10].
- Probe Validation: For probe-based assays, confirm probe specificity and optimize probe concentration through titration experiments.
PCR Phase: Reaction Setup and Cycling Conditions
Q3: What are the critical reaction components to check when no amplification occurs?
- Problem: Suboptimal reaction conditions or component concentrations prevent amplification even when the target is present.
- Solutions:
- DNA Polymerase: Verify enzyme activity and use hot-start DNA polymerases to prevent primer-dimer formation and improve specificity [3].
- Mg²⁺ Concentration: Optimize Mg²⁺ concentration, as both insufficient and excess Mg²⁺ can dramatically impact amplification efficiency [3].
- dNTPs: Ensure fresh, high-quality dNTPs at appropriate concentrations (typically 200-500 μM each).
- Primer Concentration: Optimize primer concentrations (typically 0.1-1 μM); excessively high concentrations can promote primer-dimer formation, while insufficient concentrations yield no amplification [3].
- Inhibition Mitigation: If inhibitors are suspected, dilute the template DNA or use DNA polymerases with high processivity that display better tolerance to common PCR inhibitors [3].
Q4: How should I optimize thermal cycling conditions for difficult targets?
- Problem: Inappropriate thermal cycling parameters can prevent amplification, particularly for targets with secondary structures or high GC content.
- Solutions:
- Denaturation Temperature/Time: Increase denaturation temperature (up to 98°C) and/or time (up to 5 minutes) for GC-rich templates [3].
- Annealing Temperature: Optimize annealing temperature using gradient PCR; the optimal temperature is typically 3-5°C below the primer Tm [3].
- Additives: Incorporate PCR enhancers such as DMSO, betaine, or GC enhancers (typically at 5-10% v/v) to assist with difficult templates [3].
- Cycle Number: Increase the number of PCR cycles to 45-50 when detecting extremely low-abundance targets [3].
Post-PCR Phase: Instrumentation and Data Analysis
Q5: How do I verify that my dPCR instrument is functioning properly?
- Problem: Instrument malfunctions can mimic biological negatives.
- Solutions:
- Droplet/Partition Quality: Verify that the number of generated partitions meets manufacturer specifications (e.g., >10,000 droplets for ddPCR) [14] [15].
- Optical Calibration: Perform regular instrument calibration according to manufacturer recommendations.
- Threshold Setting: Ensure appropriate threshold settings between positive and negative populations; incorrect thresholds can misclassify positive signals as negative.
- System Controls: Always run platform-specific positive and negative controls to confirm instrument performance.
Experimental Protocols for Validating True Negatives
Protocol: Systematic Verification of True Negatives
Purpose: To distinguish true biological negatives from technical failures in dPCR experiments. Materials:
- Sample with no amplification result
- Positive control template (synthetic oligo or known positive sample)
- DNA extraction kit (e.g., QIAamp Circulating Nucleic Acid kit)
- dPCR supermix appropriate for your platform
- Fluorescence-based DNA quantification kit
Procedure:
- Repeat the Original Experiment: Repeat the dPCR assay using the same DNA extract to confirm the initial result.
- Spike-in Control Experiment: Spike a known quantity of positive control template into an aliquot of the non-amplifying sample. If amplification occurs, the original result may represent a true negative. If no amplification occurs, technical issues are likely.
- Re-extract and Re-test: Perform a fresh DNA extraction from the original sample source and repeat the dPCR assay.
- Alternative Target Amplification: Attempt to amplify a different, high-abundance target from the same DNA extract (e.g., a reference gene) to confirm DNA quality and PCR competency.
- Cross-platform Validation: If available, test the sample using an alternative detection method (e.g., different dPCR system, qPCR, or next-generation sequencing).
Workflow Diagram: Decision Pathway for No-Amplification Results
Quantitative Data for Troubleshooting
Critical Quality Metrics for dPCR Experiments
Table 1: Essential Quality Control Metrics for Interpreting No-Amplification Results
| Parameter | Acceptable Range | Unacceptable Range | Corrective Action |
|---|---|---|---|
| Total Partitions | Platform-dependent: • ddPCR: >10,000 droplets• Chip dPCR: >85% well occupancy | • ddPCR: <10,000 droplets• Chip dPCR: <70% well occupancy | Check droplet generation or chip loading; vortex samples; ensure proper oil:sample ratio [14] |
| Cell-free DNA Concentration | 1-100 ng/mL plasma (cancer patients) [10] | <0.1 ng/mL plasma | Increase input volume; concentrate sample; check extraction efficiency |
| Positive Control Ct (qPCR) | ≤30 cycles | >35 cycles or no amplification | Verify control integrity; prepare fresh aliquots; check reaction components |
| Sample Purity (A260/A280) | 1.8-2.0 | <1.7 or >2.1 | Re-purify sample; ethanol precipitation; use spin columns [3] |
| Template Volume | 1-10% of total reaction volume | >20% of total reaction volume | Reduce volume to minimize inhibitors; concentrate DNA if needed |
Optimization Parameters for Challenging Samples
Table 2: Key Optimization Parameters for Difficult ctDNA Targets
| Parameter | Standard Condition | Optimization Range | Application Context |
|---|---|---|---|
| Input DNA | 1-10 ng/reaction | Up to 50 ng/reaction | Very low-abundance targets [3] |
| Annealing Temperature | 3-5°C below primer Tm | Gradient: Tm ± 10°C | Suboptimal primer binding; new assay validation [3] |
| Magnesium Concentration | 1.5-3.5 mM | 0.5-5.0 mM | Amplification failure; specific polymerase requirements [3] |
| Additive Concentration | DMSO: 2-5%Betaine: 0.5-1.0 M | DMSO: 1-10%Betaine: 0.1-2.0 M | GC-rich templates; secondary structures [3] |
| Extension Time | 30-60 seconds | 1-5 minutes | Long amplicons; complex targets [3] |
The Scientist's Toolkit: Essential Research Reagents
Table 3: Key Reagents for ctDNA Digital PCR Analysis
| Reagent Category | Specific Examples | Function | Application Notes |
|---|---|---|---|
| Blood Collection Tubes | Cell-Free DNA BCT (Streck), K₂EDTA tubes | Preserve cfDNA profile; prevent background DNA release | Streck tubes allow room temp transport for up to 7 days; critical for multi-center trials [17] |
| cfDNA Extraction Kits | QIAamp Circulating Nucleic Acid Kit (Qiagen) | Isolation of short-fragment DNA from plasma | Optimized for low-abundance targets; higher recovery of <200 bp fragments vs. standard kits [17] [14] |
| Digital PCR Master Mixes | ddPCR Supermix (Bio-Rad), QIAcuity Digital PCR Master Mix (Qiagen) | Provide optimal environment for partitioned amplification | Platform-specific formulations; some include inhibitor resistance [15] |
| Assay Design Tools | Primer-BLAST, IDT PrimerQuest, Bio-Rad ddPCR Assay Design Tool | In silico design and validation of primers/probes | Critical for rare allele detection; requires stringent specificity checking |
| Quantification Standards | Digital PCR Absolute Quantification Standards, Synthetic DNA Controls | Calibration and validation of assay performance | Essential for establishing limits of detection and quantification [14] |
Frequently Asked Questions (FAQs)
Q: How do I determine whether my no-amplification result is due to genuine target absence versus technical failure? A: Implement a systematic verification protocol including: (1) repeating the experiment with the same DNA extract, (2) testing a fresh DNA extraction from the original sample, (3) running a spike-in control to check for inhibition, and (4) attempting to amplify an alternative target from the same DNA sample. If all controls perform appropriately and only your target of interest fails to amplify, you likely have a true negative.
Q: What is the minimum number of positive droplets/partitions needed to confirm true positivity? A: The threshold depends on your background signal and false-positive rate. As a general guideline, most studies require at least 3 positive droplets in no-template controls to establish a threshold for true positivity. For very low-abundance targets, statistical analysis using Poisson confidence intervals is recommended [14].
Q: How does sample collection and processing affect amplification success in ctDNA studies? A: Sample collection is critical. Use specialized blood collection tubes (e.g., Streck Cell-Free DNA BCT) that stabilize nucleated blood cells and prevent background DNA release. Process samples within recommended timeframes (typically 24-72 hours depending on tube type), and perform double centrifugation (1600 × g followed by 16,000 × g) to remove cellular contaminants [17].
Q: What are the most common sources of PCR inhibition in ctDNA samples? A: Common inhibitors include heparin (from certain blood collection methods), hemoglobin (from hemolysis), immunoglobulin G, and impurities from DNA extraction (e.g., phenol, EDTA, proteinase K, salts). If inhibition is suspected, dilute the template, re-purify the DNA, or use DNA polymerases with high inhibitor tolerance [3].
Q: How can I improve detection of very low-abundance ctDNA targets (<0.1% variant allele frequency)? A: For ultra-rare targets, consider: (1) increasing input DNA amount (up to 50 ng per reaction), (2) analyzing larger plasma volumes (10-20 mL blood draws), (3) using highly specific assays with optimized priming conditions, and (4) increasing the number of technical replicates to improve statistical power.
In ctDNA research using digital PCR, distinguishing true negatives from technical failures requires meticulous attention to experimental design, rigorous quality control, and systematic troubleshooting. By implementing the protocols and guidelines outlined in this technical support document, researchers can significantly improve the reliability of their data interpretation. Remember that consistent application of controls, careful monitoring of quality metrics, and methodical investigation of unexpected results form the foundation of robust ctDNA analysis. As the field advances toward increasingly sensitive detection methods and clinical applications, these practices will become ever more critical for generating meaningful, reproducible results in cancer research and diagnostics.
Robust dPCR Workflow Design for Sensitive ctDNA Detection
A robust pre-analytical phase is the foundation for successful ctDNA detection in digital PCR experiments.
▎FAQs: Addressing Common Pre-Analytical Challenges in ctDNA Analysis
1. Why is my ctDNA concentration too low for reliable ddPCR analysis?
Low ctDNA yield can stem from several pre-analytical factors. The blood collection tube and time to processing are critical; cfDNA is unstable, and delays can lead to degradation. Ensure blood is processed within the recommended timeframe for your tube type. The extraction method must be optimized for the low molecular weight of cfDNA. Furthermore, low yield may reflect the patient's actual disease burden, as ctDNA levels can be very low in early-stage cancer or low-shedding tumors [18].
2. How can I prevent false positives in my ddPCR results?
False positives often originate during the analytical phase but can be influenced by pre-analytical steps. Contamination is a primary culprit. Use dedicated pre-PCR workspaces and reagents, and include negative controls (e.g., water) during extraction and ddPCR setup. During blood processing, ensure careful handling to avoid hemolysis, as the release of genomic DNA from white blood cells can dilute the mutant allele frequency, making true signals harder to distinguish from background noise [3] [19].
3. What is the impact of using different blood collection tubes?
The choice of blood collection tube is a major decision point. EDTA tubes are common but require plasma separation within a few hours to prevent cfDNA degradation from cell lysis. Stabilizing tubes (e.g., Streck Cell-Free DNA BCT, PAXgene Blood ccfDNA) contain preservatives that prevent white blood cell lysis and stabilize cfDNA, allowing for longer transport and storage times (e.g., up to 14 days for some Streck tubes). Using the wrong tube or exceeding its stability window can drastically reduce ctDNA quality and yield [20].
▎Troubleshooting Guide: Pre-Analytical Workflow
The table below outlines common issues, their causes, and solutions across the pre-analytical workflow.
| Workflow Stage | Problem | Possible Cause | Solution |
|---|---|---|---|
| Blood Collection | Rapid cfDNA degradation; high wild-type background. | 1. Delay in plasma processing when using EDTA tubes.2. Hemolysis due to rough handling. | 1. Process EDTA tubes within 2-6 hours. Use specialized cell-stabilizing tubes for longer delays [20].2. Handle blood gently; invert tubes slowly. |
| Plasma Processing | Low yield; contaminated sample. | 1. Incomplete separation of plasma from cellular components.2. Inadequate centrifugation speed/time. | 1. Perform a double centrifugation protocol (e.g., 1,600-2,000 x g for 10 min, then transfer and centrifuge supernatant at 16,000 x g for 10 min) [18].2. Always transfer plasma to a new tube after the first spin. |
| cfDNA Extraction | Low cfDNA concentration; co-purification of PCR inhibitors. | 1. Inefficient binding or elution from column/magnetic beads.2. Residual ethanol or salts from wash steps. | 1. Ensure reagents are at correct temperature. Use a pre-heated elution buffer (50-70°C) and let it incubate on the membrane for 1-5 min [18].2. Let the column dry fully after final wash or perform an additional drying spin. |
| General | High variability between replicate samples. | 1. Inconsistent techniques across users or batches.2. Use of expired or compromised reagents. | 1. Establish and follow a standard operating procedure (SOP). Train all staff consistently [20].2. Aliquot reagents to avoid freeze-thaw cycles; check expiration dates [19]. |
▎Experimental Workflow: From Blood Draw to Isolated cfDNA
The following diagram illustrates the critical steps for processing a blood sample to obtain high-quality cell-free DNA (cfDNA) for downstream digital PCR analysis.
Adherence to this workflow is critical for obtaining analyzable ctDNA. The use of stabilizing blood collection tubes is highly recommended for multi-center trials or when logistics cause delays. The double centrifugation step is non-negotiable, as it ensures the removal of residual cells and platelets that would otherwise lyse and release large amounts of genomic DNA, diluting the rare ctDNA fragments and increasing the background. Finally, eluting the purified cfDNA in a low-EDTA TE buffer or molecular-grade water is essential to prevent inhibition of the subsequent digital PCR reaction [3] [20].
▎Research Reagent Solutions for ctDNA Analysis
This table lists key materials and their critical functions in the pre-analytical phase.
| Reagent/Material | Function | Technical Notes |
|---|---|---|
| Cell-Free DNA Blood Collection Tubes | Preserves blood sample by preventing white blood cell lysis and nuclease activity, stabilizing cfDNA profile. | Enables extended sample storage and transport (up to 14 days). Essential for multi-center studies. |
| cfDNA Extraction Kits | Isolate and purify short-fragment cfDNA from plasma; remove PCR inhibitors like proteins and salts. | Select kits designed specifically for cfDNA, not genomic DNA. Ensures high yield of the sub-200 bp fraction. |
| Magnetic Beads or Silica Membranes | Bind nucleic acids to separate cfDNA from other plasma components during extraction. | Magnetic beads can offer better recovery for low-concentration samples. |
| Proteinase K | Digests plasma proteins and nucleases that could degrade cfDNA or inhibit downstream PCR. | A critical first step in most extraction protocols to ensure complete sample lysis and deactivation of nucleases. |
| Molecular-Grade Water or Low-EDTA TE Buffer | Elutes purified cfDNA from the extraction column/beads. | Provides an inert suspension medium that will not inhibit the DNA polymerase in the ddPCR reaction [3]. |
| Ethanol (70-100%) | Washes and desalts the bound cfDNA during extraction to remove impurities. | Must be completely removed before elution, as residual ethanol can severely inhibit PCR amplification [19]. |
Frequently Asked Questions (FAQs) and Troubleshooting Guides
FAQ: Addressing Common Challenges in Low-Abundance Target Detection
1. What are the primary causes of "no amplification" or low yield when detecting low-abundance targets like ctDNA? The failure to amplify low-abundance targets can stem from several factors related to sample quality and reaction components. Key issues include the presence of PCR inhibitors, insufficient template DNA quantity or quality, suboptimal primer design, and incorrect thermal cycling conditions. Inhibitors can directly obstruct DNA polymerase or interact with the nucleic acid template, which is particularly detrimental when target molecules are already scarce [21]. Furthermore, the short length of ctDNA (typically 90–150 base pairs) and its low concentration in a high background of wild-type DNA require exceptionally sensitive and optimized assays [22].
2. How can I improve the specificity of my assay to avoid non-specific products and primer-dimer? Enhancing specificity involves a multi-pronged approach. Using hot-start DNA polymerases is highly recommended, as they remain inactive at room temperature, preventing primer degradation and the elongation of misprimed sequences during reaction setup [21] [3]. Optimizing the annealing temperature by increasing it incrementally can significantly reduce non-specific binding [3] [23]. Careful primer design is also crucial; ensure primers are specific, have minimal self-complementarity, and avoid stretches of identical nucleotides at the 3' ends to prevent primer-dimer formation [21] [23]. For advanced applications, employing blocker probes, as in E-ice-COLD-PCR, can selectively inhibit the amplification of wild-type sequences, thereby enriching your target [24].
3. What strategies can be used to enrich low-abundance targets before amplification? Target enrichment is often necessary to detect rare variants. Probe-based capture methods can pre-concentrate your target sequences. One innovative approach uses DNA-clicked iron oxide nanoparticles (InBeads) with an inert silica coating to minimize non-specific binding to background genomic material, thereby enriching for specific viral sequences [25]. For DNA methylation analysis, techniques like E-ice-COLD-PCR use a Locked Nucleic Acid (LNA) blocker oligonucleotide that specifically hybridizes to and blocks the amplification of unmethylated DNA, allowing for the strong enrichment of low-abundant methylated alleles from bisulfite-converted DNA [24].
4. How does digital PCR (dPCR) aid in the detection of low-abundance targets? dPCR offers significant advantages for quantifying rare targets by partitioning a PCR reaction into thousands of nanoreactions. This allows for the absolute quantification of DNA without the need for a standard curve and greatly improves tolerance to PCR inhibitors present in complex sample matrices [22]. Its single-molecule counting capability provides a detection sensitivity that can drop below 0.01% variant allele frequency (VAF), making it particularly suitable for detecting low-VAF mutations in ctDNA [22].
Troubleshooting Guide: No Amplification or Low Yield in ctDNA dPCR
The following table outlines common problems and solutions when dealing with no or low amplification signals in digital PCR experiments for circulating tumor DNA.
| Problem Area | Possible Cause | Recommended Solution |
|---|---|---|
| Template DNA (ctDNA) | Low purity / PCR inhibitors (e.g., phenol, EDTA) [3] | Re-purify DNA, use ethanol precipitation, or use polymerases with high inhibitor tolerance [3]. |
| Insufficient quantity / Low abundance [23] | Increase input DNA volume; use target enrichment methods (e.g., probe-capture, E-ice-COLD-PCR) [25] [24]. | |
| Degraded DNA [3] | Minimize shearing during isolation; assess integrity by gel electrophoresis; store DNA correctly [3]. | |
| Primers & Probes | Problematic design [3] [23] | Redesign primers to ensure specificity, optimal length (18-30 bp), and GC content (40-60%); check for secondary structures [19] [23]. |
| Low concentration [21] [19] | Optimize primer concentration, typically between 0.1–1 μM [3] [19]. | |
| Old or degraded primers [3] | Aliquot primers after resuspension to avoid multiple freeze-thaw cycles; use fresh aliquots [3]. | |
| Reaction Components | Inappropriate or insufficient DNA polymerase [3] | Use high-sensitivity, high-fidelity, or hot-start polymerases; optimize the amount [3] [19]. |
| Suboptimal Mg²⁺ concentration [21] [3] | Perform a titration series to optimize Mg²⁺ concentration for your specific assay [21] [3]. | |
| Unbalanced dNTP concentrations [3] | Ensure equimolar concentrations of all four dNTPs to reduce PCR error rate and improve efficiency [3]. | |
| Thermal Cycling | Suboptimal annealing temperature [21] [3] | Use a gradient thermal cycler to determine the optimal temperature; increase temperature to improve specificity [3] [23]. |
| Insufficient number of cycles [3] | Increase the cycle number (e.g., up to 40 cycles) to amplify very rare targets [3] [23]. | |
| Incorrect denaturation conditions [3] | Increase denaturation time and/or temperature for GC-rich templates or sequences with secondary structures [3]. |
Experimental Protocol: E-ice-COLD-PCR for Enrichment of Low-Abundance Methylated ctDNA
This protocol enables the enrichment of rare methylated DNA molecules from a background of unmethylated DNA, such as hypermethylated ctDNA in a patient's blood sample, followed by Pyrosequencing analysis [24].
1. Assay Design
- Primers: Design primers for bisulfite-converted DNA that flank the CpG region of interest but do not contain any CpG sites themselves. This ensures amplification of all molecules regardless of methylation status.
- LNA Blocker Probe: Design an oligonucleotide blocker that is complementary to the unmethylated sequence of the bisulfite-converted DNA after C-to-U conversion. The probe should contain several Locked Nucleic Acid (LNA) bases to increase its binding affinity and specificity. This probe will hybridize to and block the amplification of completely unmethylated DNA.
2. DNA Extraction and Bisulfite Conversion
- Extract cell-free DNA from plasma using a dedicated kit (e.g., QIAamp UCP Pathogen Mini Kit).
- Convert the DNA using a commercial bisulfite conversion kit (e.g., EZ DNA Methylation-Gold kit or Epitect Fast DNA bisulfite kit), following the manufacturer's instructions. This step deaminates unmethylated cytosines to uracils, while methylated cytosines remain unchanged.
3. E-ice-COLD-PCR Amplification
- Prepare a PCR mix on ice. A sample 20 µL reaction is outlined below. Optimize the concentration of the LNA blocker probe (a typical starting range is 0.1–1 µM) and the annealing temperature for your specific assay [24].
Table: E-ice-COLD-PCR Reaction Setup
| Component | Final Concentration/Amount |
|---|---|
| Nuclease-Free Water | To 20 µL |
| 2x HotStar Taq Buffer | 10 µL |
| MgCl₂ (optional, if needed) | As optimized |
| dNTP Mix (e.g., 10 mM each) | As optimized |
| Forward Primer (e.g., 10 µM) | Variable (e.g., 0.5 µL) |
| Reverse Primer (e.g., 10 µM) | Variable (e.g., 0.5 µL) |
| LNA Blocker Probe (e.g., 10 µM) | Variable (e.g., 0.5 µL) |
| HotStar Taq DNA Polymerase | 0.5–1.25 U |
| Bisulfite-Converted DNA Template | 1–10 µL |
- Run the PCR with the following cycling conditions, optimizing the critical temperature (Tc) and annealing temperature (Ta):
- Initial Denaturation: 95°C for 15 minutes (to activate the hot-start polymerase).
- Amplification & Enrichment (40–50 cycles):
- Denaturation: 95°C for 20–30 seconds.
- Critical Temperature (Tc) Step: A specific temperature (e.g., 76–82°C) for 10–120 seconds. This is key for selective denaturation.
- Annealing: Ta °C for 20–30 seconds.
- Extension: 72°C for 20–30 seconds.
- Final Extension: 72°C for 5 minutes.
4. Analysis by Pyrosequencing
- Purify the E-ice-COLD-PCR product.
- Use a sequencing primer to analyze the enriched PCR product on a Pyrosequencing system according to the manufacturer's protocol. This provides quantitative data on the methylation levels at single-nucleotide resolution.
The Scientist's Toolkit: Essential Reagents for Sensitive Assay Development
Table: Key Research Reagent Solutions
| Reagent / Material | Function in Assay Development |
|---|---|
| High-Sensitivity dPCR Master Mix | Provides the optimized reagents and enzymes for efficient amplification in partitioned digital PCR assays, crucial for absolute quantification of rare targets [22]. |
| Hot-Start DNA Polymerase | Remains inactive until a high-temperature step, preventing non-specific amplification and primer-dimer formation during reaction setup, thereby increasing assay specificity and yield [21] [3]. |
| LNA (Locked Nucleic Acid) Oligonucleotides | Used in blocker probes (e.g., in E-ice-COLD-PCR) or assays to increase the thermal stability and specificity of hybridization, enabling selective inhibition of non-target sequences [24]. |
| Bisulfite Conversion Kit | Chemically converts unmethylated cytosine to uracil, allowing for the subsequent detection and analysis of DNA methylation patterns via PCR or sequencing [24]. |
| Methylated & Unmethylated DNA Controls | Serve as essential standards for optimizing and validating methylation-specific assays, enabling the creation of calibration curves for accurate quantification [24]. |
| Iron Oxide Nanoparticles (IONPs) | Functionalized with DNA probes, they can be used in novel capture systems to specifically enrich for low-abundance target sequences from a complex background with minimal off-target binding [25]. |
Workflow and Signaling Pathway Diagrams
Diagram Title: E-ice-COLD-PCR Workflow for Methylated ctDNA
Diagram Title: Low Abundance Target PCR Troubleshooting
In the context of circulating tumor DNA (ctDNA) research using digital PCR (dPCR), the implementation of robust experimental controls is not merely a recommendation but a fundamental necessity. ctDNA analysis presents unique challenges, including the detection of rare mutations against a high background of wild-type DNA and working with limited quantity and quality of starting material [12] [26]. Proper controls are essential to validate your results, troubleshoot assays, and ensure the accuracy required for meaningful conclusions in drug development research.
This guide details the implementation and troubleshooting of two critical control types: No Template Controls (NTCs) and Positive Controls. By integrating these controls into your dPCR workflow, you safeguard your experiments against false positives and false negatives, providing confidence in your data for critical applications such as therapy monitoring, resistance mutation detection, and early treatment response assessment [12] [27].
Understanding and Implementing No Template Controls (NTCs)
Purpose and Importance
The No Template Control (NTC) is a critical reaction containing all dPCR components—master mix, primers, probes, and water—except for the nucleic acid template [27]. Its primary function is to detect contamination in your reagents or workflow. A clean NTC (showing no amplification) confirms that your reagents are free of contaminating nucleic acids and that any signal in your experimental samples is specific to the target you intend to detect [28]. In sensitive ctDNA applications where rare variant detection is paramount, a contaminated NTC invalidates experimental results, as you can no longer trust that your signal comes from the patient sample.
Step-by-Step Protocol for NTC Implementation
- Preparation: During reaction setup, prepare at least one NTC tube or well for each unique master mix used.
- Assembly: Combine the same volume of master mix, primers, probes, and nuclease-free water as used in your test samples.
- Template Omission: Crucially, do not add any template DNA, such as ctDNA.
- dPCR Run: Load the NTC onto your dPCR platform alongside your test samples and process it through the entire workflow, including partitioning, amplification, and imaging [12].
Troubleshooting NTC Amplification
The table below outlines common causes and solutions for amplification in your NTC.
Table 1: Troubleshooting Guide for NTC Amplification
| Problem Observed | Potential Cause | Recommended Solution |
|---|---|---|
| Random or variable amplification across NTC replicates [28] | Contamination introduced during plate or tube setup (e.g., aerosol from samples). | - Use clean, dedicated lab coats and gloves.- Employ filtered pipette tips.- Physically separate pre- and post-PCR work areas [28]. |
| Consistent amplification across all NTC replicates [28] | One or more reagents are contaminated with template DNA or amplicons. | - Prepare fresh, new aliquots of all reagents, including water, master mix, and primer/probe stocks.- Use a new batch of nuclease-free water.- Incorporate UDG (Uracil-DNA Glycosylase) or UNG treatment into your protocol to degrade carryover contamination from previous PCRs [28]. |
| Low-level amplification (common with intercalating dyes) [28] | Formation of primer-dimers or non-specific amplification products. | - Optimize primer concentrations to minimize dimerization ( [28], see table below).- Re-design primers to improve specificity and reduce self-complementarity.- Switch to a hydrolysis probe (TaqMan)-based chemistry, which provides greater specificity than DNA-binding dyes [12]. |
Table 2: Primer Concentration Optimization Matrix for Reducing Primer-Dimers [28]
| Reverse Primer (nM) | Forward Primer (nM) | ||
|---|---|---|---|
| 100 | 200 | 400 | |
| 100 | 100/100 | 200/100 | 400/100 |
| 200 | 100/200 | 200/200 | 400/200 |
| 400 | 100/400 | 200/400 | 400/400 |
NTC Troubleshooting Decision Tree
Understanding and Implementing Positive Controls
Purpose and Types
Positive controls verify that your dPCR assay is functioning correctly. They confirm that your primers, probes, and enzymes can successfully amplify a known target under your chosen reaction conditions [27]. There are two main types used in dPCR:
- Absolute Standards: Nucleic acid templates of known copy number (e.g., synthetic oligonucleotides like gBlocks, plasmids with cloned sequences, or genomic DNA from established cell lines). These are used for absolute quantification [27].
- Known Positive Samples: A sample previously confirmed to contain the target of interest, used to check for the presence or absence of the target.
Furthermore, positive controls can be used either externally or internally:
- External Positive Control: Amplified in a separate reaction well to verify overall assay functionality [27].
- Internal Positive Control (IPC): A control sequence (often exogenous and heterologous) spiked into the same reaction as the test sample. The IPC primarily tests for the presence of PCR inhibitors in the sample and controls for extraction and amplification efficiency [27].
Step-by-Step Protocol for Positive Control Implementation
- Selection: Choose an appropriate control template. For ctDNA mutation analysis, this could be a synthetic DNA fragment containing the specific mutation of interest.
- Quantity Calculation: Calculate the copy number to ensure it falls within the optimal range for your dPCR system (typically 0.5-3 copies per partition on average) [12]. For example, with 10 ng of human gDNA (~3000 gene copies), you would need to dilute accordingly for a 20,000-partition system.
- Assembly: Prepare the positive control reaction identically to your test samples, but replace the unknown template with the known positive control template.
- Inclusion for IPC: For an Internal Positive Control, spike a defined copy number of the exogenous heterologous control into every sample during the reaction setup [27].
Troubleshooting Positive Control Failure
Failure of the positive control to amplify indicates a fundamental problem with the assay itself.
Table 3: Troubleshooting Guide for Positive Control Failure
| Problem Observed | Potential Cause | Recommended Solution |
|---|---|---|
| No amplification in External Positive Control | Degraded or inaccurate control template. | - Verify control template concentration and integrity (e.g., by gel electrophoresis or spectrophotometry).- Aliquot control templates to avoid freeze-thaw cycles and store at -20°C in TE buffer, pH 8.0 [12] [3]. |
| No amplification in External Positive Control | Suboptimal reaction conditions or inactive reagents. | - Check the viability of all reagents, especially the DNA polymerase.- Verify thermal cycler conditions and calibrate if necessary.- Ensure primers and probes are stored correctly (-20°C, in TE buffer) and are not beyond their shelf-life [12] [3]. |
| Internal Positive Control (IPC) amplifies, but target does not | The target is genuinely absent or below the detection limit in the sample. | - Report a true negative result for the target.- Confirm the limit of detection (LOD) of your assay is appropriate for your application [27]. |
| Internal Positive Control (IPC) fails to amplify in a sample | Presence of PCR inhibitors in the sample. | - Re-purify the sample DNA, using kits designed for challenging samples like plasma or FFPE tissue.- Use 70% ethanol precipitation to remove residual salts or ions.- Use DNA polymerases with high tolerance to inhibitors [3]. |
| Internal Positive Control (IPC) fails to amplify in a sample | Errors during nucleic acid extraction or reaction setup. | - Check the extraction protocol and ensure no step was missed.- Confirm that the IPC was added correctly to the reaction [27]. |
The Researcher's Toolkit: Essential Reagents for dPCR Controls
Table 4: Key Research Reagent Solutions for dPCR Control Implementation
| Reagent / Material | Function in Control Assays | Critical Notes for ctDNA Research |
|---|---|---|
| Synthetic DNA (gBlocks, Oligos) | Serves as an absolute quantitative standard or positive control template for mutation assays. | Ideal for generating precise copy number standards for rare mutation detection without the need for patient material [27]. |
| Hydrolysis Probes (TaqMan) | Provide sequence-specific detection, minimizing false positives from primer-dimers in NTCs. | Crucial for multiplex assays in liquid biopsy; ensure reporter and quencher combinations have minimal spectral overlap [12]. |
| UDG / UNG Enzyme | Prevents carryover contamination by degrading PCR products from previous reactions, protecting NTCs. | Essential for high-throughput labs processing many ctDNA samples daily to prevent amplicon contamination [28]. |
| TE Buffer (pH 8.0) | The recommended storage buffer for primers, probes, and DNA standards. | Maintains oligo stability. Exception: Probes with Cy5/Cy5.5 should be stored in TE buffer, pH 7.0 [12]. |
| Exogenous Heterologous IPC | A control sequence spiked into the reaction to identify PCR inhibition. | The most flexible IPC type; its design does not compete with the target for primers, preserving assay sensitivity for low-abundance ctDNA [27]. |
| Restriction Enzymes | Used to digest complex DNA (e.g., high molecular weight gDNA) to ensure uniform partitioning in positive controls. | Do not select an enzyme that cuts within your amplicon sequence [12]. |
Frequently Asked Questions (FAQs)
Q1: My NTC is clean, but I'm still getting unexpected results in my patient ctDNA samples. What could be wrong? A clean NTC rules out reagent contamination, so the issue likely lies with the sample itself. The ctDNA could be degraded, or the sample may contain PCR inhibitors that are causing inefficient amplification. Consider using an Internal Positive Control (IPC) spiked into each sample to diagnose inhibition. Also, verify the quality and quantity of your extracted ctDNA [3] [27].
Q2: What is the difference between a No Template Control (NTC) and a No RT Control? An NTC is used in all PCR-based methods (including DNA dPCR) to check for contamination. A No RT (Reverse Transcriptase) control is specific to RNA workflows. It is performed by omitting the reverse transcriptase enzyme during the cDNA synthesis step. This control is essential in RT-dPCR to detect contamination from genomic DNA in your RNA samples [27].
Q3: Can I use the same positive control for both qPCR and dPCR? Yes, the same absolute standards (e.g., plasmids, gBlocks) can often be used for both. However, the optimal primer and probe concentrations for dPCR may be higher than for qPCR to increase fluorescence amplitude and improve cluster separation during analysis. Always titrate your control in the dPCR system to ensure the copy number per partition is in the optimal range of 0.5 to 3 [12].
Q4: Why is my Internal Positive Control (IPC) amplifying, but my target is not, even though I know the mutation is present? This suggests that the target is either absent or at a concentration below the detection limit of your assay in that particular sample. The IPC amplification confirms that the reaction itself is not inhibited. You should investigate the sample's tumor fraction and ensure your assay's sensitivity (LOD) is sufficient to detect the expected variant allele frequency [27].
Technical Support & Troubleshooting Guides
Frequently Asked Questions (FAQs)
Q1: We are observing no amplification or low yield in our dPCR experiments for ctDNA detection. What are the primary causes and solutions?
A: No amplification or low yield can result from several factors related to template quality, reaction conditions, or instrumentation. Please consult the following troubleshooting table.
| Possible Cause | Recommended Solution |
|---|---|
| Low template quality/quantity | Verify DNA concentration and purity using fluorometry or spectrophotometry. For ctDNA, ensure input is sufficient given its low abundance (<0.1% of total cfDNA in early-stage cancer) [29]. |
| Suboptimal thermal cycling | Confirm denaturation temperature and time are sufficient. Adjust annealing temperature in 1-2°C increments; optimal is typically 3-5°C below the primer Tm [3]. |
| Insufficient enzyme or dNTPs | Increase the amount of DNA polymerase or dNTPs. Use polymerases with high sensitivity and ensure dNTP concentrations are balanced to prevent increased error rates [21] [3]. |
| PCR inhibition | Inhibitors can directly obstruct DNA polymerase. Use additives like Bovine Serum Albumin (BSA) to reduce inhibitor binding, or re-purify the DNA sample to remove contaminants [21] [3]. |
Q2: How can we improve precision and accuracy in copy number quantification for low-abundance targets?
A: Precision is a key strength of dPCR. To optimize it:
- Ensure adequate partitioning: A higher number of partitions improves the statistical power of Poisson correction and quantification accuracy [30] [31].
- Optimize reaction setup: The choice of restriction enzyme in sample preparation can significantly impact precision, especially for complex genomes [31].
- Validate with controls: Use synthetic oligonucleotides as controls to determine the Limit of Detection (LOD) and Limit of Quantification (LOQ) for your specific assay and platform [31].
The table below summarizes performance metrics from a cross-platform study.
| Performance Metric | Nanoplate dPCR (QIAcuity One) | Droplet dPCR (QX200) |
|---|---|---|
| Limit of Detection (LOD) | ~0.39 copies/µL input [31] | ~0.17 copies/µL input [31] |
| Limit of Quantification (LOQ) | ~1.35 copies/µL input [31] | ~4.26 copies/µL input [31] |
| Typical Precision (CV) | < 5% CV achievable with optimized methods [31] | < 5% CV achievable with optimized methods [31] |
| Key Factor for Precision | Less affected by restriction enzyme choice [31] | Precision can be significantly improved by using HaeIII over EcoRI [31] |
Q3: What are the primary sources of non-specific amplification and primer-dimer formation in dPCR, and how can they be prevented?
A: Non-specific products and primer-dimers consume reaction resources and reduce target yield.
- Use Hot-Start Polymerases: These enzymes remain inactive until a high-temperature activation step, preventing primer degradation and mis-priming at low temperatures [21] [3].
- Optimize Primer Design: Carefully design primers to ensure specificity and minimal complementarity between them, especially at the 3' ends. Use software tools for design validation [21] [3].
- Optimize Mg²⁺ Concentration and Annealing Temperature: Excess Mg²⁺ and low annealing temperatures can promote non-specific binding. Optimize these parameters stepwise [3].
Essential Research Reagent Solutions
The following table details key reagents and their critical functions in dPCR assays for ctDNA research.
| Reagent/Material | Function in dPCR for ctDNA |
|---|---|
| Hot-Start DNA Polymerase | Prevents non-specific amplification and primer-dimer formation by remaining inactive until a high-temperature initial denaturation step [21] [3]. |
| UF / UMI Adapters | Unique Molecular Identifiers (UMIs) are molecular barcodes added to DNA fragments before amplification. They enable bioinformatic error correction by distinguishing true mutations from PCR/sequencing artifacts, which is critical for ultrasensitive ctDNA detection [32]. |
| Restriction Enzymes (e.g., HaeIII) | Used in sample preparation to digest genomic DNA, which can improve the precision of gene copy number quantification, particularly in droplet-based systems [31]. |
| Surfactants / Stabilizers | Essential for droplet-based dPCR (ddPCR) to prevent droplet coalescence during the thermal cycling process, ensuring partition integrity [33]. |
| Fluorescent Probes (e.g., TaqMan) | Provide sequence-specific detection of target mutations within partitions. The use of multiple dyes allows for multiplexing [33] [32]. |
Experimental Protocols & Workflows
Detailed Protocol: Absolute Quantification of ctDNA via dPCR
This protocol is adapted for monitoring minimal residual disease (MRD) and treatment response in solid tumors [33] [32].
1. Sample Preparation and Plasma Isolation
- Collect patient blood in cell-stabilization tubes (e.g., Streck, CellSave).
- Centrifuge using a double-spin protocol to isolate platelet-poor plasma.
- Store plasma at -80°C if not used immediately. Avoid repeated freeze-thaw cycles.
2. Cell-free DNA (cfDNA) Extraction
- Extract cfDNA from plasma using commercially available silica-membrane or magnetic bead-based kits.
- Elute in a low-EDTA buffer or molecular-grade water. Quantify cfDNA using a fluorometer suitable for low-concentration samples.
3. dPCR Reaction Setup
- Prepare a master mix containing:
- DNA Polymerase: Hot-start, high-fidelity enzyme.
- Primers/Probes: Target-specific assays (e.g., for tumor-informed KRAS, BRAF, or PIK3CA mutations). Use probe-based chemistry (FAM/HEX) for specificity.
- Reaction Buffer: As recommended by the polymerase manufacturer.
- Combine master mix with ~10-20 ng of extracted cfDNA. Include a no-template control (NTC).
4. Partitioning and Amplification
- For Droplet dPCR (ddPCR): Generate droplets using an automated droplet generator. Transfer the emulsion to a 96-well plate for PCR.
- For Nanoplate dPCR: Load the reaction mix into a nanostructured cartridge, which automatically creates partitions.
- Run the following thermal cycling profile:
- Initial Activation: 95°C for 10 min (for hot-start polymerase).
- Amplification (40-45 cycles):
- Denature: 94°C for 30 sec.
- Anneal/Extend: 55-60°C for 60 sec (optimize temperature based on assay).
- Final Hold: 98°C for 10 min. Cool to 4-12°C.
5. Fluorescence Reading and Data Analysis
- Read partitions: Use a droplet reader (flow-based) or a plate imager to read fluorescence in each partition.
- Analyze data: Apply Poisson statistics to the count of positive and negative partitions to calculate the absolute concentration of the target (mutant allele) in copies/µL.
- Calculate VAF: If a reference wild-type assay is run in multiplex, the Variant Allele Frequency (VAF) can be calculated as (mutant concentration / total concentration) × 100%.
Workflow Visualization
dPCR ctDNA Analysis Workflow
Troubleshooting Decision Pathway
dPCR Troubleshooting Pathway
Systematic Troubleshooting of No-Amplification Events in dPCR ctDNA Assays
Investigating Reagent Contamination and Degradation in NTCs
In the sensitive field of digital PCR (dPCR) for circulating tumor DNA (ctDNA) research, the integrity of your negative template controls (NTCs) is paramount. Amplification in NTCs is a critical quality control failure that can invalidate experimental results, leading to false positives and incorrect conclusions about mutation presence. This guide provides a systematic approach to investigating and resolving the root causes of NTC amplification, specifically within the context of ctDNA analysis where detecting low-frequency mutations is essential [34] [35].
Troubleshooting Guide: Diagnosing NTC Amplification
Follow the diagnostic workflow below to identify the cause of amplification in your no-template controls.
Frequently Asked Questions (FAQs)
1. What does it mean if the band in my NTC is the same size as my target product? This almost certainly indicates DNA contamination. Your reaction has amplified unwanted template DNA, which could originate from contaminated reagents, amplicon carryover from previous PCRs, or cross-contamination during sample handling [36] [37]. In the context of ctDNA research, this could lead to false-positive mutation calls.
2. What does a small, faint band or smear at the bottom of my gel indicate? A low-molecular-weight band (typically <100 bp) is likely a primer-dimer [37]. These form when your forward and reverse primers anneal to each other instead of the target template and are extended by the polymerase. This is an issue of reaction specificity, not external contamination.
3. My NTCs show amplification randomly across replicates at varying concentrations. What's wrong? This pattern suggests random cross-contamination [36]. This often occurs during plate loading when template DNA, from a positive sample or aerosol, is accidentally introduced into the NTC wells.
4. All my NTC replicates show similar, consistent amplification. What does this mean? Consistent amplification across NTC replicates points to systematic reagent contamination [36]. One or more of your core reagents—such as water, master mix, primers, or probes—are contaminated with template DNA.
5. How can I confirm if my problem is primer-dimer? If you are using a SYBR Green-based chemistry, run a dissociation (melting) curve analysis following the PCR. Primer-dimers will typically appear as a distinct peak at a lower melting temperature (Tm) than your specific amplicon [36].
Resolving Contamination and Degradation Issues
Step 1: Eradicating DNA Contamination
If you have confirmed contamination, you must decontaminate your workspace and reagents before proceeding.
- Physical Separation: Maintain separate, dedicated pre- and post-PCR work areas. The pre-PCR area, used for master mix preparation, should be a "clean" space where no template DNA or amplified PCR products are ever handled [38] [37].
- Dedicated Equipment and Supplies: Use a dedicated set of pipettes, exclusively for the pre-PCR area. Always use aerosol-resistant filter tips to prevent pipette contamination [37].
- Workspace Decontamination: Thoroughly clean all surfaces, pipettes, and equipment with a 10% bleach solution or a commercial DNA decontaminant (e.g., DNA-Away) [37]. UV-irradiate your PCR hood for 15-30 minutes before use to degrade any contaminating DNA [37].
- Reagent Management: Aliquot all reagents (polymerase, water, dNTPs, primers) into single-use volumes upon receipt. This prevents the entire stock from being contaminated and allows you to discard a single suspect aliquot [38] [37].
- Enzymatic Control: For qPCR, incorporate uracil-N-glycosylase (UNG) into your master mix. UNG degrades PCR products from previous reactions that incorporate dUTP, preventing their re-amplification [36].
Step 2: Optimizing to Prevent Primer-Dimer
- Increase Annealing Temperature: Raise the annealing temperature in increments of 1-2°C to increase binding stringency and discourage primer self-annealing [3] [37].
- Use Hot-Start DNA Polymerase: Hot-start enzymes remain inactive until the initial denaturation step, preventing low-temperature activity during reaction setup that can facilitate primer-dimer formation [3].
- Optimize Primer Concentration: As detailed in the table below, test different combinations of forward and reverse primer concentrations to find the balance that maximizes specific amplification while minimizing dimer formation [36].
Table 1: Primer Concentration Optimization Matrix
| Reverse Primer (nM) | Forward Primer (nM) | Resulting Combination |
|---|---|---|
| 100 | 100 | 100/100 |
| 100 | 200 | 200/100 |
| 100 | 400 | 400/100 |
| 200 | 100 | 100/200 |
| 200 | 200 | 200/200 |
| 200 | 400 | 400/200 |
| 400 | 100 | 100/400 |
| 400 | 200 | 200/400 |
| 400 | 400 | 400/400 |
- Redesign Primers: If optimization fails, redesign your primers using specialized software. Check for and avoid self-complementarity and 3'-end complementarity between the forward and reverse primers [3] [37].
The Scientist's Toolkit: Essential Research Reagent Solutions
Table 2: Key Reagents for Contamination-Free dPCR
| Reagent / Material | Function & Importance | Best Practice for ctDNA/dPCR |
|---|---|---|
| Nuclease-Free Water | Solvent for master mixes; a common source of contamination. | Use new, molecular-grade bottles. Aliquot upon receipt. [37] |
| Hot-Start DNA Polymerase | Reduces non-specific amplification and primer-dimer formation by being inactive at room temperature. | Essential for assay specificity and robust NTCs. [3] |
| UNG (Uracil-N-Glycosylase) | Enzymatic carryover prevention; degrades uracil-containing prior amplicons. | Incorporate into master mix for qPCR/dPCR to prevent false positives. [36] |
| Aerosol-Resistant Filter Tips | Creates a barrier between the pipette and liquid, preventing aerosol contamination. | Non-negotiable for all liquid handling in pre-PCR steps. [38] [37] |
| TE Buffer (pH 8.0) | For resuspending and storing oligonucleotides. Maintains primer and probe stability. | Avoid using water. Store primers and probes in TE buffer at -20°C in aliquots. [12] |
Experimental Protocol: Validating Reagent Purity
This protocol helps you identify which specific reagent is contaminated.
- Prepare a Fresh Master Mix: Using fresh aliquots of all reagents except the one you are testing, prepare a master mix without any template.
- Split the Master Mix: Divide the master mix into several tubes.
- Spike Individual Reagents: To each tube, add a small volume of a different, potentially contaminated stock reagent (e.g., tube A gets old primer stock, tube B gets old water, tube C gets old polymerase).
- Run the dPCR: Load the mixtures onto your dPCR platform alongside a true NTC made with all fresh reagents.
- Analyze Results: The tube that shows amplification pinpoints the contaminated reagent stock. Discard all contaminated stock solutions and replace them with fresh aliquots [38].
By adhering to these rigorous troubleshooting practices and quality controls, you can ensure the reliability of your NTCs and the validity of your ctDNA research data.
The analysis of circulating tumor DNA (ctDNA) presents a unique set of challenges for researchers in oncology and drug development. A primary obstacle is the very low abundance of ctDNA, which can sometimes constitute less than 0.1% of the total circulating cell-free DNA (cfDNA), especially in early-stage disease or minimal residual disease (MRD) [29]. This low concentration is further complicated by the potential presence of PCR inhibitors in samples, which can be co-extracted from blood plasma and directly degrade DNA polymerase or obstruct its active center, leading to failed amplification and unreliable results [21]. Within the framework of digital PCR (dPCR) troubleshooting, optimizing the input DNA is a critical first step to ensure the sensitivity and accuracy required for meaningful ctDNA analysis.
Frequently Asked Questions (FAQs)
Q1: What are the primary causes of no amplification or low yield in my dPCR ctDNA assay? The main causes can be categorized as follows:
- Insufficient or Degraded Template: The ctDNA input may be below the detection limit of your assay, or the DNA may have been degraded during isolation or storage [3].
- Poor DNA Purity: Residual PCR inhibitors from the sample collection or extraction process, such as phenol, EDTA, heparin, or proteins, can be present [3] [21].
- Suboptimal Reaction Conditions: The concentration of magnesium ions (Mg²⁺), the annealing temperature, or the amount of DNA polymerase may not be optimal for your specific assay [3].
Q2: How can I improve the detection of low-concentration ctDNA targets?
- Increase Input DNA: Where sample volume allows, increase the amount of input cfDNA into the dPCR reaction [3].
- Use High-Sensitivity Reagents: Select DNA polymerases known for high sensitivity and high processivity, which display higher affinity for DNA templates and better tolerance to common inhibitors [3].
- Fragment Enrichment: Utilize library preparation methods that enrich for short cfDNA fragments (90-150 bp), which are characteristic of tumor-derived DNA. This can increase the fractional abundance of ctDNA in your sequencing library [29].
- Optimize Cycle Number: Adjust the number of PCR cycles; extending the number of cycles to 40 can be beneficial when DNA input is fewer than 10 copies [3].
Q3: What steps can I take to prevent or overcome PCR inhibition in my samples?
- Re-purify DNA: Precipitate and wash DNA with 70% ethanol to remove residual salts or inhibitors [3].
- Use PCR Additives: Incorporate additives like Bovine Serum Albumin (BSA), which can bind to and neutralize inhibitors [21].
- Dilute the Template: Diluting the DNA sample can sometimes reduce the concentration of inhibitors to a level that no longer affects the polymerase. However, this also dilutes the target ctDNA, so sensitivity must be considered [21].
- Choose Robust Enzymes: Opt for DNA polymerases with high processivity and demonstrated tolerance to inhibitors carried over from blood [3].
Troubleshooting Guide: Key Parameters and Solutions
The following table summarizes common issues related to input DNA, their possible causes, and recommended solutions.
| Problem | Possible Cause | Recommended Solution |
|---|---|---|
| No/Low Amplification | Insufficient DNA input | Quantify cfDNA accurately; increase input amount if possible [3]. |
| DNA degradation | Minimize shearing during isolation; evaluate integrity by gel electrophoresis; store DNA in TE buffer (pH 8.0) [3]. | |
| PCR inhibitors | Re-purify DNA; use inhibitor-tolerant polymerases; add BSA [3] [21]. | |
| Suboptimal Mg²⁺ concentration | Optimize Mg²⁺ concentration for maximum yield [3]. | |
| Non-Specific Bands/Background | Excess DNA input | Lower the quantity of input DNA to reduce nonspecific products [3]. |
| High primer concentration | Optimize primer concentrations (typically 0.1–1 µM) to prevent primer-dimer formation [3] [21]. | |
| Low annealing temperature | Increase annealing temperature stepwise (in 1-2°C increments) to improve specificity [3]. | |
| High Background in dPCR | Contamination with genomic DNA | Assess sample with an assay for high-molecular-weight DNA (e.g., long amplicon target) [39]. |
| High primer concentration | Optimize and lower primer concentration to reduce primer-dimer formation [3]. |
Experimental Protocols for Quality Assessment and Optimization
Protocol: Assessing cfDNA Quality and Quantity
Accurate quantification and quality control are essential before dPCR. This protocol uses ddPCR for precise measurement.
Key Reagents:
- QIAsymphony DSP Circulating DNA Kit (or equivalent) for cfDNA extraction [39].
- ddPCR Supermix for probes or EvaGreen, depending on assay.
- Nuclease-free water.
- Assays:
- EMC7 65 bp assay: To measure total cfDNA concentration [39].
- EMC7 250 bp assay: To assess contamination with high-molecular-weight genomic DNA [39].
- Immunoglobulin gene-specific assay (PBC): To evaluate contamination with lymphocyte DNA [39].
- Exogenous spike-in DNA (e.g., CPP1): To monitor extraction efficiency [39].
Methodology:
- Extract cfDNA from plasma samples according to the manufacturer's instructions, including an exogenous spike-in control [39].
- Concentrate the extracted DNA using a centrifugal filter unit (e.g., Amicon Ultra-0.5) to a volume suitable for downstream analysis [39].
- Prepare separate ddPCR reactions for the EMC7 (65 bp and 250 bp) and PBC assays.
- Run the ddPCR according to your standard thermocycling protocol.
- Analyze Results:
- Total cfDNA: Calculate concentration from the EMC7 65 bp assay.
- gDNA Contamination: A high signal in the EMC7 250 bp assay relative to the 65 bp assay indicates gDNA contamination.
- Lymphocyte DNA Contamination: A signal from the PBC assay indicates contamination with background leukocyte DNA.
- Extraction Efficiency: Calculate recovery of the spike-in control.
Protocol: Overcoming Inhibition via Re-purification
This protocol provides a method to clean up cfDNA samples suspected of containing PCR inhibitors.
Key Reagents:
- Absolute Ethanol (70% and 100%).
- 3M Sodium Acetate (pH 5.2).
- Glycogen (20 µg/µL) or another carrier.
- TE Buffer (pH 8.0) or nuclease-free water.
Methodology:
- Precipitate: To your extracted cfDNA in a nuclease-free tube, add 0.1 volumes of 3M Sodium Acetate (pH 5.2) and 2.5 volumes of 100% ice-cold ethanol. Optionally, add 1 µL of glycogen to aid visibility of the pellet.
- Incubate: Mix thoroughly and incubate at -20°C for at least 30 minutes (or overnight for maximum recovery).
- Pellet: Centrifuge at >12,000 × g for 30 minutes at 4°C. Carefully decant the supernatant without disturbing the pellet.
- Wash: Add 500 µL of ice-cold 70% ethanol to the pellet. Centrifuge at >12,000 × g for 10 minutes at 4°C. Carefully decant the supernatant.
- Dry: Air-dry the pellet for 5-10 minutes until all residual ethanol has evaporated. Do not over-dry, as this will make the pellet difficult to resuspend.
- Resuspend: Resuspend the purified DNA pellet in an appropriate volume of TE Buffer or nuclease-free water.
- Re-quantify the DNA and re-test in your dPCR assay to assess improvement.
The workflow below outlines the core process for troubleshooting ctDNA analysis, from initial problem identification to implementing specific optimization strategies.
The Scientist's Toolkit: Essential Research Reagents
The following table details key reagents and their functions for optimizing dPCR experiments for ctDNA detection.
| Reagent / Material | Function in ctDNA Analysis |
|---|---|
| Inhibitor-Tolerant DNA Polymerase | Enzymes with high processivity display higher affinity for templates and better tolerance to common PCR inhibitors from blood, improving robustness [3] [21]. |
| Hot-Start DNA Polymerase | Prevents non-specific amplification and primer-dimer formation by remaining inactive until a high-temperature activation step, crucial for maintaining specificity with low-abundance targets [3]. |
| Bovine Serum Albumin (BSA) | A common PCR additive that binds to and neutralizes inhibitors present in the sample, helping to restore polymerase activity [21]. |
| Magnesium Salt Solutions (MgCl₂/MgSO₄) | Cofactor essential for DNA polymerase activity. Its concentration must be optimized, as it significantly impacts reaction efficiency and specificity [3]. |
| Size-Selection Beads | Used to enrich for short-fragment DNA (90-150 bp), which is characteristic of ctDNA. This enrichment can increase the relative abundance of ctDNA in the sample, improving detection sensitivity [29]. |
| Unique Molecular Identifiers (UMIs) | Short nucleotide barcodes added to DNA fragments before amplification. They allow for bioinformatic error correction by distinguishing true mutations from PCR or sequencing errors, which is vital for accurate variant calling [32]. |
| Exogenous Spike-in DNA | A non-human DNA fragment added to the sample before extraction. It is used as an internal control to monitor the efficiency of DNA extraction and the presence of PCR inhibitors [39]. |
Understanding the Mechanism of PCR Inhibition
The diagram below illustrates how common inhibitors interfere with the PCR process at a molecular level, preventing the amplification of the target ctDNA.
In the field of cancer research and drug development, the detection of circulating tumor DNA (ctDNA) via liquid biopsy has emerged as a powerful, non-invasive tool for cancer diagnosis, monitoring treatment response, and detecting minimal residual disease. Breast cancer, for instance, is a heterogeneous disease with distinct molecular subtypes, where ctDNA serves as an invaluable source of cancer-associated mutations. The clinical utility of serial ctDNA monitoring is profound, enabling unparalleled efficacy assessments of systemic and targeted therapies and identifying patients at risk of progression or recurrence.
Droplet Digital PCR (ddPCR) is a cornerstone technique for this sensitive detection, prized for its high accuracy, sensitivity, reproducibility, and capacity for absolute quantification of nucleic acids without the need for a standard curve. However, the analysis of ctDNA presents unique technical hurdles. ctDNA fragments are typically short (<200 base pairs) and exist in a vast background of wild-type DNA, often at very low fractional abundances, down to 0.01% in early-stage disease. In this challenging context, assay failures due to primer-dimer formation and poor amplification efficiency can severely impact sensitivity and reliability, potentially leading to false negatives or inaccurate quantification. This guide provides targeted troubleshooting strategies to help researchers overcome these critical barriers.
Troubleshooting Guide: FAQs and Solutions
Primer-Dimer Formation
FAQ: What are primer dimers and why are they a problem in ddPCR for ctDNA? Primer dimers are short, double-stranded DNA artifacts formed when PCR primers anneal to each other instead of to the target DNA template. This occurs due to complementary regions within the primers themselves. In ddPCR for ctDNA, where the target molecule (a specific mutation) can be exceptionally rare, primer dimers compete for reaction reagents, reduce the yield of the desired product, and generate false-positive fluorescence signals that obscure accurate quantification of positive droplets.
Table 1: Troubleshooting Primer-Dimer Formation.
| Cause | Identification Method | Solution |
|---|---|---|
| Primers with self-complementary regions or 3'-end complementarity | Use primer design software to check for hairpins, self-dimers, and cross-dimers. | Redesign primers to avoid regions of complementarity, especially at the 3' ends. Consider using specialized software for assay design. |
| Excessively low annealing temperature | Perform a temperature gradient PCR; dimer formation decreases as temperature increases. | Optimize the annealing temperature. Increase it stepwise in 1-2°C increments. The optimal temperature is typically 3-5°C below the primer Tm [3]. |
| High primer concentration | Analyze the reaction setup; high primer concentrations promote primer-primer interactions. | Titrate primer concentrations, typically within the range of 0.1–1 μM. A minimum of 0.5 μM can be a starting point for difficult assays [3]. |
| Use of non-hot-start DNA polymerase | Observe if dimers form even in no-template control (NTC) reactions. | Switch to a hot-start DNA polymerase. These enzymes remain inactive until a high-temperature activation step, preventing nonspecific amplification and primer-dimer formation during reaction setup [40] [3]. |
| Long annealing times | Review thermal cycling protocol. | Shorten the annealing time to minimize the opportunity for primers to bind nonspecifically [3]. |
| Contaminants or impurities in the template or reagent mix | Include NTCs to identify if dimers originate from the assay components rather than the template. | Re-purify the template DNA. Ensure reagents are high-quality and free of nucleases. Use molecular-grade water [3]. |
Poor Amplification Efficiency
FAQ: How is PCR efficiency measured and what is the acceptable range? PCR efficiency (E) is calculated from a dilution series experiment. The Cycle threshold (Ct) values are plotted against the logarithm of the concentration, and the slope of the standard curve is used in the formula: E = -1+10^(-1/slope). Ideal efficiency is 100%, meaning the DNA doubles every cycle, which corresponds to a slope of -3.32. The acceptable efficiency for a robust assay typically ranges from 90% to 110% (a slope between -3.6 and -3.3) [41].
FAQ: Why would PCR efficiency exceed 100%? Efficiencies significantly above 100% often indicate the presence of PCR inhibitors in the more concentrated samples. The inhibitor flattens the standard curve by causing a smaller-than-expected Ct shift between dilutions, resulting in a shallower slope and a calculated efficiency over 100%. As the inhibitor is diluted out, the efficiency returns to the normal range [42].
Table 2: Troubleshooting Poor Amplification Efficiency.
| Cause | Identification Method | Solution |
|---|---|---|
| PCR inhibitors in the sample (e.g., heparin, hemoglobin, phenol, EDTA, salts) | UV spectrophotometry (A260/A280 ratio); an A260/A280 ratio far from ~1.8 for DNA indicates contamination. Inhibition plots from dilution series [41]. | Further purify the sample (e.g., phenol-chloroform extraction, LiCl precipitation). Dilute the template to a concentration where inhibition is negligible. Use a DNA polymerase master mix formulated to be more tolerant of inhibitors [41] [42]. |
| Suboptimal primer and/or probe design | Bioinformatic evaluation (BLAST for specificity, RepeatMasker for low-complexity regions, check for SNPs) [41]. | Redesign the assay to ensure primers and probes are specific, have appropriate Tm, and avoid secondary structures or SNP sites. |
| Insufficient Mg2+ concentration | Review reaction component concentrations; EDTA or high dNTPs can chelate Mg2+. | Optimize the Mg2+ concentration. The presence of chelators or high dNTPs may require a higher Mg2+ concentration [3]. |
| Non-optimal thermal cycling conditions | Analyze amplification curves and endpoint data. | Optimize denaturation, annealing, and extension temperatures and times. Increase denaturation time/temperature for GC-rich templates. Ensure the extension time is sufficient for the amplicon length [3]. |
| Inaccurate pipetting and preparation of reagents | High Ct standard deviations between replicates; R² value of standard curve <0.99 [41]. | Use calibrated pipettors, especially for low volumes (<5 µL). Mix reagent stocks and reactions thoroughly. Briefly centrifuge sealed plates before running [41]. |
| Complex template (e.g., GC-rich sequences, secondary structures) | Analyze template sequence. | Use a PCR additive like DMSO, glycerol, or betaine. Choose a DNA polymerase with high processivity. Increase denaturation temperature and/or time [3]. |
Experimental Protocols for Validation and Optimization
Protocol: Inhibitor Identification and Removal
Principle: This protocol uses a dilution series to identify the presence of PCR inhibitors and dilution as a method to mitigate their effects [41] [42].
- Sample Dilution: Prepare a 10-fold serial dilution of your isolated cfDNA sample (e.g., 1:1, 1:10, 1:100, 1:1000) using nuclease-free water or the recommended elution buffer.
- ddPCR Setup: Use each dilution as a template in your optimized ddPCR assay. Ensure all other reaction components are constant.
- Data Analysis: Analyze the data for the concentration of the target (copies/μL) in each dilution.
- Expected Result (No Inhibition): The calculated concentration should remain consistent across dilutions, as ddPCR provides absolute quantification.
- Result Indicating Inhibition: The calculated concentration will appear artificially low in the most concentrated sample(s) and will increase significantly upon dilution, plateauing once the inhibitor is sufficiently diluted.
- Solution: If inhibition is identified, either use the diluted sample (if it provides sufficient sensitivity) or re-purify the original sample using a different method or kit (e.g., column-based, silica membrane) to remove contaminants.
Protocol: Annealing Temperature Gradient Optimization
Principle: Finding the precise annealing temperature (Ta) is critical for maximizing specific target amplification while minimizing primer-dimer and other non-specific products [3].
- Setup: Using your standard ddPCR reaction mix and template, run a single assay across a range of annealing temperatures. Most modern thermal cyclers have a gradient function.
- Temperature Range: Set a gradient that spans at least 5-10°C, with the calculated Tm of your primers at the center.
- Run and Analyze: After the run, use the ddPCR software to analyze the results for each temperature separately.
- Optimal Temperature Selection: The optimal Ta is the highest temperature that yields the highest concentration of the target with a clear separation between positive and negative droplets, and the lowest number of primer-dimer positive droplets (evident in the 2D amplitude plot as a distinct, low-amplitude cluster).
The Scientist's Toolkit: Essential Research Reagents and Materials
Table 3: Research Reagent Solutions for ddPCR Assay Re-design.
| Reagent / Material | Critical Function | Application Notes |
|---|---|---|
| Hot-Start DNA Polymerase | Prevents enzymatic activity during reaction setup, dramatically reducing primer-dimer formation and non-specific amplification before thermal cycling begins [40] [3]. | Essential for all ddPCR assays, particularly for low-abundance targets like ctDNA where specificity is paramount. |
| Nucleic Acid Purification Kits | Isolate high-purity DNA/ctDNA from plasma while removing common PCR inhibitors such as proteins, heparin, and salts. | Kits specifically designed for circulating nucleic acids (e.g., QIAamp Circulating Nucleic Acid Kit) are recommended for optimal cfDNA yield and purity [14]. |
| PCR Additives/Co-solvents (e.g., DMSO) | Aids in denaturing complex DNA templates (e.g., GC-rich sequences), reduces secondary structure, and improves primer binding efficiency [3]. | Use at the lowest effective concentration (e.g., 3-5%) as it can inhibit the polymerase at high levels. Requires re-optimization of annealing temperature. |
| TaqMan-Style Probe-Based Chemistry | Provides superior specificity over DNA-binding dyes like SYBR Green, as it requires hybridization of an internal probe in addition to the primers for signal generation [41]. | The gold standard for mutation-specific ddPCR assays. Helps distinguish true positive droplets from false positives caused by primer-dimers. |
| Digital PCR Chips/Cartridges | Partitions the PCR reaction into thousands of individual nanoliter-volume reactions, enabling absolute quantification and detection of rare targets via Poisson statistics [43]. | Systems like the Bio-Rad QX200 or the Thermo Fisher QuantStudio 3D are widely used. Choice depends on required throughput, partition number, and cost. |
| UV Spectrophotometer (e.g., NanoDrop) | Rapidly assesses the concentration and purity of isolated nucleic acids. An A260/A280 ratio of ~1.8 for DNA indicates minimal protein contamination [41]. | A quick and easy first step in quality control to identify samples with potential inhibitors. |
Workflow Diagram: A Systematic Path to Assay Re-design
The following diagram outlines a logical, step-by-step workflow for diagnosing and resolving the core issues of primer-dimer formation and poor amplification efficiency.
A technical guide for researchers navigating the critical pre-amplification stage of digital PCR.
Ensuring the consistent generation of partitions—whether droplets or chambers—is a foundational step in digital PCR (dPCR). Inaccurate partitioning directly compromises the absolute quantification of nucleic acids, leading to potential overestimation or underestimation of target molecules in your samples [44]. This guide provides troubleshooting and protocols to verify your partitioning system, with a special focus on circulating tumor DNA (ctDNA) applications where sensitivity is paramount.
FAQs & Troubleshooting Guides
Q1: Why is proper droplet generation critical for accurate ctDNA quantification?
The accuracy of dPCR is fundamentally tied to partition volume. The concentration of DNA molecules (in copies per microliter) is calculated using the formula: Tc = −ln(1 − P/R) × (1/Vd) × D Where Tc is the target concentration, P is the number of positive partitions, R is the total number of analysed partitions, Vd is the volume of a single partition, and D is the dilution factor [44].
If the assigned droplet volume (Vd) is incorrect, the calculated DNA concentration will be systematically biased. For instance, if the actual droplet volume is smaller than the software-assumed value, the true concentration will be overestimated, which could lead to false positive calls in low-ctDNA scenarios [44].
Q2: My dPCR results are inconsistent between runs. Could droplet volume variability be the cause?
Yes. Significant inter-laboratory and inter-system differences in droplet volume have been documented. One study found that certain droplet generator systems produced droplets with volumes 13.1% to 15.9% lower than the manufacturer's stated value [44]. This level of variability can easily explain inconsistencies in quantification between different instruments or laboratories.
Q3: What are the most common causes of poor or failed droplet generation?
Common causes are often related to the consumables and sample preparation:
- Cartridge Issues: Using a faulty or expired droplet generation cartridge.
- Sample Mix Viscosity: The composition of the PCR supermix can affect droplet volume and stability. Different supermixes (e.g., probe-based vs. EvaGreen) can lead to statistically significant differences in droplet size [44].
- Pipetting Errors: Inaccurate pipetting during the loading of the sample-oil mixture into the cartridge will prevent proper droplet formation.
- Clogged Microfluidic Channels: Particulates in the sample or buffer can clog the delicate channels of the droplet generator.
Q4: How can I verify that my droplets are of the correct and consistent volume?
You can measure droplet volume using optical microscopy with a method traceable to the International System of Units (SI) [44]. The protocol involves:
- Generating droplets as usual.
- Transferring a small aliquot (e.g., 10 µL) into a well of a polystyrene culture plate.
- Allowing the droplets to form a monolayer.
- Imaging them with a calibrated microscope and camera.
- Measuring the diameters of a statistically significant number of individual droplets and calculating the mean volume.
Experimental Protocol: Droplet Volume Verification
This protocol, adapted from an inter-laboratory comparison, provides a method to determine the mean droplet volume for your specific dPCR system [44].
Materials:
- QX200 AutoDG or DG8 Droplet Generator (Bio-Rad)
- Appropriate droplet generation cartridges
- ddPCR Supermix for Probes (no dUTP) or QX200 EvaGreen Supermix
- Optical microscope with a 4x or 10x objective and a calibrated digital camera
- 24-well polystyrene cell culture plate (e.g., Corning Inc.)
- Analysis software (e.g., ImageJ)
Method:
- Prepare Reaction Mix: Prepare a standard dPCR reaction mix containing your supermix, primers, probes, and a control DNA template.
- Generate Droplets: Load the sample and oil into the droplet generation cartridge and run the droplet generator according to the manufacturer's instructions.
- Transfer and Image Droplets: Pipette 10 µL of the generated droplets into a well of the culture plate. Tilt the plate at a ~45° angle for a few seconds to allow the droplets to form a single layer. Image the droplets immediately under the microscope.
- Measure Droplet Diameter: Use the imaging software to measure the diameter of at least 100 individual droplets from multiple wells and cartridges to ensure a representative sample.
- Calculate Volume: Calculate the volume of each droplet based on its diameter (V = 4/3 * π * r³). Report the mean droplet volume and standard deviation for your system.
Interpreting Results: Compare your calculated mean droplet volume to the value assumed by your dPCR instrument's software (e.g., 0.85 nL for newer Bio-Rad systems). If a significant discrepancy is found, you may need to use a custom droplet volume in your concentration calculations to ensure accurate quantification [44].
Key Performance Data
The following table summarizes findings from a systematic study on droplet volume variability [44].
Table 1: Measured Droplet Volumes Across Different dPCR Systems
| Droplet Generator System | Supermix Used | Manufacturer's Stated Volume (nL) | Measured Mean Volume (nL) | Discrepancy |
|---|---|---|---|---|
| QX200 AutoDG (DG32) | ddPCR Supermix for Probes (no dUTP) | 0.85 | 0.739 | -13.1% |
| DG8 Manual | ddPCR Supermix for Probes (no dUTP) | 0.85 | 0.715 | -15.9% |
| DG8 Manual | QX200 EvaGreen Supermix | 0.85 | 0.769 | -9.5% |
Workflow Diagram
The following diagram illustrates the complete workflow for instrument verification and troubleshooting of droplet generation.
Diagram 1: Workflow for verifying proper droplet generation and troubleshooting failures.
The Scientist's Toolkit
Table 2: Essential Reagents and Materials for dPCR Partitioning Verification
| Item | Function / Rationale | Example & Notes |
|---|---|---|
| Droplet Generation Cartridges | Microfluidic device to partition sample into nanoliter droplets. | QX200 Droplet Generator Cartridges (Bio-Rad). Check for expiry and lot numbers. [44] |
| Droplet Generation Oil | Immiscible phase to create a stable water-in-oil emulsion. | QX200 Droplet Generation Oil for Probes or EvaGreen. Must match your supermix. |
| ddPCR Supermix | Optimized buffer, enzymes, and dNTPs for probe-based or dye-based detection. | ddPCR Supermix for Probes (no dUTP) or QX200 EvaGreen Supermix. Type affects droplet volume. [44] |
| Control DNA | A well-characterized, stable DNA sample for run-to-run comparison. | Genomic DNA from reference cell lines (e.g., SK-BR-3 for ERBB2 CN [45]) or synthetic DNA fragments (gBlocks [46]). |
| Optical Microscope & Camera | For direct measurement of droplet diameter. | Requires 4x-10x objective and calibrated camera for traceable measurements. [44] |
| Certified Reference Material | Provides a ground truth for inter-laboratory comparison and method validation. | e.g., AOCS 0707-B4 GM soybean DNA, used in metrology studies. [44] |
Validating dPCR Performance and Comparing with NGS for ctDNA Analysis
For researchers in oncology and drug development, establishing a robust digital PCR (dPCR) assay for circulating tumor DNA (ctDNA) analysis requires rigorous validation of key analytical parameters. The extreme sensitivity required to detect low-frequency variants in a background of wild-type DNA—sometimes at variant allele frequencies (VAF) below 0.01%—demands careful characterization of assay performance [29]. This technical guide outlines the core validation parameters of Limit of Detection (LOD), Limit of Quantification (LOQ), Precision, and Specificity within the context of dPCR for ctDNA research, providing troubleshooting guidance for common experimental challenges.
Defining Core Validation Parameters
Limit of Detection (LOD) and Limit of Quantification (LOQ)
The Limit of Detection (LOD) is the lowest concentration of an analyte that can be reliably distinguished from zero with a defined level of confidence. In dPCR for ctDNA, this represents the minimal number of mutant DNA molecules detectable in a sample. The Limit of Quantification (LOQ) is the lowest analyte concentration that can be quantitatively measured with acceptable precision and accuracy, typically defined by a coefficient of variation (CV) threshold, often <25% [47].
Table 1: Exemplary LOD and LOQ Values from Recent dPCR Studies
| Application Area | Target | LOD | LOQ | Definition Method |
|---|---|---|---|---|
| Hepatitis B Virology [48] | Serum HBV DNA | 1.6 IU/mL | 9.4 IU/mL | Probit regression |
| Food Allergen Testing [49] | Fish DNA | 0.08 pg/μL | 0.31 pg/μL | Not Specified |
| Plant Pathogen Detection [47] | Phytophthora nicotianae | Determined via Probit | CV < 25% | EP17-A Guidelines |
Precision
Precision describes the closeness of agreement between independent measurement results obtained under stipulated conditions. It is typically expressed as the Coefficient of Variation (CV), which is the standard deviation divided by the mean. In dPCR, precision is assessed through both intra-run (repeatability) and inter-run (reproducibility) variability [48]. A validated HBV ddPCR assay demonstrated excellent intra-run precision (mean CV: 0.69%) and inter-run precision (mean CV: 4.54%) [48]. The high precision of dPCR stems from its partitioning mechanism, which reduces the impact of amplification efficiency variations and provides absolute quantification without standard curves [50] [33].
Specificity
Specificity refers to the ability of an assay to detect only the intended target analyte without cross-reacting with similar, non-target sequences. For ctDNA assays, this is critical for accurately identifying somatic mutations against a high background of wild-type DNA. Specificity is typically validated by testing the assay against a panel of closely related non-target sequences or samples known to be negative for the target [47]. The high degree of partitioning in dPCR enhances specificity by physically separating target molecules, reducing template competition, and mitigating the effects of PCR inhibitors present in complex biological samples like plasma-derived cell-free DNA [51] [47].
Experimental Protocols for Parameter Validation
Protocol for Determining LOD and LOQ
The following protocol, adapted from recent publications, provides a framework for establishing LOD and LOQ for a dPCR ctDNA assay.
- Preparation of Standard Material: Create a synthetic DNA standard or cell line DNA containing the target mutation at a known, high concentration. Accurately quantify this stock using a traceable method.
- Serial Dilution: Serially dilute the standard material in a background of wild-type DNA (e.g., from healthy donor plasma) to simulate a range of variant allele frequencies relevant to ctDNA (e.g., from 10% down to 0.001%).
- Replicate Measurements: For each dilution level, perform a minimum of 20 technical replicates across multiple runs to assess variability at low concentrations [47].
- Data Analysis:
- LOQ Determination: Calculate the mean concentration and CV for each dilution level. The LOQ is defined as the lowest concentration where the CV is consistently below a predefined threshold (e.g., 25%) [47].
- LOD Determination: Analyze the data from multiple replicates of low-concentration samples and blank (negative) controls using probit regression. The LOD is defined as the concentration detectable with 95% confidence [48] [47].
Protocol for Assessing Precision
- Sample Preparation: Select at least two quality control (QC) samples: one with a mid-range VAF (e.g., 1-5%) and one with a low VAF near the anticipated LOQ (e.g., 0.1%).
- Intra-Run Precision: Process each QC sample in a minimum of 5-10 replicates within a single dPCR run. Calculate the mean, standard deviation, and CV for the measured concentration.
- Inter-Run Precision: Process each QC sample in duplicate or triplicate across at least three separate dPCR runs, performed on different days and preferably by different operators. Calculate the overall mean and CV across all runs.
Protocol for Establishing Specificity
- Panel Creation: Assemble a DNA panel that includes:
- Samples with the target mutation (positive controls).
- Samples with closely related genetic variants or single-nucleotide polymorphisms (SNPs).
- Samples from healthy donors containing only wild-type DNA.
- Other common pathogens or genetic material that could be present in patient samples.
- Testing: Run the dPCR assay against the entire panel.
- Analysis: The assay is considered specific if it yields positive results only for the confirmed positive controls and shows no signal (or a signal below the LOD) for all other samples, including those with similar sequences [47].
Troubleshooting Guides and FAQs
Table 2: Research Reagent Solutions for dPCR Assay Validation
| Reagent / Material | Function in Validation | Key Considerations |
|---|---|---|
| Synthetic DNA Standards | Provides a defined, quantifiable source of target and wild-type sequences for creating dilution series for LOD/LOQ. | Ensure sequence context matches the genomic region of interest; verify concentration by a primary method. |
| Control DNA (Wild-type) | Serves as the background matrix for serial dilutions of mutant standards, simulating patient sample conditions. | Source from well-characterized cell lines or pooled healthy donor plasma. |
| dPCR Master Mix | Provides enzymes, nucleotides, and buffer for amplification. Critical for robustness. | The choice of master mix can be a critical factor affecting accuracy and precision; use a validated mix [52]. Some master mixes show superior performance in the presence of inhibitors [53]. |
| Primers and Probes | Defines the assay's target. Essential for specificity. | Design to target highly conserved regions or specific mutations; verify specificity in silico and empirically. Use optimized concentrations [48]. |
| Restriction Enzymes | Can be used to digest long DNA fragments, potentially improving access to the target sequence. | Not always necessary; studies show it may have no relevant effect on quantification, but can be tested during optimization [52]. |
Frequently Asked Questions
Q1: Our dPCR assay shows good signal in positive controls but has a high false-positive rate in no-template controls (NTCs). What could be the cause?
- A: This is typically indicative of contamination or non-specific amplification.
- Troubleshooting Steps:
- Decontaminate: Thoroughly clean workspaces and equipment with UV light and DNA-degrading solutions.
- Check Reagents: Prepare fresh aliquots of all reagents, especially water and master mix. Test reagents individually.
- Optimize Thermal Cycling: Increase the annealing temperature in increments of 1-2°C to enhance stringency and reduce non-specific binding.
- Review Assay Design: Re-evaluate primer and probe sequences for potential secondary structures or off-target binding sites.
- Troubleshooting Steps:
Q2: We are unable to achieve the desired LOD for our rare mutation target, even with optimal assay design. What strategies can we explore?
- A: Improving LOD requires increasing the number of mutant molecules analyzed.
- Troubleshooting Steps:
- Increase Input Volume: Process a larger volume of patient plasma to extract more total cell-free DNA for the reaction. Studies have achieved high sensitivity with inputs of 200 μL of serum [48].
- Pre-amplification: Consider a short, target-specific pre-amplification step. Caution: This can introduce bias and must be rigorously controlled.
- Enrichment Strategies: Investigate emerging methods to enrich for mutant fragments or for shorter ctDNA fragments (90-150 bp) which can be selectively captured to increase the mutant allele fraction in the library [29].
- Troubleshooting Steps:
Q3: Our assay shows high CV (%) at low concentrations, preventing us from establishing a reliable LOQ. How can we improve precision?
- A: High variability often stems from technical noise or suboptimal partitioning.
- Troubleshooting Steps:
- Verify Partitioning: Ensure the droplet generator or chip is functioning correctly, producing a high number of valid partitions. A low number of accepted partitions increases Poisson noise.
- Replicate Measurements: Run more technical replicates for low-concentration samples and pool the data for analysis.
- Mitigate Inhibitors: Re-purify the DNA sample to remove potential PCR inhibitors from the plasma or extraction process. dPCR is generally more tolerant to inhibitors than qPCR, but they can still affect precision [51] [47].
- Master Mix: Evaluate different dPCR master mixes, as this choice can significantly impact the system's accuracy and precision [52].
- Troubleshooting Steps:
Workflow Diagrams for Validation and Troubleshooting
The following diagram illustrates the logical workflow for establishing the key validation parameters for a dPCR assay.
Diagram 1: Assay validation parameter workflow.
This troubleshooting flowchart guides the systematic investigation of a failed dPCR experiment.
Diagram 2: Troubleshooting no amplification in dPCR.
This technical support resource is designed for researchers working with circulating tumor DNA (ctDNA), a challenging application where choosing the right molecular tool is critical. A common and critical point of failure in this research is "no amplification" during Digital PCR (dPCR) runs. This guide directly addresses such troubleshooting issues within the broader context of selecting between dPCR and Next-Generation Sequencing (NGS). We provide FAQs, detailed protocols, and comparative data to help you balance sensitivity, multiplexing capability, and cost to ensure the success of your experiments in oncology and drug development.
Core Technology Comparison: dPCR vs. NGS
The choice between dPCR and NGS is not about which technology is superior, but which is best suited for your specific experimental question. The table below summarizes their key characteristics.
Table 1: Essential Characteristics of dPCR and NGS
| Feature | Digital PCR (dPCR) | Next-Generation Sequencing (NGS) |
|---|---|---|
| Fundamental Principle | End-point PCR amplification partitioned across thousands of nanoreactors, with absolute quantification via Poisson statistics [33]. | Massively parallel sequencing of DNA fragments, providing raw data for bioinformatic analysis [54]. |
| Quantification | Absolute, calibration-free [54] [33]. | Relative, requires calibration standards [54]. |
| Limit of Detection | Very high; can detect rare mutations down to 0.0005% variant allele frequency (VAF) [54] [55]. | Moderate; typically around 1-2% VAF for most applications [54] [56]. |
| Multiplexing Capacity | Limited; typically 2-6 targets per reaction without specialized designs [54] [55]. | Very high; can profile thousands of genes or entire genomes in a single run [54]. |
| Discovery Power | Low; requires prior knowledge of the target sequence for assay design [54]. | High; capable of discovering novel variants, transcripts, and fusion genes without prior knowledge [54]. |
| Best Applications | Absolute quantification of known targets, rare variant detection, serial monitoring of specific mutations [54] [55] [33]. | Comprehensive profiling, discovery of novel biomarkers, multi-gene panels for targeted therapy [54]. |
| Turnaround Time | Rapid; from sample to result in a few hours [54]. | Longer; involves library prep, sequencing, and bioinformatics analysis [54]. |
| Cost per Sample | Low for a small number of targets [54]. | More cost-effective when analyzing a large number of targets (e.g., >20) [54]. |
Frequently Asked Questions (FAQs) for Experimental Design
Q1: My dPCR run shows no amplification with my ctDNA sample. What are the primary causes?
"No amplification" in dPCR can stem from multiple factors related to your sample and assay [12]:
- Sample Purity: Contaminants like salts, alcohols, EDTA, or acidic polysaccharides in the ctDNA sample can inhibit the polymerase enzyme or quench fluorescence [12].
- Sample Integrity: Strongly degraded ctDNA, common in archived samples, may have a lower actual copy number than measured by spectrophotometry. Using a larger input amount or designing shorter amplicons is advised [12].
- Assay Failure: Suboptimal primer/probe design, incorrect concentrations, or degraded reagents (especially fluorescently labeled probes) can lead to failed amplification [12] [57].
Q2: For monitoring a known resistance mutation (e.g., BTK C481S) in a longitudinal study, should I use dPCR or NGS?
dPCR is often the superior choice for this specific application. A 2025 study demonstrated that multiplex dPCR (mdPCR) was more sensitive than NGS for detecting and quantifying BTK mutations at low allelic frequencies in patients progressing on ibrutinib [55]. dPCR provides absolute quantification of mutant copies, is more rapid, and is cost-effective for tracking a small number of known mutations over time [54] [55].
Q3: When should I consider using NGS and dPCR together in a single project?
The two technologies are highly complementary. A powerful strategy is to use NGS for broad, unbiased discovery of mutation profiles in a tumor, and then leverage dPCR for highly sensitive, routine validation and monitoring of the most relevant identified markers [54]. Furthermore, dPCR can be used for the accurate quantification of NGS libraries before sequencing, ensuring optimal loading and efficient use of the sequencing platform [54].
Q4: How do I calculate the correct DNA input for a dPCR assay?
Accurate input is vital for reliable Poisson statistics. The ideal number of target copies per reaction mixture should yield an average of 0.5 to 3 copies per partition after partitioning [12]. For single-copy genes in genomic DNA, you can calculate the copy number from the mass input. For example, the haploid human genome is ~3.3 pg. Therefore, 10 ng of human gDNA contains approximately 3,000 gene copies [12]. The formula is:
Copy Number = (Mass Input in grams) / (Genome Size in bp × 1.096 × 10⁻²¹ g/bp)
Troubleshooting Guide: "No Amplification" in dPCR for ctDNA
Table 2: Troubleshooting Guide for No Amplification in dPCR
| Observation | Possible Cause | Solutions & Methodologies |
|---|---|---|
| No amplification curve or signal | Inhibitors in the ctDNA sample (e.g., from plasma isolation) [12]. | - Further purify the ctDNA using alcohol precipitation or a dedicated clean-up kit [57].- Dilute the template to reduce inhibitor concentration and re-test. |
| Suboptimal primer/probe design or degradation [12] [57]. | - Recalculate primer Tm and test an annealing temperature gradient [57].- Prepare fresh aliquots of primers and probes from a lyophilized stock, dissolved in TE buffer (not water) for stability [12]. | |
| Incorrect template concentration (too low or too high) [5]. | - Verify the template concentration and quality (e.g., 260/280 ratio) [57].- Ensure the total number of target copies in the reaction is within the optimal range for your dPCR platform [12]. | |
| Low signal amplitude or poor cluster separation | Probe quality or inappropriate dye/quencher combination [12]. | - Avoid dye/quencher combinations with overlapping emission spectra [12].- Use fresh probe aliquots, as fluorescently labeled probes are typically stable for 6-9 months at -20°C [12]. |
| Low PCR efficiency. | - Increase primer and probe concentrations. For dPCR, final primer concentrations of 0.5–0.9 µM and probe concentrations of 0.25 µM are often optimal [12]. |
Key Experimental Protocols
Protocol 1: Multiplex dPCR for Detection of BTK Inhibitor Resistance Mutations
This methodology is adapted from Garcia et al. (2025) for detecting resistance mutations in chronic lymphocytic leukemia [55].
1. Sample Preparation:
- Extract cfDNA from patient plasma using a specialized cfDNA extraction kit to ensure high purity and integrity.
- Quantify DNA using a fluorometric method (e.g., Qubit) for accuracy.
2. Assay Design:
- Design three multiplex dPCR (mdPCR) assays to cover the most common resistance mutations (e.g., BTK C481S, C481F, C481R, and PLCG2 R665W).
- Use hydrolysis probes (TaqMan) with non-overlapping fluorophores for each target in a multiplex reaction.
- Primer/Probe Storage: Resuspend lyophilized primers and probes in TE buffer (pH 8.0, or pH 7.0 for Cy5/Cy5.5 dyes) to a stock concentration. Store in single-use aliquots at -20°C to avoid freeze-thaw degradation [12].
3. dPCR Reaction Setup:
- Prepare a master mix containing dPCR supermix, the pooled primer-probe mix (final concentration: primers at 0.5-0.9 µM each, probes at 0.25 µM each), and nuclease-free water.
- Add the extracted cfDNA (recommended input: 1-20 ng per reaction).
- Load the reaction mixture into the dPCR nanoplate or cartridge according to the manufacturer's instructions (e.g., QIAcuity, Bio-Rad ddPCR system).
4. Partitioning and Amplification:
- Run the instrument to generate partitions (nanoplates or droplets).
- Perform PCR amplification with the following optimized cycling conditions (adjust based on specific assay):
- Initial Denaturation: 95°C for 10 minutes.
- 40-45 Cycles of:
- Denaturation: 95°C for 30 seconds.
- Annealing/Extension: 60°C for 60 seconds.
- Final Hold: 4-10°C.
5. Data Analysis:
- Use the instrument's software to analyze the endpoint fluorescence and assign partitions as positive or negative for each channel.
- The software will apply Poisson correction to provide an absolute count of mutant and wild-type copies per µL of input.
Protocol 2: Using dPCR for Quantification of NGS Libraries
Accurate quantification is essential for maximizing NGS sequencer output and data quality [54].
1. Principle:
- dPCR absolutely quantifies the concentration of functional, adapter-ligated fragments in a library, unlike fluorometric methods which measure total DNA mass.
2. Method:
- Dilute the prepared NGS library to a level suitable for dPCR (typically in the range of 0.01-0.1 fg/µL).
- Design a dPCR assay that targets the adapter sequence or a universal sequence present in all library molecules.
- Set up the dPCR reaction as described in Protocol 1, using the diluted library as the template.
- The dPCR result, given in copies/µL, provides the exact molar concentration of the library, enabling precise pooling and loading onto the sequencer.
Workflow Visualization
The following diagrams illustrate the core workflows and decision-making process for dPCR and NGS.
dPCR Workflow: Absolute Quantification
Technology Selection Guide
The Scientist's Toolkit: Essential Reagents & Materials
Table 3: Key Research Reagent Solutions for dPCR-based ctDNA Analysis
| Item | Function | Key Considerations |
|---|---|---|
| cfDNA Extraction Kit | To isolate high-purity, short-fragment ctDNA from plasma samples. | Select kits designed specifically for cfDNA to maximize yield and minimize contaminants like albumin and IgG [12]. |
| dPCR Supermix | The core reaction buffer containing a high-fidelity, hot-start DNA polymerase, dNTPs, and stabilizers. | Use a master mix compatible with your detection chemistry (hydrolysis probes or DNA-binding dyes) and dPCR instrument [12]. |
| Hydrolysis Probes (TaqMan) | Sequence-specific probes for target detection and multiplexing. | Use probes with non-overlapping fluorophores and quenchers. Store in TE buffer, pH 7.0 for Cy5 dyes, to prevent degradation [12]. |
| Assay-specific Primers | To specifically amplify the target region of interest (e.g., a mutation site). | Design for high specificity and efficiency. Keep amplicons short (recommended for degraded ctDNA). Store in TE buffer at -20°C [12]. |
| Nuclease-free Water | To adjust reaction volume without introducing RNase or DNase contamination. | Essential for preventing the degradation of primers, probes, and template. |
| Restriction Enzymes | To digest high-molecular-weight genomic DNA or linearize plasmids for more accurate partitioning [12]. | Use enzymes that do not cut within the amplicon sequence. Reduces viscosity and prevents over-quantification [12]. |
FAQs: dPCR in Clinical Research
Q1: What makes digital PCR particularly suitable for detecting rare mutations in clinical samples like ctDNA?
dPCR is ideal for detecting rare mutations because it partitions a sample into thousands of individual reactions, effectively diluting the background of wild-type DNA and allowing for the sensitive detection of single mutant molecules. This enables absolute, calibration-free quantification of nucleic acids and provides high sensitivity, accuracy, and reproducibility, which is crucial for analyzing low-abundance targets like circulating tumor DNA (ctDNA) in liquid biopsies [33].
Q2: How can I confirm that a negative dPCR result for a biomarker is clinically meaningful and not due to experimental error?
A negative result is clinically meaningful when the dPCR system is thoroughly validated and demonstrates high sensitivity and robustness. For example, in the TRICIA trial for triple-negative breast cancer, the lack of ctDNA detection using a tumor-informed ddPCR assay at the post-neoadjuvant chemotherapy (pre-operative) time point was highly prognostic, with 95% distant-disease relapse-free survival. This indicates that the assay effectively identified a very low-risk patient group [58]. System validation should confirm that factors like the operator, primer/probe system, and sample type have no relevant effect on DNA copy number quantification [52].
Q3: What are the critical experimental factors to control when validating a dPCR assay for clinical stratification?
A multifactorial validation procedure should be employed. Key factors to control include:
- Master Mix: The choice of ddPCR master mix is a critical factor affecting accuracy [52].
- Droplet Volume: The droplet volume used to calculate DNA copy concentrations must be consistent and accurate [52].
- Partition Quality: Overnight cooling of generated droplets can increase the number of stabilized droplets, leading to improved statistical power for analysis [52]. Other factors, such as the operator, primer/probe system, and the addition of restriction enzymes, have been shown to have no relevant effect, confirming system robustness [52].
Q4: Can dPCR be used to stratify patients based on minimal residual disease or occult disease involvement?
Yes. dPCR's sensitivity allows for patient stratification even in cases of minimal or occult disease. In acute lymphoblastic leukemia (ALL) research, droplet digital PCR (ddPCR) quantification of microRNA-181a in cell-free cerebrospinal fluid was used to reclassify patients with previously ambiguous central nervous system status. This identified a group with significant infiltration and another with putative, clinically significant occult central nervous system leukemia, enabling improved risk-adapted therapy [59].
Troubleshooting Guide: dPCR in ctDNA Research
This guide addresses common issues when using dPCR for ctDNA detection in a clinical research context.
Issue 1: No Amplification or Low Yield in ctDNA dPCR
| Possible Cause | Recommended Solution | Underlying Principle / Clinical Impact |
|---|---|---|
| Low template quality/quantity | Re-purify ctDNA, concentrate sample, or increase input plasma volume. | ctDNA is fragmented and can be low abundance. Poor purity or quantity directly impacts the Poisson distribution and reliable detection needed for clinical stratification [21] [3]. |
| Suboptimal annealing temperature | Optimize annealing temperature in 1–2°C increments using a gradient cycler. | An annealing temperature that is too high can result in no amplification, preventing the detection of low-frequency variants critical for early relapse prediction [21] [3]. |
| Insufficient enzyme or dNTPs | Increase the amount of DNA polymerase or dNTPs. | Low levels of core reagents reduce PCR efficiency, which is particularly detrimental when amplifying the single DNA molecules found in individual partitions [21]. |
| PCR inhibition | Use specialized additives like Bovine Serum Albumin (BSA) to help overcome inhibition. Re-purify the sample. | Inhibitors from the sample source can obstruct DNA polymerase directly or indirectly (e.g., by chelating Mg²⁺), leading to false negatives that misrepresent the patient's true disease burden [21]. |
Issue 2: Inconsistent Quantification Between Replicates
| Possible Cause | Recommended Solution | Underlying Principle / Clinical Impact |
|---|---|---|
| Master mix performance | Validate the ddPCR system with the specific master mix. "Supermix for Probes (no dUTP)" has been shown to confirm accuracy over the entire working range. | The master mix is a critical factor. Inconsistent performance can lead to variable copy number concentrations, compromising the accuracy required for longitudinal patient monitoring [52]. |
| Non-homogeneous reagents | Mix reagent stocks and prepared reactions thoroughly to eliminate density gradients formed during storage and setup. | Uneven mixing creates concentration gradients across the reaction mix, leading to partition-to-partition variability and unreliable absolute quantification [3]. |
| Partition instability | Allow overnight cooling of droplets to increase the number of stabilized droplets available for analysis. | Unstable partitions (e.g., droplet coalescence) reduce the total number of valid partitions for Poisson calculation, lowering the statistical power and precision of the result [52]. |
| Improper threshold setting | Check that the threshold is being set properly in the analysis software; it may need to be set manually. | Incorrect threshold setting can misclassify positive and negative partitions, directly skewing the calculated concentration of the biomarker [5]. |
Experimental Protocol: Validating a dPCR Assay for Clinical Stratification
This protocol outlines the key steps for validating a droplet digital PCR (ddPCR) assay to ensure its results are robust enough to correlate with clinical outcomes, based on established validation approaches [52].
Workflow Diagram: dPCR Clinical Assay Validation
Step-by-Step Methodology
Assay Optimization:
- Primer/Probe Design: Design and obtain TaqMan-style primers and probes specific to your biomarker (e.g., a tumor-specific mutation for ctDNA analysis).
- Thermal Cycling Optimization: Use a gradient thermal cycler to determine the optimal annealing temperature for your assay. The optimal temperature is typically 3–5°C below the lowest primer Tm [3].
- Reaction Mix Setup: Prepare the ddPCR reaction mix according to manufacturer's instructions, using a master mix validated for digital PCR. The final reaction volume should be appropriate for your ddPCR system (e.g., 16 µL for the QX200 system) [5] [52].
Robustness Testing (Factorial Validation):
- Factor Selection: Test the impact of various experimental factors on DNA copy number quantification. Key factors to include are:
- Different operators.
- Different lots of primers/probes and master mix.
- The addition of enzymes like restriction enzymes (if used).
- Sample type (e.g., simulated ctDNA from different plasma sources).
- Statistical Modeling: Analyze the results using a statistical model that reflects the Poisson process. A robust system will show no relevant effect on quantification from factors like the operator or primer/probe system [52].
- Factor Selection: Test the impact of various experimental factors on DNA copy number quantification. Key factors to include are:
Sensitivity and Specificity Assessment:
- Limit of Detection (LoD): Serially dilute a synthetic target or characterized reference material to determine the lowest copy number per reaction that can be reliably detected. This is critical for establishing the assay's ability to detect low-level MRD.
- Accuracy and Precision: Run multiple replicates of samples with known copy numbers across the expected dynamic range. Assess trueness (bias) and precision (coefficient of variation) to confirm the system's accuracy. Only with certain master mixes (e.g., "Supermix for Probes") can accuracy over the entire working range be confirmed [52].
- Specificity: Test the assay against samples known to be wild-type for the mutation to ensure no false-positive signals.
Longitudinal Performance Monitoring:
- Establish a schedule for periodic re-validation using control materials.
- Monitor key performance indicators, such as the number of accepted droplets and the calculated concentration of positive controls, to ensure the assay remains stable over time, which is essential for multi-timepoint clinical studies [58] [52].
The Scientist's Toolkit: Key Research Reagent Solutions
| Item | Function in dPCR | Application Note |
|---|---|---|
| Hot-Start DNA Polymerase | Prevents non-specific amplification and primer-dimer formation by remaining inactive at room temperature. Activated only at high temperatures. | Essential for maximizing specificity and yield of the desired product in ctDNA assays, reducing background [21] [3]. |
| BSA (Bovine Serum Albumin) | Additive used to overcome PCR inhibition by reducing the binding of inhibitors to the DNA polymerase. | Can be critical when analyzing challenging sample types like blood or plasma, which may carry PCR inhibitors [21]. |
| TaqMan Probes | Sequence-specific fluorescent probes that provide high specificity through hybridization and generate a fluorescent signal upon amplification. | The cornerstone of specific target detection in multiplex dPCR assays for quantifying different mutant alleles [33] [60]. |
| Validated ddPCR Master Mix | A pre-mixed solution containing optimized concentrations of dNTPs, salts, and a proprietary hot-start DNA polymerase. | The choice of master mix is a critical factor for achieving accurate DNA copy number quantification over the entire working range [52]. |
| Restriction Enzymes | Can be added to the reaction mix to cleave complex genomic DNA, improving access to the target sequence. | Studies show their addition has no relevant effect on quantification, confirming they can be used without compromising robustness if needed for sample processing [52]. |
FAQs: Core Concepts and Troubleshooting
FAQ 1: What are the primary sources of error in ctDNA analysis using dPCR, and how can they be mitigated? Errors in ctDNA dPCR primarily arise from the low abundance of ctDNA within a high background of wild-type cfDNA, sample-specific PCR inhibitors, and pre-analytical factors. Key mitigation strategies include:
- Challenge: ctDNA can constitute less than 0.1% of total cfDNA, making rare allele detection difficult [61].
- Solution: dPCR's absolute quantification and partitioning effectively enrich for the rare mutant targets, allowing detection of mutant allele frequencies (MAFs) as low as 0.001% [61] [33]. The use of blocker strands (or clamps) can suppress amplification errors by binding to and blocking the amplification of wild-type sequences, both energetically destabilizing mishybridized complexes and creating a kinetic barrier to primer mishybridization [62].
FAQ 2: How do CRISPR-based assays enhance the specificity of molecular diagnostics? CRISPR assays add a powerful layer of specificity after initial amplification. Systems like Cas12 and Cas13 are guided by a CRISPR RNA (crRNA) to find a specific target nucleic acid sequence. Upon binding to their exact target, these enzymes activate a "collateral" or trans-cleavage activity that non-specifically cuts reporter molecules, producing a fluorescent or visual signal [63] [64]. This means a signal is only generated if the specific target sequence is present, effectively eliminating false positives from non-specific amplification products common in isothermal methods [63].
FAQ 3: What are common causes of failed amplification in dPCR for ctDNA, and how can they be resolved? Failed amplification in dPCR often stems from template quality, reagent issues, or improper thermal cycling.
- Template Integrity and Purity: ctDNA is highly fragmented (<100 bp) and can be degraded further by improper handling. Ensure strict adherence to sample collection and plasma processing protocols. Re-purify DNA to remove residual salts, EDTA, or heparin that inhibit polymerase activity [3].
- Insufficient Template Quantity: While dPCR is sensitive, over-diluting the sample can result in no target molecules being partitioned. Optimize the input amount of cfDNA and consider increasing the number of PCR cycles if the template is extremely limited [3].
- Primer/Probe Design: Primers must be designed for the short, fragmented nature of ctDNA. Verify primer specificity and avoid regions with high secondary structure. Use hot-start DNA polymerases to prevent primer-dimer formation and non-specific amplification at setup [3].
Troubleshooting Guides
Table 1: Troubleshooting Digital PCR (dPCR) for ctDNA Detection
| Problem Category | Specific Issue | Possible Cause | Recommended Solution |
|---|---|---|---|
| Amplification Failure | No fluorescence in partitions | • Poor template quality/integrity• PCR inhibitors in sample• Insufficient input DNA• Enzyme inactivation | • Re-purify DNA, assess integrity [3]• Use inhibitor-tolerant polymerases [3]• Increase template input or number of cycles [3] |
| Signal & Specificity | High background noise | • Non-specific primer binding• Primer-dimer formation• Excess Mg2+ concentration | • Optimize annealing temperature [3]• Use hot-start DNA polymerase [3]• Titrate Mg2+ concentration downward [3] |
| Signal & Specificity | False-negative/low-abundance mutant detection | • Very low mutant allele frequency (MAF)• Blocker strand inefficiency | • Use dPCR for its single-molecule sensitivity [33]• Re-design and optimize blocker strand sequence [62] |
| Quantification | Inconsistent results between runs | • Poor partition uniformity (ddPCR)• Inaccurate Poisson correction | • Ensure droplet generator is clean and functioning [33]• Verify partition volume and data analysis settings [33] |
Table 2: Troubleshooting CRISPR-Based Assays
| Problem Category | Specific Issue | Possible Cause | Recommended Solution |
|---|---|---|---|
| Signal Generation | Weak or no signal after amplification | • Cas protein (e.g., Cas12a, Cas13a) lost activity• Suboptimal crRNA design• Reporter molecule degraded | • Use fresh or properly stored Cas RNP complexes [63]• Re-design crRNA to avoid off-target sequences and ensure high activity [64]• Prepare fresh fluorescent-quenched reporter [63] |
| Assay Specificity | False-positive signal | • Non-specific amplification from pre-amplification step (RPA/LAMP)• crRNA off-target binding | • Include a CRISPR step to validate amplification specificity [63]• Re-design crRNA spacer sequence; use bioinformatics tools to predict off-target binding [64] |
| Assay Integration | Incompatibility in one-pot reactions | • Cas nuclease degradation of primers/amplicons• Mg2+ or temperature incompatibility | • Physically separate amplification and detection, or use Cas enzyme inhibitors during amplification [63]• Titrate Mg2+ and optimize a single reaction buffer and temperature [63] |
| Point-of-Care Use | Poor stability at room temperature | • Enzyme denaturation• Lyophilization formulation issues | • Lyophilize reagents with stabilizers like trehalose [63]• Use stable commercial kits or optimized lyophilization protocols [63] |
Experimental Protocols
Protocol 1: Implementing Blocker Strands for Error-Suppressed dPCR
This protocol details the use of peptide nucleic acid (PNA) or locked nucleic acid (LNA) blocker strands to suppress amplification of wild-type alleles, enhancing the detection of low-frequency mutations in ctDNA.
Methodology:
- Blocker Strand Design: Design a blocker oligonucleotide that is complementary to the wild-type sequence spanning the mutation site. The mutation site should be positioned in the center of the blocker sequence. Incorporate LNA or use a PNA backbone to increase binding affinity and mismatch discrimination [62].
- dPCR Reaction Setup:
- Prepare a standard dPCR master mix containing primers, probe, DNA polymerase, and the ctDNA/cfDNA sample.
- Add the blocker strand to a final concentration of 50-500 nM. Optimal concentration must be determined empirically.
- Partition the reaction using a droplet generator or chip-based system.
- Run the thermocycling protocol with an annealing/extension temperature 1-2°C below the melting temperature of the blocker-DNA complex to ensure efficient hybridization [62].
- Data Analysis: Analyze the endpoints of the dPCR run. Successful blockage will manifest as a significant reduction in wild-type positive partitions, improving the signal-to-noise ratio for mutant allele detection.
Protocol 2: CRISPR-Cas12a Detection for Verification of dPCR Amplicons
This protocol is used post-amplification to confirm the specificity of dPCR results, guarding against false positives from non-specific amplification.
Methodology:
- Post-dPCR Sample Processing: After dPCR reading, carefully break the droplets or open the chips. A portion of the amplified sample can be used directly.
- CRISPR Detection Reaction:
- Prepare a reaction mix containing:
- Cas12a nuclease (e.g., LbCas12a or AsCas12a)
- crRNA designed to be exactly complementary to the target amplicon.
- A fluorescent-quenched single-stranded DNA (ssDNA) reporter (e.g., FAM-TTATT-BHQ1).
- An appropriate reaction buffer.
- Add the processed dPCR sample to the reaction mix.
- Incubate at 37°C for 15-30 minutes.
- Prepare a reaction mix containing:
- Signal Readout: Measure the fluorescence using a plate reader or lateral flow strip. A significant increase in fluorescence indicates that the dPCR amplicon contained the specific target sequence, validating the dPCR result [63] [64].
Signaling Pathways and Workflows
The Scientist's Toolkit: Research Reagent Solutions
Table 3: Essential Reagents for CRISPR and dPCR Error Suppression
| Item | Function | Application Note |
|---|---|---|
| LNA/PNA Blocker Oligos | Binds perfectly to wild-type DNA with high affinity, blocking polymerase and preventing amplification. Suppresses errors from primer mishybridization [62]. | Centralize the mutation site in the sequence. Requires empirical optimization of concentration in the dPCR mix. |
| Cas12a (Cpf1) Nuclease | CRISPR effector protein that, upon crRNA-guided target DNA recognition, cleaves the target and exhibits non-specific ssDNase activity (trans-cleavage) [63] [64]. | Ideal for detecting double-stranded DNA amplicons. Does not require a PAM sequence for ssDNA targets. |
| crRNA | CRISPR RNA; guides the Cas nuclease to the specific target sequence with high precision. The programmability allows adaptation to any target [64]. | Design crRNA to have minimal off-target homology. Can be designed to distinguish single-nucleotide polymorphisms (SNPs). |
| Fluorescent-Quenched ssDNA Reporter | A short ssDNA molecule with a fluorophore and quencher. Cleavage by activated Cas12a separates the pair, generating a fluorescent signal [63]. | Use at a low concentration to minimize background fluorescence. Compatible with real-time readers and lateral flow strips. |
| Hot-Start DNA Polymerase | A modified polymerase inactive at room temperature, preventing non-specific amplification and primer-dimer formation during reaction setup [3]. | Critical for the sensitivity and specificity of both dPCR and the pre-amplification step in CRISPR assays. |
| Droplet Stabilizer / Surfactant | Stabilizes water-in-oil emulsions during ddPCR, preventing droplet coalescence throughout thermocycling [33]. | Essential for consistent partitioning and accurate quantification in ddPCR workflows. |
Conclusion
Successfully troubleshooting no amplification in dPCR for ctDNA requires a holistic approach that integrates a deep understanding of ctDNA biology, a rigorously optimized and controlled workflow, and systematic problem-solving. Digital PCR, with its absolute quantification and superior sensitivity for rare alleles, remains a cornerstone technology for liquid biopsy applications like MRD monitoring and therapy response assessment. Future directions point toward the integration of dPCR with novel technologies such as nanomaterials for enhanced detection, multiplexed CRISPR-based assays, and AI-driven bioinformatics pipelines. For researchers and drug developers, mastering these troubleshooting and validation protocols is paramount for generating reliable, clinically actionable data that can ultimately advance precision oncology and improve patient outcomes.
References
- 1. Circulating Tumor DNA Detection by Digital-Droplet PCR in ... [https://pmc.ncbi.nlm.nih.gov/articles/PMC7956845/]
- 2. Circulating tumor DNA in patients with cancer - PubMed Central [https://pmc.ncbi.nlm.nih.gov/articles/PMC12446922/]
- 3. PCR Troubleshooting Guide | Thermo Fisher Scientific - US [https://www.thermofisher.com/us/en/home/life-science/cloning/cloning-learning-center/invitrogen-school-of-molecular-biology/pcr-education/pcr-reagents-enzymes/pcr-troubleshooting.html]
- 4. Ultra-low coverage fragmentomic model of cell-free DNA ... [https://elifesciences.org/reviewed-preprints/95320]
- 5. Digital PCR Support—Troubleshooting [https://www.thermofisher.com/us/en/home/technical-resources/technical-reference-library/real-time-digital-PCR-applications-support-center/digital-pcr-support/digital-pcr-support-troubleshooting.html]
- 6. dPCR: A Technology Review - PMC - PubMed Central [https://pmc.ncbi.nlm.nih.gov/articles/PMC5948698/]
- 7. Digital PCR Principle, techniques and applications [https://www.stillatechnologies.com/digital-pcr/principle/]
- 8. Liquid Biopsy and Tissue Biopsy Comparison with Digital ... [https://pmc.ncbi.nlm.nih.gov/articles/PMC8824896/]
- 9. Efficient and accurate KRAS genotyping using digital PCR ... [https://www.nature.com/articles/s41598-023-30131-y]
- 10. The Clinical Utility of Droplet Digital PCR for Profiling ... [https://pmc.ncbi.nlm.nih.gov/articles/PMC9776872/]
- 11. Medical diagnostic value of digital PCR (dPCR) [https://www.sciencedirect.com/science/article/pii/S2667099223000221]
- 12. dPCR assay development | Digital PCR troubleshooting [https://www.qiagen.com/us/applications/digital-pcr/beginners/dpcr-guide/setup-and-troubleshooting]
- 13. Polymerase Chain Reaction: Basic Protocol Plus ... [https://pmc.ncbi.nlm.nih.gov/articles/PMC4846334/]
- 14. Droplet digital PCR for detection and quantification of ... [https://bmccancer.biomedcentral.com/articles/10.1186/s12885-017-3424-0]
- 15. The Role of Digital PCR in Enhancing Diagnostic Power ... [https://pmc.ncbi.nlm.nih.gov/articles/PMC11311727/]
- 16. Quantitative or digital PCR? A comparative analysis for ... [https://www.sciencedirect.com/science/article/abs/pii/S0165993624001584]
- 17. Droplet digital PCR-based detection of circulating tumor DNA ... [https://pmc.ncbi.nlm.nih.gov/articles/PMC8218704/]
- 18. Real-World Technical Hurdles of ctDNA NGS Analysis [https://pmc.ncbi.nlm.nih.gov/articles/PMC12564474/]
- 19. PCR Basic Troubleshooting Guide [https://www.creative-biogene.com/blog/pcr-basic-troubleshooting-guide]
- 20. International society of liquid biopsy (ISLB) perspective on ... [https://www.sciencedirect.com/science/article/pii/S2950195425000177]
- 21. PCR Troubleshooting: Common Problems and Solutions [https://www.mybiosource.com/learn/pcr-troubleshooting-common-problems-and-solutions/]
- 22. Establishment of Reference Measurement Procedure for ... [https://www.mdpi.com/2073-4425/16/5/576]
- 23. PCR Troubleshooting Guide [https://www.genscript.com/pcr-troubleshooting-guide.html]
- 24. Enhanced-ice-COLD-PCR for the Sensitive Detection of ... [https://en.bio-protocol.org/en/bpdetail?id=3452&type=0]
- 25. Enrichment of low abundance DNA/RNA by ... [https://pmc.ncbi.nlm.nih.gov/articles/PMC8219684/]
- 26. Fundamentals of digital PCR [https://www.qiagen.com/us/knowledge-and-support/knowledge-hub/bench-guide/pcr/digital-pcr/what-is-digital-pcr]
- 27. PCR controls [https://www.qiagen.com/us/knowledge-and-support/knowledge-hub/bench-guide/pcr/reference-genes-and-controls/pcr-controls]
- 28. Amplification of the No Template Control (NTC) [https://www.thermofisher.com/br/en/home/life-science/pcr/real-time-pcr/real-time-pcr-learning-center/real-time-pcr-basics/real-time-pcr-troubleshooting-tool/gene-expression-quantitation-troubleshooting/amplification-no-template-control.html]
- 29. Monitoring and Assessment of Circulating Tumor DNA in ... [https://pmc.ncbi.nlm.nih.gov/articles/PMC12550271/]
- 30. Digital PCR Breaks Into the Mainstream in 2025 - Vocal Media [https://vocal.media/feast/digital-pcr-breaks-into-the-mainstream-in-2025]
- 31. Comparing the precision of two digital PCR applications for ... [https://www.nature.com/articles/s41598-025-13143-8]
- 32. Circulating tumor DNA to monitor treatment response in ... [https://www.nature.com/articles/s41698-025-00876-y]
- 33. Digital PCR: from early developments to its future ... [https://pubs.rsc.org/en/content/articlehtml/2025/lc/d5lc00055f]
- 34. Comparative study of droplet-digital PCR and absolute Q ... [https://www.sciencedirect.com/science/article/pii/S0009898123004758]
- 35. Considerations and quality controls when analyzing cell-free ... [https://pmc.ncbi.nlm.nih.gov/articles/PMC6416156/]
- 36. Amplification of the No Template Control (NTC) [https://www.thermofisher.com/us/en/home/life-science/pcr/real-time-pcr/real-time-pcr-learning-center/real-time-pcr-basics/real-time-pcr-troubleshooting-tool/gene-expression-quantitation-troubleshooting/amplification-no-template-control.html]
- 37. Why Your Negative Control Has a Band (And How to Fix It) [https://www.clyte.tech/post/troubleshooting-pcr-why-your-negative-control-has-a-band-and-how-to-fix-it?srsltid=AfmBOoo2YLgDn2W6lb1fKytq1gp5WekMO9x806uGXdqcqBcckNaTvoM4]
- 38. Could your PCR be affected by contamination? | IDT [https://www.idtdna.com/page/support-and-education/decoded-plus/could-your-pcr-be-affected-by-contamination/]
- 39. Development and validation of a methylation-specific ... [https://www.nature.com/articles/s41598-025-15228-w]
- 40. PCR Optimization: Strategies To Minimize Primer Dimer [https://genemod.net/blog/pcr-optimization]
- 41. Poor PCR Efficiency [https://www.thermofisher.com/us/en/home/life-science/pcr/real-time-pcr/real-time-pcr-learning-center/real-time-pcr-basics/real-time-pcr-troubleshooting-tool/gene-expression-quantitation-troubleshooting/poor-pcr-efficiency.html]
- 42. Understanding qPCR Efficiency and Why It Exceeds 100% [https://biosistemika.com/blog/qpcr-efficiency-over-100/]
- 43. An integrated digital PCR system with high universality and ... [https://pmc.ncbi.nlm.nih.gov/articles/PMC9437218/]
- 44. Droplet volume variability as a critical factor for accuracy of ... [https://pmc.ncbi.nlm.nih.gov/articles/PMC5670190/]
- 45. Digital PCR quantification of ultrahigh ERBB2 copy number ... [https://www.nature.com/articles/s41523-024-00621-x]
- 46. Optimisation of robust singleplex and multiplex droplet ... [https://www.nature.com/articles/s41598-019-49043-x]
- 47. Development and validation of a droplet digital PCR assay ... [https://www.frontiersin.org/journals/plant-science/articles/10.3389/fpls.2025.1573949/full]
- 48. Development and Validation of a High-Sensitivity Droplet ... [https://pubmed.ncbi.nlm.nih.gov/40087905/]
- 49. Application of droplet digital PCR for the detection of fish ... [https://www.sciencedirect.com/science/article/pii/S0963996925014012]
- 50. droplet Digital is an PCR and accurate method to precise ... measure [https://www.nature.com/articles/s41598-025-20944-4?error=cookies_not_supported&code=6bd4510a-1d36-4b43-b218-e6669b6153f4]
- 51. Droplet Digital PCR Assay for Detection and Quantification ... [https://pmc.ncbi.nlm.nih.gov/articles/PMC12467802/]
- 52. In-house validation of a droplet digital PCR system using ... [https://www.sciencedirect.com/science/article/pii/S0003267025005665]
- 53. : THE PINNACLE OF DIGITAL | Letgen Biyoteknoloji PCR PRECISION [https://letgenbio.com/en/digital-pcr-the-pinnacle-of-precision/]
- 54. dPCR and NGS: Better Together? [https://www.qiagen.com/us/knowledge-and-support/knowledge-hub/science-matters/pcr-solutions/dpcr-and-ngs]
- 55. Multiplex digital PCR enables sensitive detection of ... [https://pubmed.ncbi.nlm.nih.gov/39849159/]
- 56. Comparison of next generation sequencing, droplet ... - PubMed [https://pubmed.ncbi.nlm.nih.gov/35334415/]
- 57. PCR Troubleshooting Guide [https://www.neb.com/en-us/tools-and-resources/troubleshooting-guides/pcr-troubleshooting-guide?srsltid=AfmBOopmfleqvpT1wktURcuRQS_m9-xaI8GDnSEm41Ex-u5WCvK8aWvk]
- 58. Clinical Validation of Digital PCR-based ctDNA detection ... [https://www.medrxiv.org/content/10.1101/2025.07.02.25330747v1]
- 59. Digital PCR-based quantification of miR-181a in the ... [https://www.nature.com/articles/s41598-024-79733-0]
- 60. Data analysis method for multiplex digital pcr using color- ... [https://patents.google.com/patent/EP4372100A1/en]
- 61. Revolution of Circulating Tumor DNA [https://pmc.ncbi.nlm.nih.gov/articles/PMC12192262/]
- 62. Error-suppression mechanism of PCR by blocker strands [https://www.sciencedirect.com/science/article/pii/S0006349523001340]
- 63. CRISPR-Based Diagnostics: Challenges and Potential ... [https://pmc.ncbi.nlm.nih.gov/articles/PMC9872163/]
- 64. CRISPR‐driven diagnostics: Molecular mechanisms, clinical ... [https://pmc.ncbi.nlm.nih.gov/articles/PMC12464570/]