Sample Quality in Cancer Molecular Testing: Foundational Principles, Methodological Advances, and Optimization Strategies for Researchers
This comprehensive review addresses the critical role of sample quality in cancer molecular testing, a fundamental determinant of diagnostic accuracy and research validity.
Sample Quality in Cancer Molecular Testing: Foundational Principles, Methodological Advances, and Optimization Strategies for Researchers
Abstract
This comprehensive review addresses the critical role of sample quality in cancer molecular testing, a fundamental determinant of diagnostic accuracy and research validity. For researchers, scientists, and drug development professionals, we explore the foundational impact of pre-analytical variables on biomarker detection, evaluate advanced methodologies for challenging samples, provide systematic troubleshooting frameworks for common quality issues, and establish validation standards for emerging technologies. By synthesizing current evidence and practical guidelines, this article aims to empower precision oncology research through enhanced understanding of sample quality considerations across diverse testing platforms and cancer types.
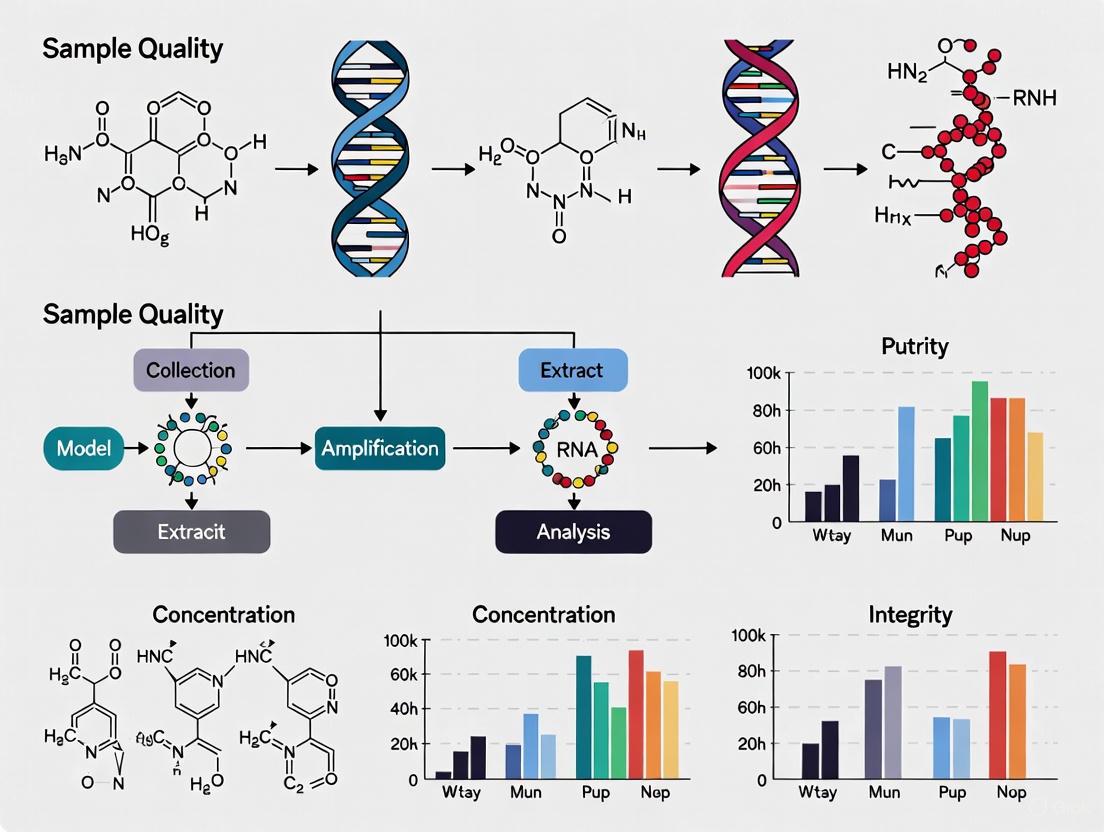
The Critical Link Between Sample Quality and Molecular Testing Outcomes in Cancer Research
Impact of Pre-analytical Variables on Biomarker Detection Accuracy
Accurate biomarker detection is the cornerstone of modern cancer molecular testing, directly influencing patient diagnosis, treatment selection, and therapeutic monitoring. However, a significant challenge in biomarker research lies in the pre-analytical phase—the procedures involving sample collection, processing, and storage before analysis. Evidence indicates that pre-analytical errors contribute to 60-70% of all laboratory errors, with poor blood sample quality alone accounting for 80-90% of these pre-analytical issues [1]. For cancer research, where biomarkers often include labile molecules such as cell-free DNA, proteins, and RNA, the integrity of these analytes is highly susceptible to handling conditions. Suboptimal practices can alter the molecular profile of a biospecimen, leading to unreliable data, failed validation studies, and ultimately, a loss of translational potential for clinical applications [2]. This guide addresses the most impactful pre-analytical variables through troubleshooting FAQs and structured data to help researchers safeguard their biomarker data quality.
Frequently Asked Questions (FAQs)
1. How does a delay in processing my blood samples affect common biomarkers?
The time interval between blood collection and centrifugation (delay to processing) is a critical variable. Cellular metabolism continues in collected blood, leading to measurable changes in analyte concentration. The table below summarizes the effects of a 24-hour processing delay at room temperature on key serum biomarkers [3].
Table 1: Effect of 24-Hour Processing Delay on Serum Biomarkers
| Biomarker | Change after 24-hour delay | Magnitude of Change |
|---|---|---|
| Glucose | Decrease | ~1.6-fold decrease (approx. 1.387 mg/dL per hour) |
| Lactate Dehydrogenase (LDH) | Increase | Significant |
| Gamma-Glutamyl Transferase (GGT) | Increase | Significant |
| Aspartate Aminotransferase (AST) | Increase | Significant |
| C-Reactive Protein (CRP) | No significant change | Stable |
2. What is the impact of repeated freeze-thaw cycles on my archived plasma and serum samples?
Repeated freezing and thawing of samples can cause protein denaturation and degradation, leading to inaccurate results. The stability of biomarkers varies, but some are particularly sensitive. Studies have shown that AST, BUN, GGT, and LDH demonstrate sensitive responses to multiple freeze-thaw cycles [3]. Best practice is to aliquot samples upon initial processing to avoid multiple freeze-thaw cycles.
3. Why might my PD-L1 immunohistochemistry staining be inconsistent, and how can I control for pre-analytical variables?
PD-L1 expression, a critical biomarker for immunotherapy, is sensitive to pre-analytical handling, particularly cold ischemic time (the time between tissue resection and formalin fixation). While an optimal cold ischemic time is often considered to be ≤ 12 hours, the acceptable duration can depend on the specific protein and tissue type [2]. Inconsistencies can also arise from:
- Fixation Type and Time: Use of neutral-buffered formalin and standardized fixation times is crucial. Prolonged fixation can mask epitopes.
- Assay Platform: Different FDA-approved PD-L1 assays (e.g., Dako 22C3, Ventana SP142) may yield different results on case-matched samples, highlighting the need for standardized and validated protocols for each specific assay [2].
4. I am getting high background in my ELISA. What are the most common causes?
High background signal in immunoassays like ELISA is a frequent issue, often traced to the following pre-analytical and analytical factors [4] [5]:
- Insufficient Washing: Inadequate washing leaves unbound antibody or enzyme conjugate in the wells, which react with the substrate. Ensure a robust washing procedure, potentially adding a 30-second soak step between washes.
- Contaminated Buffers: Make fresh buffers to avoid contamination from metals, bacteria, or residual peroxidase.
- Plate Sealers: Reusing plate sealers can transfer residual HRP enzyme between wells, causing non-specific signal. Always use a fresh sealer.
- Over-long Incubation: Incubating with the detection antibody or substrate for longer than the protocol recommends can increase background.
5. How does sample collection from an indwelling catheter introduce error, and how can it be prevented?
Blood samples drawn from an indwelling catheter are susceptible to contamination from the flush solution (e.g., normal saline or heparin). This can cause a dilution of all analytes and a direct bias for electrolytes present in the flush fluid [6]. For example, normal saline has high concentrations of Na+ (154 mmol/L) and Cl- (154 mmol/L).
- Prevention: Before collecting a sample, withdraw and discard a volume of blood that is at least three times the dead space volume of the catheter and line. Always follow the manufacturer's recommendations for the specific intravascular line product [6].
The following tables consolidate quantitative data on the effects of various pre-analytical variables, providing a quick reference for experimental planning and data interpretation.
Table 2: Impact of Pre-analytical Variables on Gene Expression Analysis [7]
| Pre-analytical Variable | Average Number of Genes with 2-Fold Expression Change | Average Consistency of Relative Expression Orderings (REOs) |
|---|---|---|
| Sampling Method (Biopsy vs. Surgical) | 3286 | 86% |
| Tumor Sample Heterogeneity (Low vs. High Tumor Cell %) | 5707 | 89.24% |
| Fixation Delay (48-hr delay vs. 0-hr) | 2970 | 85.63% |
| Preservation (FFPE vs. Fresh-Frozen) | 5009 - 10388 | 84.64% - 86.42% |
Table 3: Common Blood Sample Quality Issues and Their Prevalence [1]
| Sample Quality Issue | Approximate Prevalence among Pre-analytical Errors |
|---|---|
| Hemolyzed Sample | 40% - 70% |
| Insufficient Sample Volume | 10% - 20% |
| Use of Wrong Container | 5% - 15% |
| Clotted Sample | 5% - 10% |
Experimental Protocols for Validating Pre-analytical Conditions
Validating the stability of your target biomarkers under specific pre-analytical conditions is essential for developing a robust laboratory protocol. Below is a generalized methodology that can be adapted for various analyte types.
Protocol 1: Assessing the Impact of Delayed Processing on a Serum/Plasma Biomarker
This protocol is designed to systematically evaluate the stability of your biomarker of interest in blood samples over time [3].
1. Sample Collection:
- Collect venous blood from consented donors (e.g., n=10-50) into appropriate vacutainer tubes (e.g., SST for serum, EDTA for plasma).
2. Experimental Time-Course Setup:
- For each donor, process multiple tubes at different time points after collection (e.g., 0.5 h, 1 h, 2 h, 4 h, 24 h).
- Hold all tubes at room temperature until processing.
- Control (Reference) Sample: Centrifuge one set of tubes at 0.5 hours post-collection. Aliquot and freeze the serum/plasma immediately. This serves as the baseline.
3. Sample Processing:
- At each designated time point, centrifuge the tubes at a standardized force (e.g., 3000 g for 10 minutes).
- Immediately aliquot the supernatant (serum/plasma) into cryovials.
- Flash-freeze aliquots and store at -80°C until analysis.
4. Data Analysis:
- Measure the concentration of your target biomarker and common clinical analytes (e.g., glucose, LDH) in all aliquots using a validated assay (e.g., automated chemistry analyzer, ELISA).
- Perform statistical analysis (e.g., repeated-measures ANOVA) to compare analyte levels at each time point against the reference (0.5 h) sample.
- Determine the Significant Change Limit (SCL), defined as the reference mean ± 2.8 times the usual standard deviation (USD), to identify clinically/relevantly significant changes [3].
Protocol 2: Evaluating the Effect of Freeze-Thaw Cycles on Biomarker Stability
This protocol tests the resilience of your biomarker to the freeze-thaw stress encountered during long-term storage and repeated use.
1. Sample Preparation:
- Process blood samples from multiple donors within 30-60 minutes of collection to obtain serum or plasma.
- Pool serum/plasma from each donor in a large tube, then aliquot into a large number of identical cryovials.
2. Freeze-Thaw Cycling:
- Cycle 0 (Reference): Analyze one set of aliquots immediately after processing without freezing.
- Subsequent Cycles: Freeze the remaining aliquots at -80°C. For each freeze-thaw cycle (e.g., 1, 3, 6, 9 cycles), remove a set of aliquots, thaw them completely at room temperature, and then refreeze them. After completing the designated number of cycles, thaw the aliquots and analyze them alongside the reference.
3. Data Analysis:
- Measure biomarker concentrations in all samples.
- Calculate the percent recovery compared to the reference (Cycle 0) sample. A drop in recovery below a pre-set threshold (e.g., 15%) indicates instability to freeze-thaw cycles.
Workflow and Decision Diagrams
Biomarker Validation Workflow
Assay Problem-Solving Guide
The Scientist's Toolkit: Essential Research Reagent Solutions
Table 4: Key Materials for Managing Pre-analytical Variables
| Item | Function & Critical Feature | Application Example |
|---|---|---|
| Dry Electrolyte-Balanced Heparin | Anticoagulant for blood gas/electrolyte tests. Dry form prevents sample dilution; electrolyte-balanced prevents cation binding (e.g., to Ca2+). | Blood gas analysis to avoid falsely low cCa2+ [6]. |
| Bar-Coded Sample Tubes | Patient identification and sample tracking. Links patient, operator, and sample ID to minimize risk of patient sample mix-up. | Phlebotomy and biobanking to reduce labeling errors [6]. |
| Automated Homogenizer (e.g., Omni LH 96) | Standardized tissue/cell disruption. High-throughput, single-use tips reduce cross-contamination and operator-dependent variability. | Preparing homogeneous lysates from tumor tissues for nucleic acid or protein extraction [8]. |
| ELISA Plates (not Tissue Culture Plates) | Solid phase for antibody binding. Specifically designed for high protein-binding capacity to ensure efficient capture antibody coating. | Developing or running sandwich ELISAs for cytokine or protein biomarker detection [4] [5]. |
| Fresh, Aliquoted, Quality-Controlled Reagents | Components of assays (buffers, substrates, antibodies). Freshness and proper QC prevent contamination and ensure activity, reducing background and signal issues. | All immunoassays and molecular assays to ensure reproducibility [4] [9]. |
Understanding Tumor Purity and Its Impact on Molecular Analysis
What is tumor purity and why is it a critical parameter in cancer genomics? Tumor purity, or the proportion of cancer cells in a tissue sample, is crucial because molecular profiles from bulk tissue represent a mixture of cancer, immune, and stromal cells. This admixture confounds the biological signal, potentially altering the interpretation of genomic assays and subsequent clinical decisions. Accurate assessment is vital for parameterizing genomic analyses and correctly interpreting the clinical properties of a tumor [10].
What methods are available to estimate tumor purity, and how do they compare? Tumor purity can be estimated through pathological review or in silico methods using genomic, epigenomic, or transcriptomic data. However, these methods show significant variation and poor concordance. The choice of estimation method can profoundly impact the interpretation of genomic assays [10]. A systematic pan-cancer analysis found that purity estimates from DNA-, RNA-, and methylation-based methods have high concordance with each other, but lower correlation with pathologist-derived estimates from immunohistochemistry (IHC) [11].
What are the clinical consequences of variable tumor purity? Variable tumor purity can impinge upon molecular data interpretations and subsequent clinical decisions. It has a confounding effect on correlating and clustering tumours with transcriptomics data. For example, after accounting for tumor purity in differential expression analysis, an immunotherapy gene signature was found in several cancer types that was not detected by traditional methods [11].
Table 1: Common Tumor Purity Estimation Methods and Their Characteristics
| Method Type | Underlying Data | Key Principle | Reported Challenges |
|---|---|---|---|
| Pathology Review | Histology (H&E slides) | Visual estimation of cancer cell fraction by pathologist | Inconsistent between pathologists; may not represent profiled region [10]. |
| ESTIMATE | Transcriptome (RNA-seq) | Uses expression of 141 immune and 141 stromal genes [11] | Does not account for non-immune/stromal normal cells [11]. |
| ABSOLUTE | Genome (Copy-number data) | Models somatic copy-number alterations and allelic frequencies [10] [11] | Can fail on "quiet" genomes with few alterations; lower median purity estimates [10] [11]. |
| LUMP | Epigenome (Methylation) | Averages 44 non-methylated immune-specific CpG sites [11] | Specifically estimates immune cell infiltration as an inverse of purity [11]. |
Strategies for Overcoming Insufficient Tissue Material
What is the typical failure rate for molecular testing due to insufficient tissue, and in which cancers is this most prevalent? In non-small cell lung cancer (NSCLC), a disease where molecular testing is standard for therapy selection, up to 40% of initial biopsies can be inadequate for molecular testing, necessitating repeat invasive procedures [12].
What procedural techniques can improve sample adequacy for molecular testing? Combining different biopsy types significantly increases success rates. In Endobronchial Ultrasound (EBUS) procedures, using core needle biopsy (CNB) alone had a 20% inadequacy rate, while combining CNB with FNA smears reduced the inadequacy rate to 11.4% [12]. For CT-guided core needle biopsies, performing 5 or more passes achieved an 85% adequacy rate, which increased to 100% with over 7 passes [12].
How can cytology specimens be better utilized to avoid repeat biopsies? Cytology specimens, including smears and cell blocks, are a proven approach for genetic sequencing but are often underutilized. When tissue specimens are inadequate, cytology specimens can be a viable alternative for comprehensive genomic profiling, enhancing diagnostic accuracy and reducing the need for repeat biopsies [13]. Ensuring proper collection and processing is key to their success.
Table 2: Sample Adequacy Rates by Biopsy Technique (NSCLC Study)
| Biopsy Procedure | Sample Type | Key Finding | Recommended Best Practice |
|---|---|---|---|
| EBUS-Guided | FNA Smears Only | 35.3% inadequacy rate for NGS [12] | Combine FNA smears with core needle biopsy (CNB) [12]. |
| EBUS-Guided | CNB Only | 20.0% inadequacy rate for NGS [12] | Combine CNB with FNA smears [12]. |
| EBUS-Guided | FNA + CNB Combined | 11.4% inadequacy rate for NGS [12] | Optimal approach for lymph node sampling [12]. |
| CT-Guided | CNB | 85% adequacy with ≥5 passes; 100% with >7 passes [12] | Aim for 5-7 passes during procedure [12]. |
The Scientist's Toolkit: Research Reagent Solutions
Table 3: Key Research Tools and Technologies for Challenging Samples
| Tool / Technology | Primary Function | Application in Sample Challenges |
|---|---|---|
| ESTIMATE Algorithm | Estimates tumor purity from RNA-Seq data [11] | Informs analysis of transcriptomic data confounded by stromal and immune cells. |
| ABSOLUTE Algorithm | Estimates purity/ploidy from copy-number data [10] [11] | Provides DNA-based purity estimate for interpreting somatic alterations. |
| SLIMamp Technology | Handles degraded/ low-input DNA from FFPE samples [14] | Enables NGS on samples that fail standard QC; 77% reportability in failed samples [14]. |
| Personalized ctDNA Assays | Detects structural variants in blood [15] | Monitors disease recurrence or progression via liquid biopsy, circumventing tissue limitations. |
| Dual-Platform Liquid Biopsy | Analyzes both cfDNA and CTC DNA [15] | Provides a more comprehensive and accurate mutational profile from a blood sample. |
FAQ: Addressing Common Experimental Scenarios
A pathologist estimated my tumor sample at 80% purity, but my genomic analysis suggests it is much lower. Which should I trust? This is a common finding. Systematic benchmarking shows poor concordance between pathologic and molecular purity estimates. It is recommended to parameterize genomic analyses with tumor purity estimated from the matched molecular analyte being analyzed (e.g., use a DNA-based purity estimate for DNA sequencing analysis). Pathology estimates can be inconsistent and may not represent the specific region used for DNA/RNA extraction [10].
My sample has failed standard QC for our NGS panel due to low DNA quantity/quality. What are my options? Specialized library preparation technologies like SLIMamp are designed for challenging formalin-fixed, paraffin-embedded (FFPE) samples with low tumor purity, poor-quality DNA, or low-input DNA. One study demonstrated that this technology could generate clinical reports for 77% of samples (37/48) that had previously failed standard preanalytical QC, identifying clinically significant variants that would have otherwise been missed [14].
We are planning a study on a cancer type known for low-yield biopsies (e.g., lung cancer). How can we proactively minimize tissue adequacy issues? Engage with your clinical and pathology team to implement optimized sampling protocols. For lesions accessible by EBUS, advocate for a combined approach using both FNA smears and core needle biopsies. For CT-guided biopsies, ensure the operator is aware that 5 or more passes dramatically increase adequacy rates. Furthermore, validate the use of cytology smears for your NGS workflows to unlock an underutilized source of material [12] [13].
How does the tissue source (e.g., lymph node vs. liver) impact the success of molecular testing? The biopsy site can significantly affect adequacy. One root-cause analysis found that lymph node CNB had a 30% inadequacy rate, while liver and soft tissue biopsies showed lower rates (14.3% and 15.4%, respectively), suggesting that intrinsic lymph node heterogeneity may pose a greater challenge for obtaining sufficient tumor cells for sequencing [12].
Troubleshooting Guides
How can I reduce errors and save time during sample labeling and identification?
Incorrect sample labeling is a frequent issue that can lead to significant setbacks, including false research outcomes [16]. Implementing a dual-check system, where two personnel verify the sample labeling, can drastically reduce these errors [16]. For larger-scale operations, technological solutions are highly effective.
- Solution: Implement barcode or RFID (Radio-Frequency Identification) technology for sample tracking [16]. Each sample receives a unique identifier that, when scanned, pulls up its entire history. This not only saves time but also virtually eliminates the risk of sample misidentification [16].
- Supporting Protocol: Regular training workshops that emphasize the importance of precise labeling reinforce its significance and help maintain high standards [16].
What strategies can prevent delays in sample processing?
Processing samples promptly is essential, as delays risk sample viability and the accuracy of outcomes [16]. Bottlenecks often occur in manual, repetitive tasks.
- Solution: Streamline your lab's workflow through automation. Automated systems for sample sorting, labeling, and initial analysis steps can significantly reduce processing times and reduce the potential for human error [16].
- Supporting Protocol: Implement a lean management system. By analyzing and optimizing each step of the sample processing sequence, you can identify and remove bottlenecks, enhancing speed without compromising quality [16].
How can I improve the organization and tracking of samples in storage?
Samples that are stored incorrectly lead to wasted materials and may compromise entire studies [16]. Inefficient tracking, often reliant on error-prone manual logs, creates a ripple effect of inefficiency [16].
- Solution: Establish a tight organizational system with clear storage protocols and designated spots for every sample to prevent overcrowding and confusion [16].
- Supporting Protocol: Implement a digital management system, such as a Laboratory Information Management System (LIMS). This electronic system makes tracking every sample's location, condition, and history straightforward and can provide alerts for mishandled samples [16]. Frequent audits of the storage system ensure ongoing organization [16].
What are the best practices for maintaining sample integrity during processing and storage?
Maintaining sample integrity is paramount for accurate research and diagnostic outcomes. Common culprits that compromise sample quality include temperature fluctuations, cross-contamination, and improper handling [16] [17].
- Solution for Temperature Control: Invest in high-quality, reliable refrigeration systems with real-time monitoring and alerts for temperature deviations. Regular maintenance checks on these systems are essential [16].
- Solution for Contamination: Minimize cross-contamination with rigorous adherence to cleaning protocols and the use of disposable materials whenever possible. Upgrading storage solutions to minimize human handling through automation further preserves sample integrity [16].
- Supporting Protocol for Filtration: When sample filtration is needed, ensure chemical compatibility between the filter membrane and your solvent system to prevent leaching of interferents. For analytes prone to adsorption (like proteins and peptides), use low-binding filters such as PVDF or PES, and always conduct a filter binding investigation during method development [17].
How can we address equipment failure and reagent shortages that disrupt workflows?
In resource-limited settings, laboratory service interruptions are often caused by equipment malfunction, lack of maintenance, and stockouts of reagents [18]. Between 50% and 96% of medical equipment in low-income nations may be broken and not in use [18].
- Solution: Establish a robust equipment maintenance program. This includes adequate operator training, performing regular preventive maintenance, and ensuring a supply of necessary spare parts [18].
- Supporting Protocol: For critical equipment like personal air sampling pumps, ensure batteries are fully charged and calibrate pumps before and after each day of sampling [19]. Implement a reliable supply chain management system for laboratory consumables to prevent stockouts [18].
What role can specialized staff play in streamlining biomarker testing workflows?
The complexity of biomarker testing often leads to operational inefficiencies. Many laboratories lack dedicated staff for coordinating these complex tasks, which can lead to communication gaps and delays [20].
- Solution: The introduction of a Biomarker Testing Navigator (BTN) is a novel and feasible solution. A BTN is a laboratory professional dedicated to coordinating the biomarker testing process [20].
- Supporting Protocol: In a feasibility pilot, BTNs were shown to coordinate multigene testing panels, expedite key steps to ensure optimal preanalytical processes, reduce testing delays, and smooth overall operations. Their key functions include improving communication, better tracking of send-out tests, and enhancing task efficiency [20].
Frequently Asked Questions (FAQs)
What is the single most impactful change we can make to improve sample processing efficiency?
The most impactful change is often the implementation of an electronic tracking system, such as a LIMS, combined with barcode or RFID technology [16]. This addresses multiple hurdles at once by reducing manual data entry errors, drastically speeding up sample identification and location, and providing a clear, accessible record of each sample's lifecycle, which enhances overall workflow transparency and accountability.
Not all optimizations require significant financial investment. Start with process analysis techniques like value stream mapping or the DMAIC (Define, Measure, Analyze, Improve, Control) method from Six Sigma to identify and eliminate non-value-added steps and bottlenecks in your current workflow [21]. Implementing a dual-check system for labeling and establishing clear, standardized protocols for common tasks are low-cost, high-impact improvements [16] [21].
Our team is resistant to new workflows. How can we manage this change?
Resistance to change is a common challenge in process optimization [21]. Successful implementation requires:
- Clear Communication: Explain the reasons for the change and the benefits it will bring.
- Adequate Training: Ensure all staff are thoroughly trained on new procedures and technologies [21].
- Stakeholder Involvement: Involve team members in the planning and testing phases to build ownership and address concerns early [21].
Why is a pre-analytical phase so critical in molecular testing for cancer?
The pre-analytical phase—encompassing sample collection, processing, and storage—directly determines the quality and quantity of biological material available for analysis [22]. In molecular pathology for cancers like NSCLC, the pathologist must evaluate the sample for tumor cell percentage and necrosis. Inadequate samples can lead to false-negative, inconclusive, or incomplete molecular results, which in turn can result in an inappropriate choice of therapeutic strategy and potentially poor patient outcomes [22]. Meticulous tissue handling is required to ensure robust molecular analyses and to avoid exhausting limited tissue samples [23].
Data Presentation
Table 1: Key Challenges and Corresponding Solutions in Sample Processing
| Operational Hurdle | Root Cause | Proposed Solution | Key Benefit |
|---|---|---|---|
| Inaccurate Sample Labeling | Human error during manual entry [16]. | Implement barcode/RFID systems and a dual-check verification process [16]. | Drastically reduced misidentification and false outcomes [16]. |
| Delayed Sample Processing | Manual, repetitive tasks; workflow bottlenecks [16]. | Automate sorting/labeling steps; apply lean management to remove bottlenecks [16]. | Improved speed and maintained sample viability [16]. |
| Inefficient Sample Tracking | Reliance on manual logs and poor organization [16]. | Implement a digital LIMS; establish clear storage protocols [16]. | Real-time location and history tracking; reduced time spent searching [16]. |
| Sample Integrity Loss | Temperature fluctuations; cross-contamination; improper handling [16] [17]. | Use monitored storage; rigorous cleaning; low-binding filters [16] [17]. | Reliable and accurate analytical results [16]. |
| Equipment & Reagent Failure | Lack of maintenance; supply chain issues [18]. | Schedule preventive maintenance; improve supply chain management [18]. | Reduced downtime and service interruptions [18]. |
| Complex Biomarker Testing | Lack of dedicated coordination; poor communication [20]. | Introduce a Biomarker Testing Navigator (BTN) role [20]. | Improved communication, reduced turnaround time, smoother operations [20]. |
Experimental Protocols
Protocol 1: Implementing a Barcode-Based Sample Tracking System
- Needs Assessment: Identify the types of samples, data fields required (e.g., patient ID, date, sample type), and volume of samples processed daily.
- System Selection: Choose a LIMS or standalone software that integrates with barcode scanners and printers.
- Hardware Setup: Acquire barcode printers and durable labels resistant to lab conditions (e.g., frost-free, solvent-resistant). Install barcode scanners.
- Database Creation: Develop a centralized database within the LIMS to store all sample information.
- Staff Training: Conduct comprehensive training on the new procedure, including label printing, application, and scanning [16].
- Pilot and Roll-out: Run a pilot with a small team to identify issues before a lab-wide rollout.
- Audit and Refine: Regularly audit the system for compliance and accuracy, and refine processes as needed.
Protocol 2: Filter Binding Investigation for Sample Preparation
- Sample Preparation: Prepare a standard solution of the analyte(s) of interest in the appropriate matrix.
- Divide Sample: Split the sample into two equal aliquots.
- Processing:
- Centrifuge one aliquot to remove particulates (unfiltered sample).
- Pass the second aliquot through the filter membrane being evaluated (filtered sample).
- Analysis: Analyze both the filtered and unfiltered samples using your standard analytical method (e.g., LC-MS).
- Calculation: Compare the instrument response (e.g., peak area) for each analyte between the filtered and unfiltered samples.
- Interpretation: A significant loss in response (>5-10%) in the filtered sample indicates analyte adsorption to the filter. A different filter material (e.g., PVDF or PTFE for low molecular weight analytes) should be evaluated [17].
Workflow and Relationship Diagrams
Sample Processing Workflow
The Scientist's Toolkit: Research Reagent Solutions
Table 2: Essential Materials for Sample Management and Molecular Profiling
| Item | Function | Application Note |
|---|---|---|
| Barcode/RFID Labels | Provides a unique, machine-readable identifier for each sample [16]. | Choose durable labels resistant to low temperatures, solvents, and abrasion. |
| LIMS (Laboratory Information Management System) | A software platform for centralizing sample data, tracking location, and managing workflows [16]. | Essential for standardizing processes and providing a secure, accessible database. |
| Low-Binding Filters (e.g., PVDF, PES) | Syringe filters designed to minimize analyte adsorption during sample cleanup [17]. | Critical for filtering proteinaceous samples or low-concentration analytes to avoid loss. |
| Liquid Biopsy Kits | For isolation of cell-free DNA (cfDNA) or circulating tumor DNA (ctDNA) from blood [22]. | A minimally invasive tool for dynamic tumor monitoring when tissue is unavailable. |
| Next-Generation Sequencing (NGS) Kits | Allow for parallel sequencing of multiple genes from a single sample [23] [22]. | Recommended for comprehensive genomic profiling to identify multiple actionable biomarkers. |
| Stabilization Buffers (e.g., for RNA) | Preserve nucleic acids in tissue or blood samples immediately after collection [23]. | Prevents degradation and maintains integrity for accurate downstream molecular analysis. |
Financial and Infrastructure Limitations Affecting Sample Quality Management
Technical Support Center
Troubleshooting Guide: Common Sample Quality Issues
This guide assists researchers in identifying and resolving common pre-analytical challenges that compromise sample quality in cancer molecular testing.
TABLE: Troubleshooting Common Sample Quality Issues
| Problem Scenario | Root Cause | Impact on Molecular Testing | Corrective & Preventive Actions |
|---|---|---|---|
| Poor Fixation: Specimen fixed in unbuffered formalin or for an insufficient time [24]. | Acidic formalin degrades DNA; cold ischemia alters RNA/protein [24]. | Degraded nucleic acids; high failure rates for sequencing; erroneous results [24]. | Use 10% neutral buffered formalin; fix for 48-72 hours; ensure 10:1 formalin-to-tissue volume ratio [24]. |
| Inadequate Tissue/ Tumor Content: Biopsy with low tumor cell percentage [24]. | Sample does not meet minimum tumor content threshold for assay sensitivity. | False-negative results; inability to detect low-frequency somatic variants [24]. | Macrodissection or manual microdissection to enrich tumor content; pre-review of H&E slide by pathologist [24]. |
| Suboptimal Nucleic Acid Quality: FFPE sample with low DNA/RNA integrity [25]. | Prolonged formalin fixation causing cross-linking; improper storage [24]. | Low on-target rate & sequencing depth; poor coverage of housekeeping genes (RNA) [25]. | Employ quality metrics (ddCq, Q-value, DV200) to triage samples; optimize extraction protocols for FFPE [25]. |
| Sample Identification Error: Mislabelled specimen container or cassette [24]. | Breach in standard operating procedure during collection or processing. | Incorrect patient diagnosis and treatment; invalid research data [24]. | Implement barcode-based sample tracking (LIS); automate tissue processing to minimize manual handling [24]. |
Frequently Asked Questions (FAQs)
Q1: What are the most critical steps I can control to ensure high-quality DNA from FFPE samples for sequencing?
A: The pre-analytical phase is paramount. First, ensure rapid and adequate fixation: transfer tissue to a sufficient volume of 10% neutral buffered formalin within an hour of resection. Fixation should continue for 48-72 hours to prevent degradation [24]. Second, avoid acidic or outdated formalin, which fragments DNA. Using small, thin tissue sections and controlled processing equipment ensures consistent quality useful for sensitive sequencing methods [24].
Q2: Our research lab faces budget constraints. What are cost-effective strategies for implementing quality control (QC) for samples?
A: Proactive investment in QC is ultimately cost-saving by reducing assay failure rates. Strategically:
- Leverage Pre-Existing Data: Use quality metrics often provided by commercial sequencing labs (e.g., ddCq, Q-value, DV200) to retrospectively analyze which sample types perform best in your lab [25].
- Prioritize Tests: Triage samples using a small set of affordable, high-impact QC assays (e.g., qPCR-based DNA quality check) before committing to more expensive comprehensive genomic profiling [25].
- Standardize Protocols: In-house standardization of fixation and processing protocols reduces inter-sample variability and the need for repeated experiments [24].
Q3: How does sample quality directly impact the performance and cost-effectiveness of comprehensive genomic profiling?
A: Poor sample quality has a direct cascading effect [25]:
- Performance: Low-quality DNA/RNA leads to poor sequencing metrics like low on-target rate and uneven coverage uniformity. This increases the likelihood of missing critical mutations (false negatives) or generating inaccurate data [25].
- Cost: A failed sequencing run wastes significant funds on reagents and sequencing capacity. The subsequent need to repeat the test with a new sample doubles the cost and delays research timelines. Investing in upfront quality management is therefore essential for financial sustainability.
Q4: Our collaborative study involves samples from multiple hospitals. How can we manage inter-site variability in sample quality?
A: Significant inter-hospital differences in DNA quality metrics (ddCq, Q-value) are a documented challenge [25]. To manage this:
- Develop a Shared SOP: Create and distribute a detailed, standardized protocol for sample collection, fixation, and processing to all collaborating sites [24].
- Centralize QC: Implement a central laboratory to perform uniform quality control checks on all incoming samples before inclusion in the study [25].
- Audit and Feedback: Regularly assess quality metrics from each site and provide feedback to harmonize practices and improve overall sample quality across the network [25].
Experimental Protocols: Assessing Nucleic Acid Quality
Methodology for Pre-Sequencing Quality Control
This protocol outlines the use of key quality metrics to predict the success of comprehensive cancer genomic profiling.
TABLE: Key Quality Metrics for Nucleic Acids [25]
| Metric Name | Nucleic Acid Type | Measurement Technique | Ideal Outcome | Indication of Poor Quality |
|---|---|---|---|---|
| ddCq | DNA | qPCR-based assay | Lower values (indicating less degradation) | High ddCq suggests DNA fragmentation, predicting low sequencing depth [25]. |
| Q-value | DNA | qPCR-based assay | Higher values (indicating better integrity) | Low Q-value suggests the presence of inhibitors or damage, predicting poor coverage uniformity [25]. |
| DV200 | RNA | Fragment Analyzer/Bioanalyzer | Percentage of RNA fragments >200 nucleotides | Low DV200 indicates extensive RNA degradation, predicting poor coverage of target genes [25]. |
Procedure:
- Nucleic Acid Extraction: Isolate DNA and RNA from FFPE tissue sections using dedicated, validated kits.
- Quality Assessment:
- For DNA, perform a multiplex qPCR assay that amplifies a long and a short target. Calculate ddCq (the difference in Cq values) and the Q-value, a quantitative measure of amplifiable DNA [25].
- For RNA, use a capillary electrophoresis system (e.g., Agilent Bioanalyzer) to determine the DV200 metric [25].
- Data Interpretation: Establish lab-specific quality thresholds for each metric. For example, samples with a Q-value below a certain cutoff or a DV200 < 30% should be flagged as high-risk for sequencing failure and may require exclusion or alternative processing methods [25].
Molecular Signaling Pathway in Colorectal Cancer
Understanding the pathways tested is crucial for sample quality goals. In colorectal cancer, the EGFR signaling pathway is a key therapeutic target. The following diagram illustrates this pathway and where common molecular tests for mutations in KRAS, NRAS, and BRAF genes impact treatment decisions.
Sample Processing and Quality Control Workflow
A standardized workflow from sample collection to analysis is essential for maintaining quality. The following chart outlines the critical stages and key decision points.
The Scientist's Toolkit: Research Reagent Solutions
TABLE: Essential Materials for Sample Quality Management in Molecular Testing
| Item | Function in Experiment | Critical Specification |
|---|---|---|
| 10% Neutral Buffered Formalin | Primary tissue fixative. Preserves tissue architecture and prevents nucleic acid degradation. | pH 7.2-7.4; must be fresh; use within a defined shelf-life [24]. |
| FFPE Tissue Processing Cassettes | Holds tissue during dehydration, clearing, and paraffin infiltration in an automated processor. | Withstand high temperatures; secure lid to prevent cross-contamination [24]. |
| High-Purity Paraffin | For embedding tissue; provides support for microtomy. | Low contaminant levels; consistent melting point for uniform sectioning [24]. |
| DNA/RNA Extraction Kits (FFPE-specific) | Isolate nucleic acids from complex, cross-linked FFPE tissue. | Optimized for paraffin removal and reversal of formalin-induced cross-links [24] [25]. |
| qPCR Assay Kits for QC | Quantify and assess the quality (ddCq, Q-value) of DNA prior to sequencing. | Must include assays for multiple amplicon sizes to assess fragmentation [25]. |
| RNA Integrity Number (RIN) or DV200 Assay | Assess the degree of RNA fragmentation (e.g., via Bioanalyzer). | Critical for determining RNA sample suitability for sequencing; DV200 > 30% is often a minimum threshold [25]. |
Advanced Methodologies and Technological Solutions for Quality-Challenged Samples
Next-Generation Sequencing Applications for Low-Quantity and Degraded Samples
Next-Generation Sequencing (NGS) has transformed cancer diagnostics and treatment by enabling comprehensive genomic profiling of tumors. However, successful sequencing depends heavily on sample quality and quantity. This technical support center addresses the specific challenges researchers face when working with low-quantity and degraded samples, particularly in cancer molecular testing research. Below you'll find troubleshooting guides, FAQs, and detailed protocols to optimize your NGS workflows for the most challenging sample types.
Troubleshooting Guides
Common NGS Failure Patterns and Solutions
Table 1: Troubleshooting Common NGS Preparation Issues with Challenging Samples
| Problem Category | Typical Failure Signals | Common Root Causes | Corrective Actions |
|---|---|---|---|
| Sample Input/Quality | Low starting yield; smear in electropherogram; low library complexity [26] | Degraded DNA/RNA; sample contaminants (phenol, salts); inaccurate quantification [26] | Re-purify input sample; use fluorometric quantification (Qubit) instead of just UV; ensure high purity ratios (260/280 ~1.8 for DNA) [26] |
| Fragmentation & Ligation | Unexpected fragment size; inefficient ligation; adapter-dimer peaks [26] | Over- or under-shearing; improper buffer conditions; suboptimal adapter-to-insert ratio [26] | Optimize fragmentation parameters; titrate adapter:insert molar ratios; ensure fresh ligase and buffer [26] |
| Amplification/PCR | Overamplification artifacts; bias; high duplicate rate [26] [27] | Too many PCR cycles; inefficient polymerase or inhibitors; primer exhaustion [26] | Reduce the number of PCR cycles; use high-fidelity polymerases; optimize annealing conditions [27] |
| Purification & Cleanup | Incomplete removal of small fragments; sample loss; carryover of salts [26] | Wrong bead:sample ratio; bead over-drying; inefficient washing [26] | Precisely follow bead cleanup ratios; avoid over-drying beads; use fresh wash buffers [26] |
NGS Quality Control Metrics and Standards
Table 2: Essential Quality Control Checkpoints for Challenging Samples
| QC Checkpoint | Assessment Method | Acceptance Criteria | Implications of Failure |
|---|---|---|---|
| Nucleic Acid Purity | Spectrophotometry (NanoDrop) [28] | A260/A280 ~1.8 (DNA), ~2.0 (RNA); A260/A230 >1.8 [28] | Enzyme inhibition in downstream steps; reduced library yield [26] |
| Nucleic Acid Integrity | Electrophoresis (TapeStation, Bioanalyzer) [28] | DNA Integrity Number (DIN) >7; RNA Integrity Number (RIN) >8 [28] | Poor library complexity; high duplication rates; sequencing bias [26] |
| Library Quantification | Fluorometric methods (Qubit), qPCR [26] | qPCR for accurate amplifiable concentration [26] | Over- or under-clustering on sequencer; failed run [26] |
| Library Size Distribution | Electropherogram [26] | Sharp peak at expected size; absence of adapter dimer (~70-90 bp peak) [26] | Inefficient sequencing; high adapter content in data [28] |
| Sequencing Run Quality | FASTQ Q-scores, Cluster Density [28] | Q-score >30; >80% clusters passing filter [28] | High error rates; reduced yield and confidence in variant calling [28] |
Frequently Asked Questions (FAQs)
What are the main causes of DNA degradation in clinical samples, and how can they be minimized? DNA degradation occurs through several mechanisms: oxidation (from heat or UV exposure), hydrolysis (breaking DNA backbone bonds), enzymatic breakdown (from nucleases), and mechanical shearing [29]. In clinical contexts, formalin fixation of FFPE samples causes cross-linking and fragmentation, while delayed processing or improper storage of frozen tissues accelerates degradation [30]. Minimization strategies include using antioxidants, proper storage at -80°C, employing nuclease inhibitors like EDTA, and optimizing mechanical homogenization to avoid excessive shearing [29].
Why does my NGS library from an FFPE sample have low complexity and high duplication rates? This is a classic symptom of degraded starting material. FFPE processing fragments DNA into small pieces, reducing the diversity of unique DNA molecules available for library construction [31] [30]. During PCR amplification, the few intact molecules are over-amplified, leading to a high percentage of duplicate reads. To mitigate this, use extraction protocols designed for FFPE, input more DNA if possible, and employ library prep kits that specialize in short fragments [31].
My sequencing data shows a high percentage of adapter dimers. What went wrong in the library prep, and how can I fix it? A prominent ~70-90 bp peak on an electropherogram indicates adapter dimers, a common failure in challenging samples [26]. The root causes are often an imbalance in the adapter-to-insert ratio (too much adapter) or inefficient ligation due to poor enzyme performance or contaminants [26]. Corrective actions include: (1) accurately quantifying your fragmented DNA before adapter ligation, (2) titrating the adapter concentration, (3) ensuring a second cleanup step to remove excess adapters, and (4) verifying that ligation reagents are fresh and active [26].
What are the best practices for quantifying DNA from low-quality samples before NGS? Relying solely on UV absorbance (e.g., NanoDrop) is a common pitfall, as it overestimates concentration by counting contaminants and degraded nucleic acids [26]. A robust workflow uses a tiered approach:
- UV Spectrophotometry: For a quick purity check (260/280 and 260/230 ratios) [28].
- Fluorometry: Use a Qubit or similar instrument for a specific and accurate measurement of double-stranded DNA concentration [26].
- qPCR: For the most accurate measure of amplifiable DNA, which is critical for predicting library Prep success [26].
Are there alternative technologies if my sample consistently fails NGS? Yes. If comprehensive NGS profiling fails repeatedly due to sample quality, targeted technologies with lower input requirements and tolerance for fragmentation can be a solution. For example, the MassARRAY System uses short amplicon PCR (80-120 bp) and mass spectrometry, enabling it to generate results from FFPE samples that had previously failed NGS, achieving high sensitivity with as little as 20 ng of input DNA [31].
Detailed Methodologies & Protocols
Protocol 1: Optimized DNA Extraction from Challenging FFPE Samples
Principle: Efficiently recover fragmented DNA while removing formalin-induced cross-links and PCR inhibitors common in FFPE tissue [29] [30].
Reagents and Equipment:
- Xylene or another deparaffinization agent
- Ethanol (100%, 96%)
- Proteinase K
- Lysis buffer with EDTA
- RNAse A
- Magnetic bead-based purification kit or spin columns
- Heat block or water bath (56°C, 80°C)
- Centrifuge
- Vortex mixer
Procedure:
- Sectioning and Deparaffinization: Cut 3-5 sections of 10 µm thickness into a microfuge tube. Add 1 ml of xylene, vortex, and incubate at room temperature for 5 minutes. Centrifuge at full speed for 2 minutes and carefully remove the supernatant. Repeat once.
- Ethanol Wash: Add 1 ml of 100% ethanol to the pellet, vortex, and centrifuge. Remove the supernatant. Repeat with 96% ethanol. Air-dry the pellet for 5-10 minutes.
- Lysis and De-crosslinking: Resuspend the pellet in 200 µl of lysis buffer containing 20 µl of Proteinase K. Incubate at 56°C with agitation until the tissue is completely dissolved (several hours to overnight).
- RNAse Treatment: Add 2 µl of RNAse A, mix, and incubate at room temperature for 2 minutes.
- Purification: Purify the DNA using a magnetic bead-based cleanup system (e.g., following the Bead Ruptor Elite protocol for tough samples [29]) or a spin column, following the manufacturer's instructions. Elute in a low-EDTA buffer or nuclease-free water.
- Quality Control: Quantify DNA using fluorometry (Qubit) and assess integrity via fragment analyzer (TapeStation). A DV200 value (percentage of fragments >200 bp) of >50% is generally desirable for NGS.
Protocol 2: Saline Freezing for Sample Preservation in Low-Resource Settings
Principle: When standard FFPE processing leads to severe DNA degradation, freezing tissue in saline provides a cost-effective alternative that preserves high DNA integrity, requiring only basic equipment [30].
Reagents and Equipment:
- Sterile physiological saline (0.9% NaCl)
- Cryogenic vials
- -20°C freezer (a standard laboratory/freezer is sufficient)
Procedure:
- Immediately after collection, place the fresh tissue biopsy (e.g., core needle biopsy) in a cryovial filled with sterile physiological saline.
- Ensure the tissue is fully submerged.
- Place the vial directly into a -20°C freezer for storage.
- For DNA extraction, thaw the sample on ice and proceed with a standard tissue DNA extraction protocol. This method has been shown to yield DNA of significantly higher integrity than matched FFPE samples, enabling robust NGS library construction [30].
Workflow Visualization
The following diagram illustrates the complete NGS workflow for challenging samples, highlighting key quality control checkpoints and potential failure points.
NGS Workflow with QC Gates
The Scientist's Toolkit: Research Reagent Solutions
Table 3: Essential Reagents and Kits for Challenging NGS Samples
| Item | Function | Application Notes |
|---|---|---|
| Bead Ruptor Elite | Mechanical homogenizer for efficient cell lysis and DNA extraction from tough samples (e.g., bone, tissue) [29] | Provides precise control over homogenization parameters to minimize DNA shearing; specialized bead tubes optimize recovery [29]. |
| Magnetic Bead Cleanup Kits | For post-extraction and post-ligation purification to remove contaminants, salts, and short fragments [26] [27] | Critical for removing adapter dimers; the bead-to-sample ratio must be精确 followed to prevent sample loss or inefficient cleanup [26]. |
| NGS Library Prep Kits for FFPE/Low Input | Specialized reagents for constructing sequencing libraries from degraded or limited material [31] [27] | Often incorporate protocols for enzymatic fragmentation and are optimized for shorter fragment sizes, improving success rates with suboptimal samples [31]. |
| MassARRAY System | Mass spectrometry-based platform for targeted genotyping [31] | An alternative rescue technology for samples failing NGS; uses short amplicons (80-120 bp) requiring minimal DNA input (≤20 ng) [31]. |
| EDTA | Chelating agent used in lysis buffers [29] | Demineralizes tough tissues (e.g., bone) and inhibits nucleases that degrade DNA; concentration must be balanced as it can also inhibit PCR [29]. |
Integrated RNA and DNA Sequencing Approaches to Overcome Technical Limitations
Frequently Asked Questions (FAQs)
General Principles and Rationale
Q1: Why is integrating RNA and DNA sequencing particularly important for cancer research? In cancer molecular testing, DNA sequencing identifies mutations, but RNA sequencing reveals which of those mutations are actively expressed and likely to impact protein function. This integration helps distinguish driver mutations from passive events and uncovers biologically active gene fusions and splicing variants that DNA-seq alone can miss. RNA-seq bridges the "DNA to protein divide," providing more clarity and therapeutic predictability for precision oncology [32].
Q2: When should I use a targeted RNA-seq panel versus whole transcriptome sequencing? Targeted RNA-seq panels are recommended when you need deeper coverage of specific cancer-related genes, higher detection accuracy for rare alleles, and more reliable variant identification. Whole transcriptome sequencing is more suitable for discovery-based research, such as identifying novel fusion genes or unanticipated splicing events [32].
Troubleshooting Common Experimental Challenges
Q3: My RNA-seq data shows a high false positive rate for variant calling. How can I improve accuracy? Implement stringent bioinformatics parameters and leverage a high-confidence negative position list to control the false positive rate. Key steps include:
- Setting a minimum variant allele frequency (VAF) threshold (e.g., ≥2%)
- Ensuring sufficient read depth (e.g., DP ≥20) and alternative allele depth (e.g., ADP ≥2)
- Using multiple variant callers (e.g., VarDict, Mutect2, LoFreq) and consensus approaches [32]
Q4: I am getting low library yields from my NGS prep. What are the most common causes? Low library yield is a frequent challenge with several potential root causes and solutions [26]:
| Common Cause | Mechanism of Yield Loss | Corrective Action |
|---|---|---|
| Poor Input Quality | Enzyme inhibition from contaminants (phenol, salts, EDTA). | Re-purify input sample; ensure 260/230 >1.8 and 260/280 ~1.8. |
| Quantification Errors | Overestimating usable DNA/RNA concentration. | Use fluorometric methods (Qubit) over UV absorbance (NanoDrop). |
| Fragmentation Issues | Over- or under-fragmentation produces suboptimal fragment sizes. | Optimize fragmentation time/energy; check fragment distribution pre-ligation. |
| Suboptimal Ligation | Poor ligase performance or incorrect adapter:insert ratio. | Titrate adapter ratios; ensure fresh ligase/buffer; optimize incubation. |
Q5: A variant was detected by DNA-seq but not by RNA-seq. What does this mean? This typically indicates that the mutation is not expressed or is expressed at very low levels in the tumor sample. This could mean the mutation occurred in a non-expressed gene, in a subclone of tumor cells, or in non-tumor cells (e.g., due to clonal hematopoiesis). From a clinical perspective, an unexpressed variant may be of lower therapeutic relevance, as the aberrant protein is not being produced [32].
Q6: My sequencing data shows high adapter-dimer contamination. How can I prevent this? A sharp peak at ~70-90 bp on an electropherogram indicates adapter dimers. To prevent this [26]:
- Accurately quantify input DNA to use the optimal adapter-to-insert molar ratio.
- Avoid using an excess of adapters.
- Optimize bead-based cleanup parameters (e.g., adjust bead-to-sample ratio) to more effectively remove short fragments.
- Consider a two-step indexing PCR protocol instead of a one-step protocol to reduce artifact formation.
Data Analysis and Interpretation
Q7: How can I best integrate DNA and RNA sequencing data for a holistic view of a tumor's biology? A robust integrative analysis involves both confirmation and discovery [32]:
- Use RNA-seq to verify and prioritize DNA variants: Confirm that DNA mutations are transcribed, suggesting functional relevance.
- Use RNA-seq for independent variant detection: It can uniquely identify expressed variants missed by DNA-seq, especially in complex genomic regions.
- Leverage RNA-seq for fusion and splicing analysis: It is indispensable for detecting gene fusions, alternative splicing, and other transcriptomic alterations.
Q8: What are the key quality control metrics for a successful integrated sequencing experiment? For both DNA and RNA sequencing, key QC metrics include [32] [26]:
- For Input Sample: High-quality, high-molecular-weight DNA/RNA (e.g., RIN >7 for RNA).
- For Library Prep: High library concentration, correct fragment size distribution, and low adapter-dimer peak.
- For Sequencing Data:
- High read depth (coverage) over your regions of interest.
- High mapping rate to the reference genome.
- For RNA-seq, good 3' bias metrics and expected expression of housekeeping genes.
Troubleshooting Guides
Guide 1: Addressing Sample Quality and Preparation Failures
Sample quality is the foundation of successful sequencing. Failures at this stage can compromise your entire experiment.
Problem: Low or Failed Library Yield.
Step-by-Step Diagnosis and Solution:
- Check Input DNA/RNA Quality:
- Symptoms: Degraded nucleic acids appear as a smear (rather than a sharp band) on an electropherogram.
- Solution: Re-extract samples, minimize freeze-thaw cycles, and use proper storage conditions. For RNA, always work in an RNase-free environment [26].
Check for Contaminants:
- Symptoms: Low 260/230 and 260/280 ratios from a spectrophotometer.
- Solution: Re-purify the sample using clean columns or beads to remove salts, phenol, or other inhibitors. Ensure wash buffers are fresh [26].
Verify Quantification:
- Symptoms: Yield is low despite good spectrophotometer readings.
- Solution: Do not rely solely on UV absorbance (NanoDrop), which can overestimate concentration by detecting contaminants. Use fluorometric methods (Qubit, PicoGreen) that are specific for nucleic acids [26].
Review Fragmentation and Ligation Steps:
- Symptoms: Incorrect fragment size distribution or high adapter-dimer peaks.
- Solution:
- Optimize fragmentation parameters (time, energy) for your specific instrument.
- Titrate the adapter-to-insert molar ratio to find the optimal balance that maximizes ligation efficiency while minimizing adapter-dimer formation [26].
Guide 2: Resolving Discrepancies Between DNA and RNA Sequencing Results
Encountering a variant in one dataset but not the other is a common challenge in integrated analysis. The following workflow guides you through a systematic investigation.
Investigation Workflow for DNA/RNA Variant Discrepancies
Guide 3: Choosing the Right Sequencing Platform for Integrated Analysis
The choice of sequencing platform is a strategic decision that depends on the specific research questions and applications. The table below compares key technologies.
Comparison of Next-Generation Sequencing Platforms [33] [34] [35]
| Platform (Technology) | Read Length | Key Strengths | Common Applications in Cancer Genomics | Technical Limitations |
|---|---|---|---|---|
| Illumina (Short-read) | 75-300 bp | High accuracy (~99.9%), low cost per base, high throughput. | Whole genome/exome sequencing, targeted panels, RNA-seq. | Struggles with repetitive regions, phasing, and structural variants. |
| PacBio HiFi (Long-read) | >15,000 bp | High accuracy (>99.9%), resolves complex regions. | Genome assembly, phasing, structural variant detection, isoform sequencing. | Higher cost per sample, lower throughput than Illumina. |
| Oxford Nanopore (Long-read) | Up to 2+ Mb | Ultra-long reads, real-time analysis, direct RNA sequencing. | Real-time pathogen detection, structural variants, epigenetic modifications. | Higher raw error rate than Illumina, requires specific bioinformatics. |
Experimental Protocols
Protocol: Targeted RNA-Seq for Expressed Variant Validation
This protocol is designed to validate and prioritize DNA-identified variants using targeted RNA sequencing [32].
1. Sample Preparation and Input QC
- Input Material: 50-100 ng of total RNA with a RIN (RNA Integrity Number) > 7.0.
- QC Method: Assess RNA quality using an Agilent BioAnalyzer or TapeStation. Use fluorometry (Qubit) for accurate quantification.
2. Library Construction
- Enrichment Method: Use targeted RNA-seq panels (e.g., Agilent ClearSeq, Roche Comprehensive Cancer) with probes designed for cancer-related genes.
- Probe Design: Panels should include exon-exon junction spanning probes to accurately capture spliced transcripts.
- Fragmentation & Library Prep: Follow manufacturer's instructions for the selected kit. Typically involves RNA fragmentation, cDNA synthesis, adapter ligation, and PCR amplification.
3. Sequencing
- Platform: Illumina systems (e.g., NovaSeq, MiSeq) are commonly used for targeted sequencing.
- Coverage: Sequence to a high average depth (>500x) over the targeted regions to ensure sensitivity for detecting lowly expressed variants.
4. Data Analysis
- Alignment: Map reads to the reference genome using a splice-aware aligner (e.g., STAR).
- Variant Calling: Use a pipeline optimized for RNA-seq data. It is recommended to use multiple callers (e.g., VarDict, Mutect2) and aggregate the results.
- Filtering: Apply stringent filters:
- Minimum Depth: DP ≥ 20
- Alternative Allele Depth: ADP ≥ 2
- Variant Allele Frequency: VAF ≥ 2%
- Validation: Compare the final list of high-confidence RNA variants against the original DNA-seq findings to confirm expression.
Key Research Reagent Solutions for Integrated Sequencing [32] [26] [36]
| Item | Function | Example/Notes |
|---|---|---|
| Targeted RNA Panels | Enriches sequencing reads for specific genes of interest, allowing for deeper coverage and more sensitive mutation detection. | e.g., Afirma Xpression Atlas (593 genes), Agilent ClearSeq, Roche Comprehensive Cancer panels. |
| DNA/RNA Extraction Kits | Isolates high-quality, high-molecular-weight nucleic acids from various sample types (FFPE, fresh frozen). | Ensure kits are validated for your sample type and minimize contaminant carryover. |
| Library Prep Kits | Prepares nucleic acid fragments for sequencing by adding platform-specific adapters and barcodes. | Choice depends on platform (Illumina, Nanopore) and application (DNA, RNA). |
| Nuclease-free Water | A critical reagent used to dilute samples and reagents without degrading nucleic acids. | |
| Magnetic Beads (SPRI) | Used for post-reaction cleanups and size selection to remove unwanted fragments like adapter dimers. | The bead-to-sample ratio is critical for optimal size selection. |
| Flow Cells | The consumable where the actual sequencing reaction occurs. | Platform-specific (e.g., Illumina S-series, Nanopore MinION R10.4.1). |
| QC Instruments | Assesses the quantity and quality of input samples and final libraries. | Fluorometer (Qubit) for concentration; Bioanalyzer/TapeStation for fragment size. |
Tissue biopsy has long been the gold standard for cancer diagnosis and molecular profiling. However, it faces significant limitations including invasive sampling procedures, tumor heterogeneity, and challenges in longitudinal monitoring. Liquid biopsy emerges as a transformative technology that circumvents these tissue quality issues by analyzing tumor-derived biomarkers from bodily fluids, enabling less invasive sampling, real-time monitoring, and a comprehensive view of tumor heterogeneity [37] [38].
This technical support center provides researchers and clinicians with practical guidance for implementing liquid biopsy technologies, focusing on methodologies, troubleshooting, and reagent solutions to address common experimental challenges.
Frequently Asked Questions (FAQs)
What is the primary advantage of liquid biopsy over tissue biopsy for molecular profiling?
The primary advantage is the ability to obtain a comprehensive molecular profile without the invasiveness and limitations of tissue sampling. Liquid biopsy analyzes circulating tumor biomarkers (CTCs, ctDNA, EVs) from blood or other bodily fluids, providing a real-time snapshot of tumor heterogeneity across multiple disease sites and enabling serial monitoring of treatment response and resistance evolution [37] [38]. This is particularly valuable when tissue is insufficient, inaccessible, or when repeated sampling is needed to monitor disease progression.
Which biomarkers can be detected via liquid biopsy and what are their key applications?
Table 1: Liquid Biopsy Biomarkers and Applications
| Biomarker | Description | Primary Applications |
|---|---|---|
| Circulating Tumor DNA (ctDNA) | Fragments of tumor-derived DNA in bloodstream [38] | - Somatic mutation detection- Treatment monitoring- Minimal Residual Disease (MRD) assessment |
| Circulating Tumor Cells (CTCs) | Intact cells shed from primary/metastatic tumors [38] | - Prognostic assessment- Studying metastasis mechanisms |
| Tumor-Derived Extracellular Vesicles (EVs) | Membrane-bound vesicles carrying proteins, nucleic acids [37] | - Proteomic profiling- RNA analysis |
When is liquid biopsy clinically indicated versus when should tissue biopsy be prioritized?
Liquid biopsy is considered medically necessary in specific clinical scenarios, particularly for patients with advanced cancers. Key indications include:
- When a companion diagnostic test is required for patient selection for a specific therapy and tissue results are unavailable [39].
- For patients with locally advanced or metastatic NSCLC when tumor tissue is insufficient for testing or biopsy is unsafe [39].
- To identify specific mutations (e.g., PIK3CA in breast cancer) to guide targeted therapy in the metastatic setting [39]. Tissue biopsy remains the gold standard for initial diagnosis and can provide architectural information that liquid biopsy cannot. The decision should be based on clinical context and testing objectives [38] [39].
What are the most common causes of false-negative liquid biopsy results?
- Low tumor DNA shedding: The amount of ctDNA released into the bloodstream varies by cancer type, disease burden, and tumor characteristics. Cancers such as brain, renal, and thyroid tumors typically shed less DNA [40].
- Inadequate analytical sensitivity of the assay, especially for early-stage disease or minimal residual disease with very low ctDNA concentrations [40].
- Pre-analytical errors: Improper blood collection, processing, or storage can degrade biomarkers [41].
How can variants from clonal hematopoiesis (CHIP) be distinguished from true tumor-derived variants?
Clonal hematopoiesis of indeterminate potential (CHIP) is a phenomenon where non-cancerous blood or bone marrow cells develop genomic variants in cancer-associated genes. These CHIP variants are detectable in liquid biopsy and can be misinterpreted as tumor-derived, potentially leading to inappropriate treatment decisions [40]. Differentiation strategies include:
- Paired white blood cell (WBC) sequencing: Sequencing a matched WBC sample allows for subtraction of CHIP-associated variants [40].
- Bioinformatic filtering: Using databases of known CHIP mutations and specific mutational signatures [40].
- Correlation with clinical context: Considering the mutation profile in relation to the patient's specific cancer type.
Troubleshooting Common Experimental Challenges
Challenge: Low ctDNA Yield or Purity
Table 2: Troubleshooting Low ctDNA Yield
| Observed Problem | Potential Root Cause | Recommended Solution |
|---|---|---|
| Consistently low ctDNA yield across samples | - Delayed sample processing- Improper blood collection tube- Inefficient DNA extraction method | - Process plasma within 2-4 hours of blood draw [41]- Use validated blood collection tubes (e.g., Streck, EDTA)- Implement extraction methods optimized for short-fragment cfDNA |
| High background of wild-type DNA masking variants | - Low tumor fraction- Inadequate assay specificity | - Use assays with high sequencing depth (>10,000X) for low-frequency variants [41]- Employ unique molecular identifiers (UMIs) to reduce PCR errors |
Challenge: Inconsistent CTC Capture or Viability
Table 3: Troubleshooting CTC Isolation
| Observed Problem | Potential Root Cause | Recommended Solution |
|---|---|---|
| Low CTC recovery rates | - Over-reliance on EpCAM-based capture for epithelial-mesenchymal transition (EMT) cells- Excessive blood cell contamination | - Use multi-marker approaches (e.g., include EMT markers) [38]- Implement size-based or density-based pre-enrichment methods |
| Isolated CTCs non-viable for culture | - Cellular damage during isolation- Extended processing time | - Use gentler microfluidic technologies- Reduce time from draw to processing; optimize culture media immediately post-isolation |
Experimental Protocols for Key Liquid Biopsy Applications
Protocol 1: ctDNA Extraction and Mutation Analysis from Plasma
Principle: Isolate cell-free DNA (cfDNA) from plasma and analyze for tumor-specific mutations via next-generation sequencing (NGS) [38] [41].
Workflow Diagram:
Methodology:
- Blood Collection and Processing: Collect venous blood into stabilized blood collection tubes (e.g., Streck Cell-Free DNA BCT). Process within 2-4 hours by double centrifugation (e.g., 1600 × g for 10 min, then 16,000 × g for 10 min) to obtain platelet-poor plasma [41].
- cfDNA Extraction: Use commercial silica-membrane column or magnetic bead-based kits specifically validated for cfDNA isolation. Quantify yield using fluorometry (e.g., Qubit).
- Library Preparation and Sequencing: Prepare sequencing libraries from cfDNA using kits compatible with low input DNA. Incorporate Unique Molecular Identifiers (UMIs) to correct for amplification errors and enable accurate quantification. Use targeted NGS panels covering relevant cancer genes with high sequencing depth (>10,000X coverage).
- Bioinformatic Analysis: Align sequences to reference genome. Use UMI consensus reads to generate high-confidence variant calls. Filter against population databases and, if possible, matched white blood cell DNA to exclude CHIP variants [40].
Protocol 2: Circulating Tumor Cell (CTC) Enrichment and Identification
Principle: Enrich and identify rare circulating tumor cells from peripheral blood based on physical and/or biological properties [38].
Workflow Diagram:
Methodology:
- Sample Preparation: Collect blood in EDTA tubes. Process within 24-48 hours. Perform red blood cell lysis using ammonium chloride solution.
- CTC Enrichment:
- Positive Immunomagnetic Selection: Incubate with antibody-coated magnetic beads (e.g., anti-EpCAM). Isulate using a magnetic separator. Note: This may miss EpCAM-low CTCs.
- Negative Selection: Deplete hematopoietic cells using CD45-coated beads.
- Size-Based Filtration: Use microfluidic devices with precise pore sizes to separate larger CTCs from blood cells.
- CTC Identification and Staining: Fix and permeabilize enriched cells. Stain with fluorescently labeled antibodies: anti-cytokeratin (CK+ for epithelial origin), anti-CD45 (leukocyte marker, should be negative), and DAPI (nuclear stain). Vimentin staining can detect mesenchymal-like CTCs.
- Enumeration and Analysis: Identify CTCs as nucleated (DAPI+), CK+, CD45- cells using fluorescence microscopy or automated scanning systems.
The Scientist's Toolkit: Essential Research Reagents
Table 4: Key Reagents for Liquid Biopsy Research
| Reagent / Material | Function | Example Application Notes |
|---|---|---|
| Stabilized Blood Collection Tubes | Preserves cell-free DNA and cellular integrity post-draw | Critical for multi-center trials; prevents genomic DNA contamination and cfDNA degradation during transport [41]. |
| cfDNA Extraction Kits | Isolate and purify short-fragment DNA from plasma | Select kits optimized for <300bp fragments; avoid genomic DNA co-extraction. |
| UMI Adapters | Tag individual DNA molecules pre-amplification | Enables error correction and accurate quantification of variant allele frequency in NGS [41]. |
| Anti-EpCAM Magnetic Beads | Immuno-affinity capture of epithelial CTCs | Effective for carcinomas; may require combination with other markers (e.g., Vimentin) for EMT-type CTCs [38]. |
| Microfluidic Chips (e.g., CTC-iChip) | Size-based and inertial focusing for CTC isolation | Allows marker-independent isolation, preserving CTC viability for downstream culture or functional analysis. |
Rapid Molecular Testing Platforms for Time-Sensitive Clinical Scenarios
Frequently Asked Questions (FAQs)
1. What are the key advantages of using rapid molecular syndromic panels in critical care? Rapid Multiplex Molecular Syndromic Panels (RMMSP) are designed to simultaneously detect multiple pathogens (typically 3 or more) and genotypic resistance markers with a time-to-result of less than 6 hours. Their implementation significantly enhances diagnostic accuracy, reduces the time-to-appropriate antimicrobial treatment, decreases inappropriate empiric therapy, and shortens the duration of antibiotic therapy. This contributes positively to antimicrobial stewardship and may be associated with lower in-hospital mortality and potential cost savings [42].
2. How can sample quality impact the results of my cancer molecular test? Poor sample quality is a primary cause of test failure or unreliable results in molecular assays. For tests like PCR, poor DNA template integrity—such as sheared or nicked DNA from improper isolation—can lead to amplification failure. Similarly, low-purity templates containing residual inhibitors like phenol, EDTA, or excess salts can also prevent successful amplification. It is crucial to use proper isolation techniques, store DNA correctly in molecular-grade water or TE buffer, and assess DNA integrity via gel electrophoresis when necessary [43].
3. My PCR reaction produced no amplification product. What are the most common causes? A complete lack of PCR product can stem from several issues related to the template, primers, or reaction conditions:
- Template DNA: The target sequence might be absent, the template could be degraded, or inhibitors might be present.
- Primers: They may be poorly designed, non-specific, or used at an insufficient concentration.
- Reaction Components: The reaction mix might be missing a component, or the concentration of Mg2+ or DNA polymerase may be incorrect.
- Thermal Cycling: The denaturation, annealing, or extension temperatures and times may be suboptimal, or an insufficient number of cycles may have been run [43] [44].
4. What should I do if my PCR results show multiple non-specific bands? Non-specific amplification is often due to low reaction specificity. Solutions include:
- Employing a Hot-Start DNA Polymerase to prevent activity during reaction setup.
- Increasing the annealing temperature in 2°C increments to enhance stringency.
- Optimizing Mg2+ concentration, as excess Mg2+ can reduce fidelity.
- Checking primer design to ensure specificity and avoid self-complementarity.
- Reducing primer or template concentration if they are in excess [43] [44].
5. How do I ensure my diagnostic model is robust when using machine learning with molecular data? For a robust molecular classifier, as demonstrated in cancer grading research, key considerations include:
- Using a rigorous multi-phase study design (discovery, screening, validation, model construction) with progressively expanded cohorts to refine biomarkers and validate models.
- Applying appropriate data preprocessing, such as rank transformation of gene expression data, which conserves gene relationships and allows for single-sample analysis without batch correction.
- Validating the model's performance using independent datasets and relevant statistical measures, such as Receiver Operating Characteristic (ROC) curves and Area Under the Curve (AUC) values [45] [46].
Troubleshooting Guides
Common PCR Issues and Solutions
Table: Troubleshooting Common PCR Problems
| Observation | Possible Cause(s) | Recommended Solution(s) |
|---|---|---|
| No Amplification Product | Poor template quality or integrity [43]. | Isolate DNA with minimal shearing. Assess integrity by gel electrophoresis. Re-purify to remove inhibitors [43]. |
| Poor primer design or specificity [44]. | Verify primer sequence complementarity to the target. Use primer design tools. Avoid complementary regions [43] [44]. | |
| Suboptimal reaction conditions [44]. | Optimize Mg2+ concentration and annealing temperature. Ensure all reaction components are added [43] [44]. | |
| Multiple or Non-Specific Bands | Primer annealing temperature too low [43]. | Increase annealing temperature in 2°C increments. Use a gradient cycler for optimization [43]. |
| Excess Mg2+ concentration [43]. | Adjust Mg2+ concentration in 0.5 mM increments to find the optimal range [43]. | |
| Non-hot-start DNA polymerase activity at low temps [44]. | Use a hot-start DNA polymerase. Set up reactions on ice [43] [44]. | |
| Faint Bands | Insufficient template or primer quantity [43]. | Increase the amount of input DNA. Optimize primer concentration (typically 0.1–1 μM) [43]. |
| Insufficient number of cycles [43]. | Increase the number of cycles (up to 40 for low-copy templates) [43]. | |
| Suboptimal extension time/temperature [43]. | Prolong extension time for longer amplicons. Ensure extension temperature is correct for the polymerase [43]. | |
| Smear or High Background | Excessive DNA input [43]. | Lower the amount of template DNA in the reaction [43]. |
| Non-specific priming [44]. | Increase annealing temperature. Redesign primers for greater specificity [43] [44]. | |
| Contamination with foreign DNA [44]. | Use dedicated workspace and filtered pipette tips. Use UV irradiation to decontaminate surfaces [44]. |
Pre-analytical Sample Quality Checklist
This checklist is critical for ensuring reliable results in cancer molecular testing research.
- □ Sample Collection: Use appropriate collection tubes (e.g., EDTA, PAXgene) and standardize procedures.
- □ Sample Storage: Freeze samples at -80°C or in liquid nitrogen promptly after collection to preserve nucleic acid integrity.
- □ Nucleic Acid Extraction: Use validated kits for your sample type (e.g., plasma, tissue). Avoid manual methods that cause shearing.
- □ Quality Control: Quantify nucleic acids using spectrophotometry (A260/A280) and fluorometry. Assess integrity via gel electrophoresis (RIN >7 for RNA).
- □ Inhibition Testing: Perform a spike-in control assay to check for PCR inhibitors in the sample.
Experimental Workflows
Workflow for Developing a Molecular Classifier
This diagram outlines a general workflow for creating a machine learning-based molecular classifier, as applied in cancer research.
Molecular Classifier Development Workflow
PCR Optimization Pathway
This flowchart guides users through a logical sequence for troubleshooting a failed PCR experiment.
PCR Troubleshooting Pathway
The Scientist's Toolkit: Research Reagent Solutions
Table: Essential Reagents for Molecular Testing
| Reagent / Material | Function / Application | Key Considerations |
|---|---|---|
| Hot-Start DNA Polymerase | Enzyme activated only at high temperatures, reducing non-specific amplification and primer-dimer formation in PCR [43]. | Essential for improving specificity, especially in multiplex assays. |
| RNA Stabilization Reagents | Preserve RNA integrity in clinical samples (e.g., blood, tissue) between collection and nucleic acid extraction [46]. | Critical for obtaining accurate gene expression data in cancer transcriptomic studies. |
| Nucleic Acid Extraction Kits | Isolate high-purity DNA or RNA from various sample matrices (e.g., plasma, tissue, cells) [43] [46]. | Select kits designed for specific sample types to maximize yield and purity while removing inhibitors. |
| PCR Additives (e.g., DMSO, GC Enhancer) | Aid in the amplification of difficult templates, such as GC-rich sequences or those with secondary structures, by lowering melting temperatures [43]. | Concentration must be optimized, as excess can inhibit the polymerase. |
| Quantitative PCR (qPCR) Master Mixes | Provide all components necessary for real-time PCR, including enzymes, dNTPs, salts, and optimized buffers, often with a fluorescent dye [46]. | Enables precise quantification of target nucleic acids. Choose mixes compatible with your detection chemistry. |
| Magnetic Bead-Based Cleanup Kits | Purify PCR products by removing excess primers, dNTPs, and enzymes in preparation for downstream sequencing or cloning [44]. | Faster and more efficient than traditional gel extraction methods. |
Artificial Intelligence and Bioinformatics Tools for Quality Assessment
Frequently Asked Questions (FAQs)
Q1: What are the most common indicators of poor-quality sequencing data that I might encounter? Poor-quality data often manifests as low sequencing depth, which limits the reliable detection of genetic variants; a high duplicate read rate, indicating technical artifacts or insufficient library complexity; and an unexpected distribution of base quality scores, which can reveal issues during sequencing itself [47].
Q2: How can AI tools help identify and correct for batch effects in my multi-omics cancer dataset? Artificial Intelligence and Machine Learning approaches are designed to handle large, high-dimensional datasets and can uncover patterns often missed by traditional methods [48]. Specifically, AI can integrate multi-omics data (spanning genomics, transcriptomics, and proteomics) to extract meaningful insights and identify hidden technical biases, such as batch effects, that could confound your analysis [48].
Q3: My RNA-seq sample has low alignment rates. What are the potential causes? This issue frequently originates from sample degradation, which results in fragmented RNA, or contamination from other species (e.g., bacterial or fungal). It can also occur if the reference genome or annotation file used during alignment is incorrect or incomplete [47].
Q4: What is a crucial first step in a bioinformatics workflow to prevent quality issues? A collaboratively designed experiment is foundational to success. This includes planning for appropriate biological replicates, avoiding confounding batch effects, and discussing the analytical study plan with a bioinformatician before generating data [47].
Q5: Which tools can I use to get a rapid quality assessment of my raw FASTQ files?
The versatile software toolkit SeqKit provides the stats command, which delivers simple statistics like the number of sequences, min/max length, and Q20%/Q30% scores on FASTA/Q files, facilitating a quick initial assessment [49].
Troubleshooting Guides
Issue 1: Low-Quality Variant Calls from Whole Genome Sequencing
Problem: High false positive or false negative rates in variant calling (e.g., SNPs, Indels). Investigation & Solutions:
- Verify Raw Data Quality: Use tools like SeqKit stats [49] or FastQC to confirm sufficient read depth (>30x for somatic, >50x for germline is often recommended) and high base quality scores (Q30 > 80%).
- Inspect for Contamination: Check for unusually high alignment rates to multiple species, which may indicate sample cross-contamination.
- Employ Robust Bioinformatics Pipelines: Utilize established genomic analysis toolkits like the Genome Analysis Toolkit (GATK) for best-practice variant calling and filtering, which helps distinguish true biological variants from sequencing artifacts [48].
Issue 2: Inconsistent Differential Gene Expression Results in RNA-seq
Problem: Findings from RNA-seq data are not reproducible or conflict with other data. Investigation & Solutions:
- Check for Batch Effects: Use PCA plots or other unsupervised learning methods to see if samples cluster more strongly by processing date than by experimental group. If found, use AI/ML-based normalization or tools like ComBat to adjust for these effects.
- Assess Library Complexity: Low complexity (high PCR duplication rates) can skew results. Tools like SeqKit rmdup can help investigate duplication levels [49].
- Use Established Statistical Methods: For final analysis, employ robust tools specifically designed for RNA-seq count data, such as DESeq2 or EdgeR [48].
Issue 3: Poor Integration of Multi-omics Data for Biomarker Discovery
Problem: Difficulty in combining genomic, transcriptomic, and proteomic data to identify coherent biomarkers. Investigation & Solutions:
- Ensure Data Compatibility: Confirm that all datasets are aligned to the same reference genome build and use consistent sample identifiers.
- Leverage Integrated AI Platforms: Use cloud-based platforms like Galaxy or DNAnexus that facilitate streamlined processing of different data types [48]. Furthermore, leverage data portals like cBioPortal to combine multi-omic datasets, which provides a comprehensive perspective on tumor biology [48].
- Apply Advanced AI/ML Modeling: Implement machine learning frameworks (e.g., Python's scikit-learn, TensorFlow) to build predictive models that can identify complex, cross-omics patterns associated with clinical outcomes [48] [50].
Experimental Protocols for Quality Assessment
Protocol 1: Pre-processing and Quality Control for NGS Data
Objective: To assess the quality of raw sequencing data and perform initial filtering and trimming.
- Quality Check: Run FastQC on raw FASTQ files to generate a report on per-base sequence quality, sequence duplication levels, and adapter contamination.
- Format Conversion (if needed): Use SeqKit fq2fa to convert FASTQ to FASTA format for certain applications [49].
- Adapter Trimming & Quality Filtering: Use tools like Trimmomatic or Cutadapt to remove adapter sequences and low-quality bases.
- Post-trimming QC: Re-run FastQC on the trimmed FASTQ files to confirm improvement.
Protocol 2: AI-Driven Biomarker Discovery from Multi-omics Data
Objective: To identify a panel of molecular biomarkers predictive of cancer survival or treatment response by integrating different data types.
- Data Acquisition and Curation: Download processed and normalized multi-omics data (e.g., gene expression, somatic mutations, copy number variations) for a cancer cohort from a public repository like The Cancer Genome Atlas (TCGA) [48].
- Feature Selection: Use AI-based feature selection methods (e.g., LASSO regression, random forest feature importance) on each data type to reduce dimensionality and identify the most predictive features.
- Data Integration and Model Training: Integrate the top features from all omics layers into a single dataset. Train a machine learning model (e.g., a blended ensemble of Logistic Regression and Gaussian Naive Bayes, as shown in a recent study [50]) to predict the clinical outcome of interest.
- Validation: Validate the performance of the model and the identified biomarker signature on an independent hold-out test set or a different patient cohort [50].
The following table summarizes key quantitative metrics to evaluate during quality assessment.
| Data Type | Metric | Target Value | Tool Example |
|---|---|---|---|
| NGS (General) | Q30 Score | > 80% | SeqKit stats [49], FastQC |
| Duplicate Rate | < 20-50% (varies by application) | Picard MarkDuplicates | |
| Genomics (WGS/WES) | Mean Coverage | > 30x (somatic), > 50x (germline) | GATK [48], Mosdepth |
| Alignment Rate | > 90-95% | HISAT2, STAR [48] | |
| Transcriptomics (RNA-seq) | rRNA Rate | < 10% | FastQC, Picard Tools |
| Genes Detected | > 10,000 (for human) | FeatureCounts, DESeq2 [48] |
The Scientist's Toolkit: Research Reagent Solutions
| Item / Tool | Function |
|---|---|
| Genome Analysis Toolkit (GATK) | A structured software library for variant discovery in high-throughput sequencing data; it is the industry standard for germline and somatic SNP/Indel calling [48]. |
| DESeq2 / EdgeR | Statistical tools for assessing differential gene expression from RNA-seq count data, modeling biological variability and testing for significance [48]. |
| Seurat | A comprehensive R toolkit for single-cell RNA-seq data analysis, enabling the identification and characterization of rare cellular subpopulations within tumors [48]. |
| cBioPortal | An open-access platform that provides visualization, analysis, and download of large-scale cancer genomics data sets, facilitating integrative exploration [48]. |
| SeqKit | A cross-platform and ultrafast toolkit for FASTA/Q file manipulation, useful for tasks like format conversion, sequence statistics, and filtering [49]. |
| MaxQuant | A quantitative proteomics software package designed for analyzing large mass-spectrometric data sets, used for identifying and quantifying proteins [48]. |
| STR ING / Cytoscape | Tools for investigating molecular interaction networks and functional enrichment, helping to interpret lists of biomarkers in a biological pathway context [48]. |
Experimental Workflow Diagram
The following diagram illustrates a generalized AI and bioinformatics workflow for quality assessment and analysis in cancer research.
AI-Driven Multi-Omic Analysis Workflow
Sample Quality Control Pathway
This diagram outlines the logical decision process for assessing sample quality in a molecular testing pipeline.
Sample QC Decision Pathway
Troubleshooting Common Sample Quality Issues and Optimization Strategies
Strategies for Managing Insufficient Tissue Samples and Low Tumor Content
Frequently Asked Questions (FAQs)
FAQ 1: What are the primary consequences of low tumor content in a sample?
Low tumor content can lead to several critical issues in molecular testing:
- False-Negative Results: The test may fail to detect true mutations if the fraction of tumor DNA is below the assay's limit of detection [51] [52].
- Test Failure: There may be insufficient quality or quantity of DNA to pass the test's quality control metrics, resulting in an inconclusive report [52].
- Inaccurate Biomarker Quantification: For biomarkers like Tumor Mutational Burden (TMB), low tumor content can skew estimation and categorization. However, optimized panel sequencing methods can accurately classify TMB status even in samples with only 1-2% tumor content [53].
FAQ 2: What is the minimum tumor cellularity required for reliable NGS testing?
The required percent tumor nuclei varies by test platform and its specific performance metrics. A common minimum requirement for many targeted gene panels is 20% tumor nuclei [52]. This threshold is linked to the assay's sensitivity for detecting variants. The use of modern error-corrected next-generation sequencing (NGS) platforms can help lower this minimum requirement by improving the detection of variants with low variant allelic frequency [51].
FAQ 3: What strategies can be employed when a biospecimen is insufficient for testing?
- Rapid On-Site Evaluation (ROSE): Involves a pathologist during the biopsy procedure to immediately assess sample adequacy, which can help ensure enough material is collected in the first attempt [51] [54].
- Liquid Biopsy: If tissue is inadequate or cannot be re-biased, a liquid biopsy analyzing circulating tumor DNA (ctDNA) from blood can serve as a complementary or "rescue" strategy [51] [54].
- Macrodissection: For samples with mixed cellularity, this technique allows a pathologist to selectively scrape or core areas of the tissue block that are enriched with tumor cells, thereby increasing the effective tumor percentage for nucleic acid extraction [52].
Troubleshooting Guides
Issue 1: Pre-analytical Phase – Biospecimen Collection & Evaluation
Problem: A high rate of samples are being flagged as "Quantity Not Sufficient" (QNS) or have unacceptably low tumor cellularity upon pathology review.
| Root Cause | Potential Solution | Key Technical/Best Practice Considerations |
|---|---|---|
| Suboptimal biopsy technique [51] | Utilize core needle biopsies over fine needle aspiration when feasible; employ navigational bronchoscopy for peripheral lung lesions [54]. | Involve an experienced proceduralist. Adhere to biopsy collection best practices and standardized institutional protocols for specimen handling [51] [54]. |
| Inadequate tissue triage [54] | Implement a clear tissue triage protocol that prioritizes molecular testing when tissue is limited. | Coordinate multidisciplinary discussions between pathologists, pulmonologists, and oncologists. Use multiplexed NGS assays that require less input material to conserve tissue [51] [54]. |
| Overestimation of tumor cell content [51] | Develop and implement standard operating procedures (SOPs) for tumor cell content assessment. | The College of American Pathologists (CAP) has recommendations for defining tumor cell content and quality assurance. For borderline cases, microdissection techniques can be used to enrich for tumor cells [51]. |
| Poor pre-analytical tissue handling [51] | Strictly comply with recognized guidelines for tissue handling. | Follow the CAP checklist for controlling pre-analytical factors like cold ischemia time and fixation conditions to preserve nucleic acid integrity [51]. |
Issue 2: Analytical Phase – Test Ordering & Performance
Problem: Biomarker tests are not ordered, or results are inconclusive due to technical failures related to sample quality.
| Root Cause | Potential Solution | Key Technical/Best Practice Considerations |
|---|---|---|
| Treatment initiated before test ordering/result reporting [51] | Implement reflexive testing policies where biomarker testing is automatically ordered as part of the initial diagnostic workup [51]. | Order NGS testing at the time of diagnosis. Optimize interdepartmental handoffs and track sample processing timelines to reduce turnaround time [51]. |
| Inconclusive results from low-input DNA [52] | Adopt advanced sequencing methods and assays designed for minimal input. | Use error-corrected DNA and RNA platforms for NGS-based testing. Some FDA-approved comprehensive profiling assays have been clinically validated to deliver accurate results from minimal tissue input (e.g., 50 ng of DNA) [51] [55]. |
| Challenges with TMB estimation in low-purity samples [53] | Use targeted panel sequencing with pipelines optimized for low tumor content. | Targeted panels can outperform whole-exome sequencing for TMB categorization in samples with low tumor proportion. Some vendor-specific pipelines can accurately classify TMB status in samples with only 1-2% tumor content [53]. |
Quantitative Data on Clinical Practice Gaps
The following table summarizes data from an analysis of over 38,000 patients with advanced non-small cell lung cancer (aNSCLC), highlighting where patients are lost in the precision oncology pathway due to tissue and testing issues [51].
| Clinical Practice Gap | Patient Attrition (per 1,000 patients) | Key Potential Solution Strategies |
|---|---|---|
| Biopsy Referral: Initial biopsy never performed. | 66 (6.6%) | Ensure equitable access; perform liquid biopsy where applicable [51]. |
| Biospecimen Collection: Insufficient tissue/tumor content. | 136 (14.6%) | Adhere to collection best practices; involve pathologists; offer second biopsy/liquid biopsy [51]. |
| Biospecimen Evaluation: Tumor cell content overestimated. | 14 (1.7%) | Use error-corrected NGS platforms; employ microdissection; define standard SOPs [51]. |
| Biomarker Test Ordering: Test not ordered or treatment started first. | 142 (18.1%) | Implement reflexive NGS testing; harmonize guidelines; ensure coverage/reimbursement [51]. |
| Biomarker Test Performance: Test provides inconclusive results. | 118 (18.4%) | Follow good laboratory practices; maintain instruments; use quality control measures [51]. |
The Scientist's Toolkit: Research Reagent Solutions
| Item | Function/Benefit | Application Context |
|---|---|---|
| Error-Corrected NGS Platforms | Improves detection of low-frequency variants and lowers the minimum required tumor cell content by correcting for sequencing errors [51]. | NGS-based comprehensive genomic profiling for solid tumors. |
| Unique Molecular Identifiers (UMIs) | Short DNA tags added to each molecule before PCR amplification, allowing for computational identification and removal of PCR duplicates. This increases accuracy in variant calling from low-input or degraded DNA [56]. | Sensitive mutation detection in FFPE samples and liquid biopsies. |
| Multiplexed NGS Panels | Allows simultaneous testing for multiple biomarkers from a single, small sample, conserving precious tissue [51] [54]. | Comprehensive genomic profiling when tissue is limited. |
| Cell Line-Derived Reference Standards | DNA samples derived from tumor-normal cell line pairs mixed at defined ratios (e.g., 1%, 5%, 10% tumor) to mimic low tumor content clinical samples. Used to validate and harmonize assay performance [53]. | Benchmarking TMB estimation and variant detection limits in low-purity samples. |
Experimental Workflow for Challenging Samples
The following diagram outlines a logical workflow for managing samples with suspected low tumor content or insufficient tissue, integrating strategies from the FAQs and troubleshooting guides above.
Optimizing Nucleic Acid Extraction from FFPE and Challenging Specimens
This technical support center provides targeted guidance for researchers grappling with the challenges of nucleic acid extraction from Formalin-Fixed, Paraffin-Embedded (FFPE) and other challenging specimens, a critical step for reliable molecular testing in cancer research.
Core Challenges in FFPE Nucleic Acid Extraction
What are the primary sources of DNA and RNA degradation in FFPE samples?
The quality of nucleic acids from FFPE samples is compromised through several mechanisms induced during the fixation and embedding process [57] [58]:
- Formalin-Induced Cross-linking: Formalin creates methylene bridges between proteins and nucleic acids, forming a tight meshwork that physically traps DNA and RNA, making them difficult to extract and amplify [57] [58].
- Chemical Fragmentation: Formalin fixation leads to DNA fragmentation and chemical modifications of nucleotide bases. This process also causes cytosine deamination (C to T mutations), introducing sequencing artifacts that can lead to false-positive results in mutation analysis [57] [59].
- Paraffin Embedding Effects: The embedding process involves dehydration and exposure to high temperatures (60°C), which further fragments nucleic acids. Incomplete paraffin removal during extraction can inhibit downstream applications [57] [59].
- Oxidative Damage: Bases can undergo oxidative damage (e.g., 8-oxo G leading to G to T mutation), while hydrolytic processes can cause depurination, leaving behind abasic sites that stall polymerases during amplification [59] [29].
Why do my DNA quantification results not correlate with downstream assay success?
This common issue arises because standard quantification methods measure different properties, not all of which reflect the amplifiable fraction of DNA [60]:
Table 1: DNA Quantification Methods for FFPE Samples
| Method | Principle | Advantages | Limitations for FFPE |
|---|---|---|---|
| UV/Vis Absorbance (e.g., Nanodrop) | Measures absorbance of UV light by nucleic acids | Fast, requires small volume, low cost | Inaccurate for yields <10 ng/µl; overestimates amplifiable DNA due to impurities and degradation [60] |
| Fluorescent Dyes (e.g., Qubit) | Binds specifically to double-stranded DNA | More specific for DNA than UV/Vis | Still overestimates usable DNA by 2-3x in degraded samples [60] |
| Functional qPCR Assays | Quantifies amplifiable DNA | Most accurate measure of usable nucleic acid; predictive for downstream applications [60] | More time-consuming; requires optimization |
Recommendation: For the most reliable prediction of downstream performance (like NGS or ddPCR), use functional qPCR assays such as the ProNex DNA QC Assay to determine the amount of amplifiable DNA in a sample [60].
Optimized Extraction Protocols and Methodologies
What are the critical steps for optimizing nucleic acid extraction from FFPE samples?
Successful extraction requires careful attention to both pre-processing and purification steps [60]:
- Deparaffinization: Use specialized solutions (e.g., xylene, limonene, or commercial deparaffinization solutions) to completely dissolve and remove paraffin wax. For manual protocols, a series of soaks in xylene followed by ethanol washes is common. Some automated protocols can perform deparaffinization without organic solvents using specialized additives that penetrate and lift away wax [58] [61].
- Proteinase K Digestion: Perform proteolytic digestion under optimized conditions to break cross-links. Critical: Follow manufacturer-recommended digestion times precisely—over-digestion can further degrade nucleic acids. Typical conditions range from 45 minutes to overnight at 50-60°C, depending on the kit [58] [61].
- Cross-link Reversal (Decrosslinking): This temperature-dependent step (typically 80°C for 15-60 minutes) helps reverse formalin-induced crosslinks. Essential: Ensure your heat block has reached the target temperature before starting incubation timing, as this significantly impacts efficiency [60] [61].
- Post-Lysis DNA Repair: For sequencing applications, consider incorporating enzymatic repair steps. The NEBNext FFPE DNA repair V2 mix, for example, selectively targets damaged bases, excising artifacts while preserving true mutations, significantly enhancing data accuracy [59].
Table 2: Comparison of Representative FFPE Nucleic Acid Extraction Kits
| Kit Name | Format | Deparaffinization Method | Digestion Time (DNA) | Unique Features |
|---|---|---|---|---|
| RecoverAll Total Nucleic Acid Isolation Kit (Thermo Fisher) | Filter-based spin column | Xylene (or substitute) & ethanol washes required | Overnight at 50°C | Compatible with total nucleic acid isolation (DNA & RNA) [58] |
| MagMAX FFPE DNA/RNA Ultra Kit (Thermo Fisher) | Magnetic beads in 96-well plates | None required (uses additive to penetrate wax) | 60 min at 60°C + 30 min at 80°C | High-throughput; automatable on KingFisher instruments [58] |
| QIAamp DNA FFPE Advanced UNG Kit (QIAGEN) | Spin column | Dedicated deparaffinization solution | Protocol-specific | Includes UNG enzyme to remove uracil bases from deaminated cytosine, reducing sequencing artifacts [61] |
| Maxwell RSC Xcelerate DNA FFPE (Promega) | Automated magnetic beads | Instrument-integrated | Protocol-specific | Automated workflow; demonstrated good DNA yield with low degradation indices [57] |
The following workflow diagram illustrates the critical decision points in a successful FFPE nucleic acid extraction protocol:
How can I improve sequencing results from FFPE-derived nucleic acids?
- Library Preparation Selection: Choose kits specifically designed for FFPE-derived nucleic acids. For RNA-seq from FFPE samples, the Takara SMARTer Stranded Total RNA-Seq Kit v2 has demonstrated comparable gene expression quantification with 20-fold less RNA input compared to the Illumina Stranded Total RNA Prep kit, a crucial advantage for limited samples [62].
- Targeted Enrichment Strategies: For whole genome sequencing, consider targeted enrichment panels. Technologies like single primer extension (SPE) with unique molecular indexes (UMIs) can achieve complete and uniform coverage from difficult FFPE samples while minimizing false positives by removing PCR artifacts [61].
- Enzymatic DNA Repair: Incorporate dedicated repair enzymes. The NEBNext UltraShear FFPE DNA Library Prep Kit includes a repair step that specifically targets damaged bases (such as cytosine deamination and oxidative damage), excising them before polymerase activity to prevent false mutations [59].
Troubleshooting Common Experimental Scenarios
I am getting partial or incomplete STR profiles from my FFPE samples, despite good DNA yield. What can I do?
This is a common challenge in forensic and cancer research. A recent study using the Maxwell RSC Xcelerate DNA FFPE Kit found that despite recovering relatively high DNA yields with low degradation indices, generation of complete STR profiles was often unsuccessful [57]. The solution involves both extraction and analysis adjustments:
- Amplification Strategy: Shift to short amplicon markers (miniSTRs) that target smaller fragment sizes. Standard STR assays requiring longer intact DNA fragments will consistently underperform with FFPE material due to inherent fragmentation [57].
- Extraction Protocol Refinement: Ensure complete cross-link reversal during extraction. If using an automated system like the Maxwell RSC, verify temperature calibration during the de-crosslinking step [60].
- DNA Repair Enzymes: Consider post-extraction enzymatic repair to fix damaged bases and nicks that contribute to allele dropout [59].
My FFPE samples are very old. Are they still usable for molecular analysis?
Yes, but with limitations. The chemical damage to nucleic acids in FFPE samples appears to increase with age, even though paraffin embedding should displace water and air from the tissue matrix [58]. Success depends on:
- Initial Fixation Quality: Samples fixed in buffered formalin (pH ~7) yield significantly better results than those fixed in unbuffered formalin (pH <4). DNA from buffered formalin-fixed tissues may reach lengths up to ~1 kb, compared to only 100-300 bp from unbuffered formalin [57].
- Realistic Expectations: Accept that you will likely only recover shorter fragments. Design your downstream assays accordingly (e.g., target amplicons <100-150 bp for qPCR, use targeted NGS panels rather than whole genome sequencing) [61].
- Enhanced QC: Implement rigorous quality control using fragment analysis systems to assess the actual size distribution of your DNA and only proceed with samples containing sufficient material in your target size range [29].
Essential Research Reagent Solutions
Table 3: Key Reagent Solutions for FFPE and Challenging Sample Extraction
| Reagent / Kit | Primary Function | Application Notes |
|---|---|---|
| Proteinase K | Proteolytic digestion to break cross-links and release nucleic acids | Add directly to sample to prevent self-digestion; follow manufacturer's incubation times precisely [60] |
| Deparaffinization Solution (e.g., QIAGEN) | Dissolves paraffin wax while preventing interference with subsequent steps | Penetrates tissue to ensure complete paraffin removal; can be left in tube during initial steps [61] |
| UNG Enzyme (Uracil-N-Glycosylase) | Removes uracil bases resulting from cytosine deamination | Critical for reducing C→T artifacts in sequencing; included in specialized FFPE kits [61] |
| NEBNext FFPE DNA Repair Mix | Enzymatic repair of damaged bases, nicks, and gaps | Excises artifacts while preserving true mutations; performed before fragmentation in library prep [59] |
| EDTA-based Buffers | Demineralization and nuclease inhibition for tough samples | Balance concentration carefully as EDTA can inhibit PCR; often used with mechanical homogenization [29] |
Pre-Analytical Considerations for Optimal Results
How can tissue collection and fixation processes be optimized for better molecular analysis?
Researchers often have limited control over these pre-analytical factors, but understanding them is crucial for interpreting results [61]:
- Fixation Time: Ideally, formalin fixation should not exceed 24-48 hours. Prolonged fixation significantly increases DNA damage and cross-linking. Tissues fixed over weekends (∼72 hours) show markedly worse nucleic acid quality [61].
- Formalin Type: Neutral-buffered formalin (pH ~7) should always be used instead of unbuffered formalin. Acidic conditions (pH <4) in unbuffered formalin promote intense DNA degradation and higher mutation rates [57].
- Tissue Size: Formalin penetrates tissue at ∼1mm/hour. Tissue thickness should not exceed 5mm in its thinnest dimension to ensure complete fixation and prevent autolysis in the tissue center [61].
Which automation strategies work best for FFPE processing?
Automation can improve throughput and consistency but requires special considerations [60]:
- Organic Solvent Handling: When automating deparaffinization with solvents like xylene, develop specialized liquid classes: use slow aspiration/dispensing rates, pre-wet pipettes, and draw air gaps to prevent dripping [60].
- Pre-processing Options: Consider manual pre-processing (deparaffinization, digestion) followed by automated purification, as preprocessing steps are time-consuming and can tie up instruments for extended incubations [60].
- High-Throughput Solutions: Magnetic bead-based systems (e.g., MagMAX, Maxwell) are particularly suited for 96-well plate formats and automation platforms like KingFisher instruments [58].
Standardizing Pre-analytical Protocols Across Multiple Collection Sites
Frequently Asked Questions (FAQs)
FAQ 1: What are the most critical pre-analytical variables to control for cancer tissue samples? The most critical variables are warm and cold ischemic time, fixation method, and storage conditions. Warm ischemia (time after blood supply interruption but before tissue removal) causes rapid phosphoprotein degradation, with biomarkers like p-AKT and p-ERK changing within 10-30 minutes [63]. Cold ischemia (time from removal to preservation) significantly alters up to 20% of detectable genes and proteins within 30 minutes [63]. Standardized fixation using 10% Neutral Buffered Formalin for 3-6 hours is optimal for nucleic acid preservation [64].
FAQ 2: How long can blood samples for plasma DNA analysis be stored before processing? For plasma cell-free DNA, samples can be stored at room temperature for up to 24 hours, at 2-8°C for up to 5 days, and at -20°C for longer periods [64]. For viral DNA like HBV, plasma remains stable for up to 28 days at both room temperature and 4°C [64].
FAQ 3: What is the impact of delayed fixation on molecular test results? Delayed formalin fixation induces DNA-protein and RNA-protein cross-links, causing nucleic acid fragmentation and loss [64]. This can lead to false mutations in sequencing assays and reduce detection efficiency in PCR-based tests [64]. Fixation should begin within 1 hour of tissue removal, with total cold ischemia time ideally limited to 1 hour when DNA is analyzed by FISH [64].
FAQ 4: How can we minimize pre-analytical errors across multiple collection sites? Implement barcoding systems for specimen labeling, use digital temperature monitors during storage/transport, and provide continuous staff training [65] [66]. Develop stringent Standard Operating Procedures for sample collection and handling to reduce variability [67]. Utilize Lab Information Management Systems to track the specimen journey and identify potential mishandling early [68].
Troubleshooting Guides
Issue 1: Degraded Nucleic Acids from Tissue Specimens
- Problem: Poor RNA Integrity Number (RIN) or low DNA quality from FFPE tissues.
- Potential Causes:
- Solutions:
- Document and limit ischemic times: Establish protocols to keep warm ischemia under 1 hour and cold ischemia under 1 hour [64] [63].
- Use neutral buffered formalin: Avoid unbuffered formalin to prevent pH-related nucleic acid degradation [64].
- Control fixation duration: Maintain formalin fixation between 3-6 hours for optimal preservation; do not exceed 72 hours [64].
- Monitor storage conditions: Implement continuous temperature monitoring with alerts; minimize freeze-thaw cycles by creating sample aliquots [67] [68].
Issue 2: Inconsistent Protein Biomarker Results
- Problem: Variable or unreliable immunohistochemistry results, especially for phospho-proteins.
- Potential Causes:
- Solutions:
- Standardize fixation protocols: Implement consistent fixation type, duration, and temperature across all sites [69].
- Rapid processing: Process tissues within 20-30 minutes to preserve vulnerable phospho-epitopes like p-AKT and p-MAPK [63].
- Document pre-analytical variables: Record cold ischemic time and fixation duration for each sample to aid in troubleshooting anomalous results [63].
Issue 3: Sample Misidentification and Labeling Errors
- Problem: Sample mix-ups, unreadable labels, or missing data.
- Potential Causes:
- Solutions:
- Implement barcoding systems: Use durable, water-resistant barcode labels for all samples [65] [68].
- Establish unique identifiers: Develop a consistent naming convention using date, sample type, and sequential numbers [68].
- Utilize digital systems: Implement a Laboratory Information Management System to automate label printing, tracking, and data management [68] [66].
Pre-analytical Variable Reference Tables
Table 1: Specimen Stability for Molecular Analysis
| Specimen Type | Target | Temperature | Maximum Duration | Reference |
|---|---|---|---|---|
| Whole Blood | DNA | Room Temperature | 24 hours | [64] |
| DNA | 2-8°C | 72 hours (optimal); up to 6 days | [64] | |
| Plasma | DNA | Room Temperature | 24 hours | [64] |
| DNA | 2-8°C | 5 days | [64] | |
| DNA | -20°C | Longer than 5 days | [64] | |
| RNA (HIV, HCV) | 4-8°C | 1 week | [64] | |
| Tissue (Post-Resection) | DNA/RNA | Room Temperature | ≤1 hour (cold ischemia) | [64] |
| Stool | DNA | Room Temperature | 4 hours | [64] |
| DNA | 4°C | 24-48 hours | [64] | |
| Nasopharyngeal Swabs | Respiratory Viruses | 4°C | 3-4 days | [64] |
Table 2: Tissue Fixation Guidelines for Molecular Studies
| Parameter | Recommendation | Rationale | Reference |
|---|---|---|---|
| Fixative Type | 10% Neutral Buffered Formalin | Prevents acid-induced nucleic acid degradation | [64] |
| Time to Fixation | <1 hour (cold ischemia) | Minimizes RNA degradation and protein modifications | [64] [63] |
| Fixation Duration | 3-6 hours (optimal); <72 hours | Balances tissue preservation with minimal cross-linking | [64] |
| Fixation Temperature | Cold fixation (4°C) | Optimizes nucleic acid preservation | [64] |
| Tissue Thickness | 4-5 mm | Ensures complete penetrance of fixative | Standard Practice |
Experimental Workflows and Standardization
Diagram: Pre-analytical Phase Workflow for Tissue Specimens
Diagram: Multi-Site Standardization Framework
The Scientist's Toolkit: Essential Research Reagent Solutions
Table 3: Key Reagents for Pre-analytical Standardization
| Reagent/Supply | Function | Application Notes |
|---|---|---|
| 10% Neutral Buffered Formalin | Tissue fixation | Preserves morphology while minimizing nucleic acid degradation; preferred over unbuffered formalin [64] |
| RNA Stabilization Solutions | Preserve RNA integrity | Critical for gene expression studies; prevents RNase degradation during transport and storage [67] |
| EDTA or PAXgene Blood Tubes | Blood collection for DNA/RNA | Maintains nucleic acid stability in whole blood before processing [64] |
| Barcode Labels | Sample identification | Durable, water-resistant labels for unique sample tracking; reduces misidentification errors [68] |
| Temperature Monitoring Devices | Storage condition verification | Digital monitors with alarms to ensure proper temperature maintenance during storage/transport [65] |
| Viral Transport Media | Swab specimen preservation | Maintains viability of viral pathogens in nasopharyngeal swabs for molecular detection [64] |
Implementing Reflex Testing Pathways to Streamline Workflow Efficiency
Reflex testing is an automated testing protocol in which a pathologist or laboratory system initiates a prespecified set of diagnostic tests immediately upon confirmation of a specific diagnosis, without requiring separate orders from treating clinicians [70]. This approach standardizes diagnostic workflows and ensures that all patients receive comprehensive biomarker evaluation according to established guidelines. In oncology, reflex testing has demonstrated significant improvements in both turnaround times for reporting molecular results and frequency of variant detection, ultimately reducing time to initiation of optimal therapy [71] [70].
For cancer molecular testing research, implementing reflex pathways is particularly valuable for managing often-limited tissue samples efficiently. Studies show that reflex testing optimizes tissue stewardship and increases successful analysis of initial diagnostic specimens, potentially reducing the need for repeat biopsies [70]. This technical support guide provides detailed methodologies and troubleshooting approaches for implementing robust reflex testing pathways within molecular cancer research programs.
Reflex Testing Workflow Design
Core Operational Framework
The diagram below illustrates the standard reflex testing workflow, from sample acquisition through final reporting.
Quantitative Workflow Efficiency Metrics
The implementation of reflex testing demonstrates measurable improvements in operational efficiency, as shown by comparative studies in lung adenocarcinoma molecular profiling.
Table 1: Turnaround Time Comparison: Reflex vs. Traditional Testing
| Testing Model | Average Turnaround Time (Days) | Median Turnaround Time (Days) | Testing Completion Rate |
|---|---|---|---|
| Reflex Testing | 16.6 | 15.0 | 95-97% |
| Traditional Clinician-Ordered | 52.6 | N/A | 54% (EGFR only) |
| Send-out Testing | 22.6 | 21.0 | 85-90% |
Source: Data adapted from Houston Methodist Hospital implementation study [71]
Technical Specifications and Research Reagent Solutions
Essential Research Reagents and Platforms
Successful implementation of reflex testing pathways requires carefully selected reagents and platforms optimized for standardized workflows.
Table 2: Essential Research Reagent Solutions for Molecular Reflex Testing
| Reagent Category | Specific Examples | Research Function | Technical Considerations |
|---|---|---|---|
| Nucleic Acid Extraction | Automated extraction systems, Extraction-less protocols | Nucleic acid purification from FFPE tissues | Reduce manual steps, improve reproducibility [72] |
| PCR & MassArray | Oncocarta panel, MassArray instrument (Agena Bioscience) | Multiplex PCR and single base extension with mass spectrometry analysis | Simultaneous detection of EGFR, KRAS, BRAF, ERBB2 mutations [71] |
| RNA-based NGS | FusionPlex (ArcherDx), NextSeq (Illumina) | Detection of gene fusions (ALK, RET, ROS1, NTRK1/3) and MET exon 14 skipping | Requires high-quality RNA; validates sample adequacy [71] |
| Immunohistochemistry | SP142 antibody (Ventana) | PD-L1 expression analysis by IHC | Standardized scoring protocols essential [71] |
| FISH | MET amplification testing | Gene amplification detection | Often requires send-out to reference labs [71] |
Troubleshooting Common Implementation Challenges
Preanalytical Variables and Sample Quality
Problem: Inconsistent sample quality affecting test validity. Solution: Implement strict preanalytical controls and sample adequacy checks.
- Inadequate Tumor Content: Require minimum pathological tumor content of 30% for successful NGS analysis [73]. Implement rapid on-site evaluation (ROSE) for biopsy procedures to ensure sample adequacy.
- Nucleic Acid Degradation: Optimize fixation protocols using 10% neutral buffered formalin with fixation times of 6-72 hours. Avoid decalcification procedures that damage nucleic acids when possible [74].
- Inhibitor Contamination: Identify and mitigate common inhibitors (heparin, hemoglobin, heme metabolites) through proper extraction and purification methods. Follow manufacturer recommendations for sample collection containers [74].
Problem: Invalid results due to sample processing issues. Solution: Establish standardized sample handling protocols.
- Implement a predefined logistic workflow to standardize and optimize valid sequencing results [73].
- For bone biopsies, prioritize PSMA-positive lesions with substrate on CT scan, favoring pelvis over vertebrae and other axial sites [73].
- Control for time, temperature, and freeze-thaw cycles during sample transport and storage, as nucleic acid targets have variable stability under different conditions [74].
Workflow Integration Barriers
Problem: Resistance to protocol change from traditional ordering practices. Solution: Demonstrate value through measurable outcomes and multidisciplinary engagement.
- Present quantitative benefits: Reflex testing increased uptake of HCV RNA NAT testing among antibody-positive patients (pooled RR 1.35, 95% CI: 1.16-1.58) compared to non-reflex testing [75].
- Establish a molecular tumor board (MTB) with defined criteria for druggable targets to standardize recommendations [73].
- Develop a "standing order" protocol approved by the multidisciplinary team that remains disease stage agnostic, effectively ordered by the oncologist and instigated automatically by the pathologist [70].
Problem: Limited tissue availability for comprehensive testing. Solution: Optimize tissue stewardship through reflex testing protocols.
- Studies observed significantly fewer unsuccessful tests for EGFR mutations and ALK fusions after adopting reflex testing (14% before vs. 4% after for EGFR; 17% before vs. 3% after for ALK) [70].
- Implement RNA-based NGS panels that allow simultaneous detection of multiple fusion types from limited sample material [71].
- Prioritize testing algorithms that use conserved sample material, beginning with the most clinically actionable biomarkers.
Financial and Regulatory Considerations
Problem: Cost concerns and reimbursement limitations. Solution: Document cost-effectiveness and pursue alternative funding models.
- Laboratory-based reflex testing is potentially cost-saving compared with conventional two-step testing due to reduced clinic visits and clinician time [75].
- In a 2013 analysis by Public Health England, estimated annual savings from reflex RNA NAT testing of an anti-HCV positive sample was £166,500 [75].
- Frame testing costs as a minute proportion of the overall cost of managing a cancer patient, especially as survival lengthens with successful targeted therapy [70].
Experimental Protocols for Validation Studies
Protocol: Validation of Reflex Testing Turnaround Time
Objective: Quantify workflow efficiency improvements following reflex testing implementation.
Methodology:
- Cohort Selection: Identify all patients with newly diagnosed lung adenocarcinoma within a defined period (e.g., 3-4 months) [71].
- Turnaround Time Definition: Define turnaround time as days between release of initial anatomic pathology report and final molecular pathology report [71].
- Data Collection: Collect turnaround times for both in-house performed tests and send-out tests.
- Comparison Group: Compare with historical controls from traditional ordering practices if available.
- Statistical Analysis: Calculate average and median turnaround times with ranges. Use statistical tests (e.g., Mann-Whitney U) to compare pre- and post-implementation periods.
Expected Outcomes: Houston Methodist Hospital observed reduction in average turnaround time from 52.6 days (traditional) to 16.6 days (reflex) for in-house testing [71].
Protocol: Assessment of Variant Detection Rates
Objective: Determine if reflex testing improves completeness of molecular profiling.
Methodology:
- Testing Completion Rate: Track the percentage of eligible patients who receive complete biomarker testing according to guidelines [70].
- Variant Detection Analysis: Document the frequency of detected variants across all tested biomarkers [71].
- Comparative Analysis: Compare variant detection rates before and after reflex testing implementation.
- Statistical Analysis: Calculate percentages and confidence intervals for detection rates. Use chi-square tests to compare proportions.
Expected Outcomes: One institution reported variant detection rate increase from 25.6% with traditional ordering to 48.8% after reflex testing implementation [71]. In a 2019 cohort, 52.6% of specimens had identifiable variants through reflex testing [71].
Frequently Asked Questions (FAQs)
Q1: What is the fundamental difference between reflex testing and traditional clinician-ordered testing? A1: Reflex testing is initiated automatically by the pathologist upon diagnosis confirmation using predefined protocols, while traditional testing requires specific orders from treating clinicians after they review the pathology report. This elimination of the separate ordering step reduces delays by 2-4 weeks on average [70].
Q2: How do we determine which biomarkers to include in our reflex testing panel? A2: Biomarker panels should be defined by the multidisciplinary team based on current clinical guidelines, evidence for actionability, and local treatment availability. For NSCLC, core biomarkers include EGFR, ALK, ROS1, BRAF, NTRK, RET, KRAS, MET, and PD-L1 [70]. The panel should be regularly updated as new biomarkers emerge.
Q3: Our institution is concerned about the cost of implementing reflex testing. What evidence supports its cost-effectiveness? A3: Multiple studies demonstrate that reflex testing is potentially cost-saving. One analysis showed annual savings of £166,500 due to reduced referrals and clinic visits [75]. Additionally, the cost of biomarker testing is minimal compared to the overall cost of cancer care, particularly as successful targeted therapies extend survival [70].
Q4: How does reflex testing impact tissue stewardship with limited biopsy samples? A4: Reflex testing optimizes tissue stewardship by ensuring appropriate triage and conservation of precious samples. Studies show significantly fewer unsuccessful tests for key biomarkers after implementing reflex protocols (e.g., EGFR unsuccessful tests reduced from 14% to 4%) [70]. This reduces the need for repeat biopsies.
Q5: What are the main barriers to implementing reflex testing, and how can we overcome them? A5: Key barriers include reimbursement limitations, concerns about over-testing, and regulatory requirements for clinician orders. Solutions include: developing MDT-approved "standing orders," documenting improved outcomes, and engaging with payers to demonstrate overall cost savings [70]. As targeted therapies expand into earlier disease stages, the concern about over-testing diminishes.
Q6: How does reflex testing address disparities in cancer care? A6: Reflex testing creates a more systematic and equitable system by ensuring all patients receive guideline-concordant testing regardless of socioeconomic factors, geographic location, or treating physician testing preferences [70]. This helps standardize care and reduce disparities in biomarker testing access.
Quality Control Metrics and Rejection Criteria for Molecular Assays
Regulatory Framework and Required Performance Specifications
In the United States, clinical laboratories performing molecular testing must adhere to the Clinical Laboratory Improvement Amendments (CLIA) standards, which set minimum requirements for test validation and quality control to ensure accurate, reliable, and clinically relevant results [76]. The specific validation requirements differ for FDA-approved/cleared tests and laboratory-developed tests (LDTs) [76].
The table below summarizes the key performance characteristics that must be verified for FDA-approved tests or established for LDTs.
Table 1: CLIA-Required Performance Specifications for Molecular Assays
| Performance Characteristic | Requirement for FDA-Approved/Cleared Tests | Requirement for Laboratory-Developed Tests (LDTs) |
|---|---|---|
| Accuracy | Verify with 20 patient specimens or reference materials at 2 concentrations [76]. | Establish using ≥40 specimens tested in duplicate over 5 days; use regression statistics and difference plots [76]. |
| Precision | For qualitative tests: test 1 control/day for 20 days. For quantitative tests: test 2 samples at 2 concentrations over 20 days [76]. | Establish with a minimum of 3 concentrations tested in duplicate over 20 days; calculate SD and/or CV [76]. |
| Reportable Range | Verify with 5-7 concentrations across the stated linear range, with 2 replicates each [76]. | Establish with 7-9 concentrations across the anticipated range with 2-3 replicates each; use polynomial regression [76]. |
| Analytical Sensitivity (Limit of Detection, LOD) | Not required by CLIA, but CAP requires verification for quantitative assays [76]. | Establish with 60 data points (e.g., 12 replicates from 5 samples) over 5 days; use probit regression [76]. |
| Analytical Specificity | Not required by CLIA [76]. | Establish by testing for interfering substances and genetically similar organisms; use paired-difference statistics [76]. |
| Reference Interval | May transfer the manufacturer's interval if applicable to the patient population, or verify with 20 specimens [76]. | For qualitative tests, often "negative" or "not detected"; for quantitative, report below LOD or lower limit of quantitation [76]. |
Preanalytical Sample Quality and Rejection Criteria
The preanalytical phase is critical for reliable molecular results. Sample quality directly impacts the success of nucleic acid extraction and subsequent analysis [77].
Table 2: Sample Quality Considerations and Rejection Criteria in Molecular Cancer Testing
| Sample Parameter | Quality Considerations | Potential Rejection Criteria |
|---|---|---|
| Sample Type | Tissue, cytology samples, or liquid biopsy (EDTA blood for plasma/cell-free DNA) [77]. | Use of incorrect collection tube (e.g., serum instead of plasma for cell-free DNA); sample type unsuitable for the requested test. |
| Tissue Fixation | Neutral buffered formalin is standard; fixation time and temperature must be controlled. Cold ischemia time should be minimized [77]. | Prolonged cold ischemia time; over-fixation (e.g., >24-48 hours in formalin); use of unbuffered formalin. |
| Tissue Quantity & Quality | For small biopsies, optimize tissue usage. Rapid on-site evaluation (ROSE) can ensure adequate sampling [78]. | Insufficient tumor content or cellularity for the intended test (e.g., below a validated threshold for NGS). |
| Nucleic Acid Quality | DNA/RNA extraction should be standardized and checked for quality/quantity regularly [77]. | Poor RNA Integrity Number (RIN) or DNA degradation; insufficient concentration for the test protocol. |
Diagram 1: Sample Testing Workflow with Rejection Points
Common QC Failures and Troubleshooting FAQs
FAQ 1: Our molecular run failed due to poor precision. What are the main causes?
Poor precision (high variability between replicate measurements) can stem from multiple factors in the analytical process [79].
- Pipetting Errors: Solution: Regularly calibrate pipettes, especially multichannel pipettes. Ensure tips are tightly secured and use proper pipetting technique [80].
- Inconsistent Reagent Mixing: Solution: Vortex all reagents and samples thoroughly before pipetting to ensure a consistent concentration across all wells [80].
- Inadequate Washing: Solution: Follow the washing procedure meticulously. Ensure all wells are filling and aspirating completely. Consider adding a 30-second soak step between washes and tap the plate forcefully on absorbent tissue to remove residual fluid [4] [80].
- Edge Effects: Solution: Avoid stacking plates during incubation. Ensure the incubation temperature is even across the entire plate by placing it in the center of the incubator. Use a fresh plate sealer each time to prevent evaporation and contamination [4] [80].
FAQ 2: We are getting no signal in our qualitative assay. How should we troubleshoot this?
A lack of signal indicates a failure of the detection system [80].
- Verify Reagent Addition: Confirm that all critical reagents, including the detection antibody and substrate, were added correctly and in the proper order [4] [80].
- Check Reagent Integrity: Ensure reagents are stored correctly and are not past their expiration date. Substrate solution should be clear and colorless before use and protected from light [4] [80].
- Inspect Wash Buffer: Avoid sodium azide in wash buffers, as it can inhibit horseradish peroxidase (HRP) enzyme activity [80].
- Assay Design (for LDTs): If you are developing your own assay, ensure the capture antibody has properly bound to the plate and that you are using enough detection reagent. Epitope recognition may be impeded, requiring optimization of the coating process [80].
FAQ 3: What are the best practices for ongoing quality control of a validated molecular test?
Sustaining quality requires a proactive and systematic approach [79].
- Use Homogeneous QC Materials: Move away from variable patient samples as controls. Use commercial controls or pooled patient samples to create a consistent, reproducible QC material. This allows for tracking performance over time [79].
- Monitor Quantitative Outputs: For systems with quantitative outputs (e.g., fluorescence, allelic ratio), track these results on Levey-Jennings charts. Apply Westgard Rules or similar statistical quality control rules to detect shifts, trends, and random errors before the test fails completely [79].
- Participate in External Quality Assessment (EQA): Regular participation in EQA schemes (proficiency testing) is a prerequisite for a reliable service, providing an independent check of analytical performance [77].
- Implement Process Controls: For complex tests like next-generation sequencing (NGS), include controls along the entire process, from extraction to sequencing, to monitor the efficiency of each step [77].
Diagram 2: QC Failure Investigation Flowchart
The Scientist's Toolkit: Essential Research Reagent Solutions
Table 3: Key Reagents and Materials for Molecular Assay QC
| Reagent/Material | Function | QC Consideration |
|---|---|---|
| Commercial Control Materials | Provides a stable, homogeneous material for daily QC monitoring of accuracy and precision [79]. | Select controls at multiple concentrations (low, medium, high). Monitor with Levey-Jennings charts. |
| Synthetic Oligonucleotides | Used as calibrators or for establishing the standard curve and limit of detection [76]. | Ensure they are suspended in the appropriate matrix to mimic patient samples. |
| Reference Standards | Well-characterized materials (e.g., cell lines) used for method comparison and accuracy studies [76]. | Critical for validating laboratory-developed tests (LDTs). |
| Blocking Buffers | Reduce non-specific binding in assays like PCR or ELISA, lowering background signal [80]. | Ineffective blocking is a common cause of high background. May require optimization for LDTs. |
| Nucleic Acid Extraction Kits | Isolate and purify DNA/RNA from various sample types [77]. | The extraction step must be monitored as part of the QC process. Check yield and purity regularly. |
Validation Frameworks and Comparative Analysis of Sample Quality Across Testing Platforms
Analytical Validation Standards for Integrated RNA and DNA Sequencing Assays
Combining RNA sequencing (RNA-seq) with whole exome sequencing (WES) from a single tumor sample can substantially improve the detection of clinically relevant alterations in cancer, yet routine clinical adoption remains limited due to the absence of standardized validation frameworks [81]. Integrated DNA and RNA sequencing assays represent a significant advancement in molecular profiling for precision oncology, enabling simultaneous detection of diverse biomarker classes including single nucleotide variants (SNVs), insertions/deletions (INDELs), copy number variations (CNVs), gene fusions, and gene expression signatures [81] [82]. The validation of these combined assays requires comprehensive approaches that address both technical performance and clinical utility, ensuring reliable detection of actionable alterations to guide personalized cancer treatment strategies [81] [55].
Key Validation Experiments & Performance Standards
Analytical Validation Framework
Robust validation of integrated RNA and DNA sequencing assays follows a structured framework encompassing multiple experimental approaches to establish accuracy, sensitivity, precision, and reproducibility [81].
Table 1: Analytical Validation Experiments for Integrated Sequencing Assays
| Validation Experiment | Purpose | Key Metrics | Typical Performance Standards |
|---|---|---|---|
| Reference Standard Testing | Establish assay accuracy using samples with known mutations | Sensitivity, Specificity, Positive Predictive Value | >97% agreement with reference methods [81] [55] |
| Limit of Detection (LOD) Studies | Determine lowest detectable variant allele frequency or transcript abundance | Sensitivity at varying tumor purities and input amounts | SNVs: 5% VAF; INDELs: 10% VAF; SVs: ≥20% tumor purity [83] [82] |
| Precision/Reproducibility Studies | Assess repeatability within and between runs | Intra-run and inter-run concordance | >99% intra-run and inter-run PPV; >96% positive agreement [83] |
| Orthogonal Validation | Verify results using alternative methods | Percentage agreement with established methods | 100% sensitivity for fusion detection [82] |
| Input Quantity Studies | Determine minimum input requirements | Success rate and accuracy with low input samples | 50 ng DNA input while maintaining accuracy [55] |
Experimental Protocols for Key Validation Studies
Protocol 1: Comprehensive Analytical Validation Using Reference Materials
- Generate exome-wide somatic reference standards containing known variants (e.g., 3,042 SNVs and 47,466 CNVs) [81].
- Sequence multiple replicates of reference cell lines at varying tumor purities (e.g., 20%-80%) across different sequencing runs [81].
- Perform serial dilution experiments for DNA (2.5%-8% mutational abundance) and RNA (250-2000 copies/100ng) to establish precise limits of detection [82].
- Analyze using bioinformatics pipelines with stringent quality thresholds (Q30 > 90%, PF > 80%) and alignment to reference genome (hg38) [81].
- Calculate sensitivity, specificity, and concordance by comparing detected variants to expected variants in reference standards [81] [82].
Protocol 2: Orthogonal Clinical Validation with Patient Samples
- Select clinical samples (e.g., formalin-fixed paraffin-embedded (FFPE) tissue) with previously established mutation status via validated methods [82].
- Process samples through integrated RNA-DNA workflow including nucleic acid extraction, library preparation, and sequencing [81] [84].
- Perform parallel testing with established orthogonal methods (e.g., FISH, targeted NGS, Sanger sequencing) [83] [82].
- Blind analysis of integrated assay results compared to orthogonal method results.
- Resolve discordant results through additional verification methods (e.g., Sanger sequencing) to determine true false positives/negatives [82].
Troubleshooting Guide: Common Experimental Issues
This section addresses frequently encountered challenges during the development and validation of integrated RNA and DNA sequencing assays.
Table 2: Troubleshooting Common Issues in Integrated Sequencing Assays
| Problem Category | Specific Symptoms | Root Causes | Recommended Solutions |
|---|---|---|---|
| Sample Quality Issues | Low library complexity, degraded electropherograms, failed QC metrics | Degraded DNA/RNA, sample contaminants (phenol, salts), inaccurate quantification [26] | Re-purify input samples; verify purity ratios (260/230 > 1.8, 260/280 ~1.8); use fluorometric quantification instead of UV absorbance only [26] |
| Library Preparation Failures | Unexpected fragment sizes, inefficient ligation, adapter-dimer peaks (sharp ~70-90 bp peaks) [26] | Over-/under-fragmentation, improper adapter ratios, suboptimal reaction conditions [26] | Optimize fragmentation parameters; titrate adapter:insert molar ratios; use fresh enzymes and buffers [26] |
| Low Sequencing Yield | Low final library concentration, broad or faint electropherogram peaks, dominance of adapter peaks [26] | Enzyme inhibition, pipetting errors, suboptimal purification, inadequate amplification [26] | Use master mixes to reduce pipetting error; optimize bead cleanup parameters; verify reagent concentrations and quality [26] |
| Variant Detection Inconsistencies | Missing expected variants, false positives/negatives, discordant DNA vs RNA results | Insufficient coverage, low tumor purity, variant calling thresholds too stringent [81] [82] | Ensure tumor depth ≥10 reads, normal depth ≥20 reads; apply appropriate VAF filters (≥0.05); use combined DNA+RNA calling [81] |
| Fusion Detection Challenges | Fusions detected in RNA but not DNA or vice versa, inconsistent fusion partners | Breakpoints in non-covered regions, RNA degradation, complex rearrangements [82] | Implement combined DNA+RNA approach; ensure adequate RNA quality (RIN scores); use orthogonal confirmation for novel fusions [82] |
Frequently Asked Questions (FAQs)
Q1: What are the key advantages of integrated RNA and DNA sequencing compared to DNA-only approaches? Integrated assays enable direct correlation of somatic alterations with gene expression, recovery of variants missed by DNA-only testing, and improved detection of gene fusions [81]. Studies demonstrate that combined approaches uncover clinically actionable alterations in up to 98% of cases and reveal complex genomic rearrangements that would likely remain undetected with DNA-only testing [81].
Q2: What are the minimum sample quality requirements for successful integrated sequencing? For DNA, input of 50-200 ng is typically required, with higher amounts needed for degraded FFPE samples [81] [55]. For RNA, integrity numbers (RIN) >7 are generally recommended, though specialized protocols can accommodate more degraded samples [81]. Sample purity ratios should be 260/230 >1.8 and 260/280 ~1.8 [26].
Q3: How does the performance of integrated assays compare to orthogonal methods? Validated integrated assays demonstrate >97% overall agreement with FDA-approved companion diagnostics [55], with specific biomarkers such as microsatellite instability (MSI) showing near-perfect accuracy in colorectal and endometrial cancers [55]. For fusion detection, sensitivities of 100% have been reported compared to orthogonal methods [82].
Q4: What bioinformatics considerations are unique to integrated RNA-DNA analysis? Integrated analysis requires specialized pipelines for joint variant calling, with RNA-seq data potentially recovering variants missed by DNA analysis alone [81]. Key considerations include proper handling of strand-specific RNA data, normalization for gene expression quantification, and algorithms that leverage both data types for fusion detection [81].
Q5: How can false negatives in fusion detection be minimized? Combining DNA and RNA approaches compensates for limitations of either method alone. DNA-based NGS may miss fusions due to unpredictable breakpoints or large intronic regions, while RNA-based NGS can be affected by degradation or low expression [82]. Integrated approaches have demonstrated identification of previously missed fusions, such as TPM3::NTRK1, confirmed by orthogonal methods [82].
Essential Research Reagent Solutions
Table 3: Key Reagents and Materials for Integrated Sequencing Workflows
| Reagent/Material | Function | Application Notes |
|---|---|---|
| SureSelect XTHS2 kits (Agilent) | Library preparation for DNA and RNA | Enables exome capture from both DNA and RNA; suitable for FFPE samples [81] |
| AllPrep DNA/RNA kits (Qiagen) | Simultaneous nucleic acid extraction | Isolates both DNA and RNA from same sample, preserving sample material [81] |
| TruSeq stranded mRNA kit (Illumina) | RNA library construction | Maintains strand specificity for accurate transcript quantification [81] |
| RNA Save solution | Fresh tissue preservation | Maintains RNA integrity for samples collected during surgery [84] |
| Sherlock AX Kit | Manual DNA extraction | Effective for fresh tissue samples; alternative to automated extraction [84] |
| Custom gene panels | Targeted sequencing | Can be designed to include clinically relevant genes (e.g., 487 genes for hematologic malignancies) [83] |
Workflow Diagrams
This technical support guide provides a comparative analysis of tissue and liquid biopsy specimens for cancer molecular testing research. The selection between these sample types is a critical pre-analytical step that directly impacts the success and interpretation of your experiments. This resource addresses frequently asked questions and troubleshooting guidelines to help you navigate the technical challenges associated with each method, framed within the broader context of sample quality considerations for cancer research.
FAQ: Key Performance Characteristics
How do the fundamental performance metrics of liquid and tissue biopsies compare?
Liquid biopsy demonstrates high specificity but variable sensitivity compared to tissue biopsy, which remains the gold standard for initial diagnosis. The following table summarizes key performance metrics based on recent meta-analyses and clinical studies.
Table 1: Overall Diagnostic Performance Metrics
| Performance Metric | Liquid Biopsy | Tissue Biopsy | Context & Notes |
|---|---|---|---|
| Sensitivity | Variable; Pooled: 0.78 (95% CI: 0.72-0.83) [85] | High (Gold Standard) | Liquid biopsy sensitivity is highly dependent on tumor type, stage, and burden [85] [38]. |
| Specificity | High; Pooled: 0.93 (95% CI: 0.89-0.96) [85] | High (Gold Standard) | Specificity for liquid biopsy is consistently high across studies [85]. |
| Diagnostic Odds Ratio (DOR) | 45.3 (95% CI: 28.1-73.0) [85] | Reference Standard | DOR is a single indicator of test performance combining sensitivity and specificity [85]. |
| Turnaround Time (TAT) | Shorter (e.g., Mean: 9.7 days [86]) | Longer (e.g., Mean: 21.7 days [86]) | Faster TAT for liquid biopsy enables more timely treatment decisions [86]. |
How does mutation detection concordance vary between the two methods?
Mutation detection is not always congruent between tissue and liquid biopsy. Concordance rates vary significantly by specific gene, reflecting technological and biological factors.
Table 2: Gene-Specific Concordance Rates in Lung Cancer
| Gene | Concordance Rate | Context & Notes |
|---|---|---|
| EGFR | ~85% [85] | High concordance makes liquid biopsy a reliable tool for detecting key EGFR mutations [85]. |
| ALK | ~78% [85] | Moderate to high concordance [85]. |
| KRAS | ~65% [85] | Moderate concordance [85]. |
| ROS1 | ~59% [85] | Lower concordance; fusion detection can be challenging for liquid biopsy alone [85]. |
Troubleshooting Common Experimental Issues
Issue 1: Inadequate Tumor Material or Low Analytic Yield
Problem: The specimen does not contain sufficient tumor-derived material (DNA, cells) for downstream molecular analysis.
Troubleshooting Guide:
- For Liquid Biopsies:
- Low ctDNA Fraction: The fraction of circulating tumor DNA (ctDNA) in total cell-free DNA (cfDNA) can be very low (0.1-1.0%), especially in early-stage cancer or low tumor burden [38]. This is the most common cause of false negatives.
- Solution: Process a larger volume of blood (e.g., two 10mL tubes instead of one) to increase the yield of cfDNA. Use extraction kits validated for high recovery of fragmented cfDNA [87]. For known mutations, employ ultra-sensitive methods like droplet digital PCR (ddPCR) that can detect allele frequencies as low as 0.01% [88].
- For Tissue Biopsies:
- Insufficient Tumor Cellularity: The sample may have a low percentage of tumor cells or be too small.
- Solution: Utilize cytology specimens (e.g., smears) as a proven alternative for comprehensive genomic profiling when traditional tissue blocks are inadequate [13]. Always request macro-dissection or micro-dissection to enrich for tumor cells before nucleic acid extraction.
Issue 2: Results Are Not Reproducible or Discordant
Problem: Molecular results from liquid and tissue biopsies from the same patient do not match, or serial liquid biopsies show unexpected variation.
Troubleshooting Guide:
- Understand Biological Causes: Discordance is not always a technical failure. It can reflect tumor heterogeneity [87] [89]. A single tissue biopsy captures a single site at a single time, while a liquid biopsy may capture DNA from multiple metastatic sites, revealing a more comprehensive genomic profile [90] [89].
- Investigate Technical Artifacts:
- Tissue: Formalin fixation can cause DNA damage and introduce sequence artifacts (e.g., C>T transitions), leading to false positives in sequencing assays [87] [89].
- Liquid: The presence of non-tumor DNA, such as from clonal hematopoiesis of indeterminate potential (CHIP), can be a confounder, as these are age-related mutations in blood cells mistakenly attributed to the cancer [38] [88].
- Solution: If a mutation is detected in liquid biopsy but not in tissue, consider a second liquid biopsy for confirmation or seek orthogonal validation. For CHIP, sequencing matched peripheral blood mononuclear cells (PBMCs) can help distinguish the source.
Issue 3: Difficulty Isolating and Analyzing Circulating Tumor Cells (CTCs)
Problem: CTCs are extremely rare in blood (approximately 1 CTC per million leukocytes) and are technically challenging to isolate without loss or contamination [38] [88].
Troubleshooting Guide:
- Choose the Right Enrichment Strategy: No single method is perfect. The choice depends on your experimental goal.
- Positive Enrichment: Uses antibodies against surface markers like EpCAM (e.g., CellSearch system, the only FDA-cleared method for CTC enumeration). Risk: May miss CTCs that have undergone epithelial-to-mesenchymal transition (EMT) and no longer express EpCAM [38] [88].
- Negative Enrichment: Removes leukocytes (CD45+ cells), leaving behind an unbiased CTC population. Risk: May have lower purity [88].
- Biophysical Property-Based Enrichment: Uses size (microfilters) or density. Advantage: Label-free; can capture EpCAM-negative CTCs [88].
- Solution for Functional Studies: For downstream cell culture or xenograft models (CDX), use larger blood volumes and rapid processing to maintain CTC viability [88]. Negative enrichment or size-based methods are often preferred to capture a wider variety of CTC phenotypes.
Experimental Protocols: Core Methodologies
Protocol 1: Standard Workflow for ctDNA Analysis from Blood
This protocol outlines the key steps for isolating and analyzing circulating tumor DNA, critical for assessing tumor genetics and monitoring therapy.
Title: ctDNA Analysis Workflow
Detailed Steps:
Pre-analytical Blood Collection & Processing:
- Collect blood in cell-stabilizing tubes (e.g., Streck) or K2-EDTA tubes. CRITICAL: Process within 1-6 hours to prevent lysis of white blood cells, which contaminates plasma with genomic DNA [38] [88].
- Centrifuge at low speed (e.g., 800-1600 RCF for 10 min) to separate plasma from cells. Transfer the supernatant to a new tube.
- Perform a second, high-speed centrifugation (e.g., 16,000 RCF for 10 min) to remove any remaining cellular debris. Aliquot and store plasma at -80°C if not extracting immediately.
cfDNA Extraction:
- Use commercial kits designed for high recovery of short-fragment cfDNA (typically 160-180 bp). Magnetic bead-based methods (e.g., BioChain's vamPure Blood Kit) are efficient and compatible with automation [87]. The goal is to maximize cfDNA yield per mL of plasma.
Quality Control (QC):
- Quantification: Use fluorescence-based assays (e.g., Qubit) for accurate DNA quantification.
- Fragment Analysis: Use a Bioanalyzer or TapeStation to confirm the expected size distribution of cfDNA (~166 bp peak). A large peak at higher sizes indicates contamination with genomic DNA, and the sample should be re-purified or re-drawn.
Molecular Analysis:
- For Known Mutations: Use highly sensitive methods like ddPCR or BEAMing to detect and quantify specific mutations at very low allele frequencies (0.01%-1%) [88].
- For Broad Profiling: Use Next-Generation Sequencing (NGS). Targeted panels (e.g., CAPP-Seq, TAm-Seq) are cost-effective for focused questions. Whole-exome (WES) or whole-genome (WGS) sequencing provides a comprehensive view but requires higher DNA input and has greater analytical complexity [88].
Protocol 2: Integrated Liquid Biopsy Analysis Using ctDNA and ctRNA
This protocol describes a combined approach to improve the detection of actionable gene rearrangements, which can be challenging with ctDNA alone.
Title: Combined ctDNA and ctRNA Analysis
Detailed Steps:
Sample Collection: Follow the same blood collection and plasma separation steps as in Protocol 1.
Nucleic Acid Co-Extraction: Use commercial kits that can co-purify both DNA and RNA from a single plasma sample to maximize the use of precious material. Alternatively, perform separate extractions from split plasma aliquots.
Library Preparation & Sequencing:
- For ctDNA, proceed with a standard NGS library prep, often involving end-repair, adapter ligation, and target capture or amplification [88].
- For circulating tumor RNA (ctRNA), convert RNA to cDNA and then perform NGS library prep. This is crucial for detecting gene expression changes, fusions (e.g., ALK, ROS1), and alternative splicing variants [86].
Data Integration: Align sequencing data to the reference genome and use specialized bioinformatic pipelines to call mutations from ctDNA and fusions/expression outliers from ctRNA.
- Key Application: A 2025 study (LIQUIK) demonstrated that adding ctRNA analysis to ctDNA increased the diagnostic yield of tissue NGS-confirmed gene rearrangements by 28.6% and all actionable biomarkers by 15.6% compared to ctDNA alone [86].
The Scientist's Toolkit: Essential Research Reagent Solutions
Table 3: Key Reagents and Kits for Biopsy Research
| Product / Technology | Primary Function | Key Features & Applications |
|---|---|---|
| CellSearch System | CTC Enumeration | FDA-cleared; immunomagnetic capture using EpCAM antibody; prognostic validation in breast, prostate, colorectal cancer [38] [88]. |
| BioChain cfDNA Extraction Kits | Nucleic Acid Extraction | Magnetic bead-based; high recovery from <1 mL plasma; automation-compatible; ideal for low-abundance ctDNA [87]. |
| Droplet Digital PCR (ddPCR) | Mutation Detection & Quantification | Absolute quantification of known mutations; ultra-sensitive (down to 0.01% AF); ideal for monitoring minimal residual disease (MRD) and resistance mutations [88]. |
| CAPP-Seq (NGS) | Targeted Genome Sequencing | Uses selector oligonucleotides to deeply sequence recurrently mutated regions; cost-effective; good for monitoring tumor burden and heterogeneity [88]. |
| LiquidHALLMARK (LHM) Assay | Integrated Liquid Biopsy | Simultaneously analyzes ctDNA and ctRNA; demonstrated improved detection of fusions and actionable biomarkers vs. ctDNA-only assays [86]. |
| Cytology Specimen Protocols | Alternative Sample Source | Utilize smears and cytology samples for comprehensive genomic profiling when tissue is insufficient; reduces need for repeat biopsies [13]. |
Frequently Asked Questions (FAQs)
Q1: What is the core advantage of using ddPCR over qPCR or NGS for analyzing limited or low-quality samples?
ddPCR provides absolute quantification of nucleic acid targets without the need for a standard curve, which is a significant advantage over qPCR. It achieves this by partitioning a sample into thousands of nanoliter-sized droplets and applying Poisson statistics to count the target molecules based on the fraction of positive and negative partitions [91]. This method offers high sensitivity, accuracy, and reproducibility. Furthermore, ddPCR exhibits a greater tolerance to PCR inhibitors compared to other methods, as the inhibitors are diluted into the many separate partitions, minimizing their impact in any single reaction [92] [93]. This makes it particularly suitable for challenging sample types.
Q2: When should NGS be chosen over ddPCR in a concordance study?
NGS should be the preferred choice when the clinical or research question requires a comprehensive, genome-wide screening for unknown or novel genetic alterations. Its unparalleled breadth makes it the gold standard for discovering complex genomic alterations, such as novel fusion genes in cholangiocarcinoma [23]. Conversely, ddPCR excels in scenarios requiring highly sensitive and precise quantification of a known, specific target, such as monitoring minimal residual disease or specific resistance mutations in cancer [91] [92]. Its lower cost and simpler workflow also make it ideal for high-frequency monitoring of predefined biomarkers.
Q3: How can pre-analytical sample quality impact the results of cross-platform molecular tests?
Pre-analytical factors are critical determinants of the success and reliability of any molecular test. Key considerations include:
- Sample Type and Cellularity: The use of cytology specimens for molecular testing of solid tumors is a proven approach, especially when tissue is inadequate. However, challenges in specimen cellularity and nucleic acid yield must be addressed [13].
- Sample Processing: For blood-based liquid biopsies, the choice of blood collection tube is vital. Cell-stabilizing tubes (e.g., Streck) prevent white blood cell lysis and preserve the integrity of cell-free DNA, maintaining the fetal fraction (FF) in NIPT or tumor DNA fraction in oncology [92]. A standardized two-step centrifugation protocol is recommended for plasma separation to minimize cellular contamination [92].
- Sample Input and Quality: Low quantity or degraded nucleic acids can lead to test failure or reduced sensitivity. Methods like the crude lysate protocol for ddPCR can maximize the yield from limited cell samples by bypassing the DNA extraction step, which can cause target loss [94].
Q4: What are the common issues in ddPCR data analysis and how can they be resolved?
Common issues and their solutions include:
- Poor Partitionment (Droplet Generation): High sample viscosity can impede droplet formation. Implementing a viscosity breakdown (VB) step prior to droplet generation can significantly improve reliability and data clarity [94].
- Threshold Setting: The analysis software may sometimes set an incorrect threshold between positive and negative partitions. It is crucial to manually verify and adjust the threshold to ensure accurate counting, especially in rare event detection [95].
- Dilution Factor Errors: Incorrect calculation or entry of sample dilution factors in the analysis software will lead to inaccurate concentration results for the original stock. All dilution steps must be precisely accounted for in the software settings [95].
Troubleshooting Guides
Pre-Analytical Sample Quality Issues
| Issue | Potential Impact on ddPCR/NGS/Cartridge Systems | Preventive & Corrective Actions |
|---|---|---|
| Low Nucleic Acid Yield (e.g., from cytology samples or limited biopsies) | - Test failure.- Reduced sensitivity for rare targets.- Inaccurate quantification. | - Use crude lysate protocols to avoid loss during DNA extraction [94].- Prioritize sample types with higher cellularity when possible [13].- Use ddPCR due to its superior performance with low-input samples [94]. |
| Low Fetal Fraction (FF)/Tumor Fraction (in liquid biopsies) | - False negative results in aneuploidy or mutation detection.- Reduced assay sensitivity. | - Use cell-stabilizing blood collection tubes and process plasma within recommended timeframes [92].- Implement a two-step centrifugation protocol for clean plasma separation [92].- Use dPCR for its robustness in detecting low-abundance targets amidst a high background of wild-type DNA [91] [92]. |
| Sample Degradation | - Assay failure, particularly for longer amplicons in NGS and qPCR. | - Ensure proper storage of samples at -80°C for long-term preservation [92].- dPCR can be more tolerant of fragmentation, especially when targeting short amplicons, making it suitable for cell-free fetal DNA (cffDNA) or circulating tumor DNA (ctDNA) analysis [92]. |
| PCR Inhibition | - Reduced amplification efficiency, leading to underestimation of target concentration. | - Dilute the sample to dilute out inhibitors.- Use ddPCR, as its partitioning nature naturally mitigates the effect of inhibitors [93]. |
Technical Platform-Specific Issues
| Issue | Platform | Root Cause | Solution |
|---|---|---|---|
| Rare Target Detection Inconsistency | ddPCR vs. NGS | - Different Limits of Detection (LOD): ddPCR may detect very low levels (<0.1%) that NGS misses.- Partitioning statistics: Too many targets per partition. | - Ensure samples are sufficiently diluted to be in the "digital range" for accurate Poisson analysis [95].- Use crude lysate or optimized DNA extraction to maximize target input and improve rare allele detection [94]. |
| Quantification Discrepancy | ddPCR vs. qPCR | - qPCR relies on external standards which can introduce error.- Incorrect droplet volume setting in ddPCR software. | - For ddPCR, measure the actual droplet volume microscopically and update the software setting (default is often 0.85nL, but measurements may show ~0.70nL) [94].- Trust ddPCR's absolute quantification for calibration-free results [91] [94]. |
| Multiplexing Failure | ddPCR | - Suboptimal primer/probe concentrations.- Fluorescence crosstalk between channels. | - Systematically optimize concentrations and ratios of primers and probes for each target [93].- Use a ratio-based probe-mixing strategy to distinguish multiple targets in a single fluorescent channel [93]. |
Essential Experimental Protocols
Protocol: Crude Lysate Preparation for ddPCR from Limited Cell Samples
This protocol is designed to maximize nucleic acid recovery from limited cell samples (as low as 200 cells) by eliminating the DNA extraction step, which can lead to significant target loss [94].
Workflow Diagram: Crude Lysate ddPCR
Materials & Reagents:
- Lysis Buffer: SuperScript IV CellsDirect cDNA Synthesis Kit Lysis Buffer ("Buffer 2") was validated as highly effective [94].
- Phosphate-Buffered Saline (PBS)
- Droplet Digital PCR System (e.g., Bio-Rad QX200)
- ddPCR Supermix and Target-specific primers/probes
Step-by-Step Procedure:
- Cell Preparation: Pellet a minimum of 200 cells and wash with PBS. Thoroughly resuspend the cell pellet in PBS.
- Lysis: Add an appropriate volume of the selected lysis buffer to the cell suspension.
- Incubation: Incubate the mixture for 10 minutes at room temperature to ensure complete cell lysis.
- Viscosity Breakdown (Critical Step): Perform the viscosity breakdown protocol as described in the source material [94]. This step is essential to reduce sample viscosity from released nucleic acids, which is crucial for successful and consistent droplet generation.
- Dilution: Dilute the resulting crude lysate before adding it to the ddPCR reaction master mix. The optimal dilution factor may require empirical testing.
- ddPCR Setup and Run: Add the diluted lysate to the ddPCR supermix, primers, and probes. Proceed with droplet generation, PCR amplification, and droplet reading according to the manufacturer's instructions.
Protocol: Optimizing a Quadruple ddPCR Assay
This protocol outlines the key steps for developing and optimizing a multiplex ddPCR assay capable of simultaneously quantifying four different targets in a single reaction, using a two-channel system [93].
Workflow Diagram: Quadruple ddPCR Assay Development
Materials & Reagents:
- Primers and Probes: Designed for all four targets (sul1, sul2, sul3, sul4 in the original study [93]).
- Droplet Digital PCR System with two fluorescence detection channels (e.g., FAM and HEX).
- ddPCR Supermix
Step-by-Step Procedure:
- Primer and Probe Design: Meticulously design primers and probes for all four targets to ensure similar annealing temperatures and minimal cross-hybridization.
- Annealing Temperature Optimization: Perform a thermal gradient ddPCR experiment to identify the optimal annealing temperature that provides strong, specific amplification for all four targets.
- Concentration Optimization: Systemically test different concentrations of primers and probes for each target to find the combination that yields clear, well-separated clusters in the fluorescence amplitude plot.
- Ratio-Based Probe Mixing: To distinguish four targets with two channels, use a ratio-based strategy. Assign two targets to the FAM channel and two to the HEX channel. Use significantly different concentrations of the two probes within the same channel so that the targets generate distinct fluorescence amplitudes (e.g., high-FAM and low-FAM) [93].
- Assay Validation: Validate the final optimized assay for:
- Sensitivity: Determine the Limit of Detection (LOD) and Limit of Blank (LOB).
- Specificity: Ensure no cross-reactivity with non-target sequences.
- Linearity: Test serial dilutions of the target to confirm a linear quantitative response.
- Repeatability: Assess the coefficient of variation (CV) across replicates.
Research Reagent Solutions
The following table details key reagents and materials essential for successful cross-platform molecular studies, particularly those dealing with challenging samples.
| Item | Function/Application | Key Considerations |
|---|---|---|
| Cell-Stabilizing Blood Tubes (e.g., Streck) | Preserves cell-free DNA profile in plasma for liquid biopsy tests. | Prevents leukocyte lysis, maintains fetal/tumor DNA fraction, and allows for longer sample transport times [92]. |
| SuperScript IV CellsDirect Lysis Buffer | Efficient cell lysis for crude lysate ddPCR protocols. | Validated for use with limited cells (~200), enabling accurate rare target quantification without DNA extraction [94]. |
| Ratio-Optimized Probe Pairs | Enables multiplexing beyond two targets in a two-channel ddPCR system. | By using different concentrations of probes for different targets in the same channel, they can be distinguished by fluorescence amplitude [93]. |
| NGS Comprehensive Genomic Profiling (CGP) Panels | For broad, hypothesis-free screening of genomic alterations in cancer. | Ideal for identifying actionable mutations, fusions (e.g., FGFR2 in cholangiocarcinoma), and copy number variations when sample material is sufficient [23] [13]. |
Reference Materials and Controls for Quality Assurance Programs
Core Concept: The Foundation of Reliable Cancer Molecular Testing
In cancer molecular testing research, reference materials and controls are standardized samples used to validate, monitor, and verify the performance of laboratory assays. They are the cornerstone of any robust quality assurance program, ensuring that test results for somatic and germline variants are accurate, reliable, and reproducible [96] [77].
High-quality controls provide patient-like performance for techniques like PCR, sequencing, and serology. They are precisely titrated and demonstrate high lot-to-lot consistency, which is critical for detecting subtle genetic changes in cancer genomes, such as low-frequency somatic mutations or gene rearrangements [96]. Their use directly aids in improving quality assurance while reducing costs from unwanted repeat procedures [96].
Within the context of cancer research, the preanalytical phase—encompassing sample acquisition, fixation, and nucleic acid extraction—is a major source of variability. Using well-characterized reference materials helps laboratories control for this variability and deliver a reliable service, which is a prerequisite for personalized cancer medicine [77].
Troubleshooting Guide & FAQs
This section addresses common challenges in cancer molecular testing workflows, from sample preparation to analysis.
Sample Quality and Preanalytical Issues
Q: Our extracted DNA from tumor tissue yields inconsistent PCR results. What are the key preanalytical factors to investigate?
Inconsistent results often originate from preanalytical handling. Adherence to standardized protocols is essential for reliable molecular analysis [77].
- Tissue Fixation: For formalin-fixed paraffin-embedded (FFPE) tissue, controlled fixation is critical. Neutral buffered formalin should be used and fixation time must be optimized. Under-fixation can lead to poor tissue architecture, while over-fixation can cause nucleic acid fragmentation and cross-linking [77].
- Cold Ischemia Time: The time between tissue removal and fixation significantly alters gene expression (RNA and protein levels). To minimize this, transport fresh specimens to the pathology lab rapidly, preferably under vacuum at 4°C if transport exceeds one hour [77].
- Sample Purity and Integrity: Assess DNA integrity by gel electrophoresis. Ensure no residual PCR inhibitors (e.g., phenol, EDTA, or high salt concentrations) are present. If necessary, re-purify the DNA [43].
Q: What are the minimum standards for sample handling in molecular pathology?
Clear Standard Operating Procedures (SOPs) must be established for tissue handling. These should define responsibilities for [77]:
- Patient and sample identification using multiple identifiers.
- Specimen type, origin, and container type.
- Transport requirements, including time and temperature limits.
- Fixation requirements, including procedures for opening bowel specimens and incising large masses to ensure proper fixative penetration.
PCR Amplification Problems
Q: We are getting no PCR product from our patient sample, but the positive control worked. What should I do?
A failed PCR with a functioning control indicates an issue specific to the patient sample or its setup. The following table outlines a systematic troubleshooting approach.
Table 1: Troubleshooting 'No PCR Product' Results
| Observation | Possible Cause | Recommended Solution |
|---|---|---|
| No product | Poor template quality or quantity | Analyze DNA via gel electrophoresis; check 260/280 ratio; increase template amount if too low [97] [43]. |
| Presence of PCR inhibitors | Further purify template by alcohol precipitation or column cleanup [97]. | |
| Suboptimal reaction conditions | Optimize Mg2+ concentration in 0.2-1 mM increments [97]. | |
| Incorrect annealing temperature | Recalculate primer Tm; test a temperature gradient starting 5°C below the lower Tm [97]. | |
| Insufficient number of cycles | Rerun the reaction with more cycles (e.g., up to 40 for low-copy templates) [43]. |
Q: Our PCR produces multiple non-specific bands or a high background smear. How can we improve specificity?
Non-specific amplification is a common issue that can be resolved by adjusting reaction stringency and components.
Table 2: Troubleshooting Multiple or Non-Specific PCR Products
| Observation | Possible Cause | Recommended Solution |
|---|---|---|
| Multiple bands/smear | Primer annealing temperature too low | Increase annealing temperature stepwise in 1-2°C increments [97] [43]. |
| Excess Mg2+ concentration | Optimize and lower Mg2+ concentration in 0.2-1 mM increments [97]. | |
| Excess primer or template | Lower primer concentration (within 0.1–1 µM); reduce template quantity [43]. | |
| Non-hot-start polymerase | Use a hot-start polymerase to prevent activity during reaction setup [97]. | |
| Contamination with exogenous DNA | Use dedicated work areas, aerosol-resistant pipette tips, and wear gloves [97]. |
Next-Generation Sequencing (NGS) Quality Control
Q: What are the essential components of a Quality Management System (QMS) for NGS in cancer testing?
A robust QMS for NGS is critical for generating reliable clinical and research data. Key resources and practices include [98]:
- Personnel, Equipment, and Process Management: Implement ready-to-use guidance documents and customizable SOPs.
- Quality System Essentials (QSEs): Follow a framework, such as the 12 QSEs from the Clinical & Laboratory Standards Institute (CLSI), to organize and prioritize all quality activities.
- Validation and Proficiency Testing: Adhere to joint consensus recommendations for validating NGS bioinformatics pipelines and oncology panels [98]. Participate in regular external quality assessment schemes.
- Standardized Reporting: Use guidelines from the Association for Molecular Pathology (AMP), American Society of Clinical Oncology (ASCO), and College of American Pathologists (CAP) for interpreting and reporting sequence variants in cancer [98].
Experimental Protocol: Validating a QC Panel for Somatic Variant Detection
This protocol outlines a methodology for using reference materials to validate a custom NGS panel for detecting somatic mutations in cancer.
1. Objective: To establish the analytical sensitivity, specificity, and reproducibility of a targeted NGS panel for detecting low-frequency somatic variants in tumor DNA.
2. Materials and Reagents:
- Biosynthetic Reference Materials: Commercially available multiplexed reference standards containing known somatic variants at defined allele frequencies (e.g., 1%, 5%, 10%) in key cancer genes (e.g., EGFR, KRAS, BRAF, PIK3CA) [96].
- Wild-Type Control Genomic DNA: From well-characterized cell lines.
- NGS Library Preparation Kit: For the targeted panel.
- Sequencing Platform: e.g., Illumina, Ion Torrent.
- Bioinformatics Pipeline: For alignment, variant calling, and annotation.
3. Methodology: * Sample Preparation: Create dilution series of the reference materials with wild-type DNA to simulate variant allele frequencies relevant to your assay's intended use (e.g., down to 1%). * Library Preparation and Sequencing: Perform NGS library preparation on the reference material dilutions and controls in triplicate across multiple runs and by different operators to assess reproducibility. * Data Analysis: * Sensitivity: Calculate the percentage of known variants in the reference standard that were correctly identified by the pipeline at each allele frequency. * Specificity: Determine the false positive rate by analyzing the wild-type control and any non-variant positions in the reference material. * Reproducibility: Assess inter-run and inter-operator concordance for variant calls.
4. Validation Criteria: The assay is considered validated if it meets pre-defined performance goals, for example: >95% sensitivity for variants at ≥5% allele frequency, >99.5% specificity, and 100% concordance across replicates for known variant calls.
The following diagram illustrates the core workflow and logical relationships in this validation experiment:
The Scientist's Toolkit: Essential Research Reagent Solutions
This table details key materials required for implementing a quality assurance program in cancer molecular research.
Table 3: Key Reagents for Quality Assurance in Molecular Testing
| Research Reagent Solution | Function in Quality Assurance |
|---|---|
| Serology Controls | Validate and monitor the performance of infectious disease serology assays, which is crucial for studying cancer-causing pathogens (e.g., HPV, HBV, HCV) [96]. |
| PCR Controls (Positive/Negative) | Provide a baseline for comparing patient sample amplification, detecting contamination, and ensuring reaction efficiency [97] [43]. |
| Biosynthetic NGS Reference Materials | Act as a truth set for validating sequencing panels, verifying bioinformatics pipelines, and monitoring cross-platform performance for tumor profiling, cell-free DNA, and germline testing [96] [98]. |
| Cell-Free DNA (cfDNA) Controls | Standardize the analysis of circulating tumor DNA (ctDNA) from liquid biopsies, enabling sensitive detection of somatic mutations in plasma [77]. |
| Fidelity Polymerases | Ensure high accuracy during PCR amplification, which is critical for generating reliable data for downstream applications like cloning and sequencing [97]. |
Multicenter Validation Approaches for Decentralized Testing
Frequently Asked Questions (FAQs)
Q1: What is the primary goal of a multicenter validation study for a decentralized test? The primary goal is to ensure the test's accuracy, reliability, and consistency across different geographical locations, operational environments, and user skill levels. This process verifies that the test performs as intended regardless of where it is used, providing robust evidence for its clinical utility and ensuring that results are comparable and reproducible everywhere [99] [100].
Q2: What are the critical sample quality considerations for cancer molecular testing? Sample quality is paramount. Key considerations include:
- Pre-analytical variables: Factors like cold ischemic time (the time between tissue resection and preservation), fixation methods, and storage conditions can significantly impact the quality of biomolecules (DNA, RNA, proteins) and the success of subsequent tests [101].
- Sample Integrity: Quantitative metrics, such as RNA Integrity Number (RIN) for frozen tissue or morphological assessment for FFPE tissue, are crucial for selecting suitable samples [101].
- Documentation: Access to detailed documentation on sample handling, processing, and storage history is essential for researchers to interpret results correctly and ensure research reproducibility [101].
Q3: How do regulatory standards like CLIA impact decentralized testing? In the U.S., the Clinical Laboratory Improvement Amendments (CLIA) set the quality standards for all laboratory testing. For a test to be used in a decentralized setting, the validation must demonstrate it can meet these standards, which cover personnel, quality control, quality assurance, and proficiency testing. The complexity of the test (waived, moderate, or high) determines the stringency of the requirements [99].
Q4: What are common failure points in decentralized testing workflows, and how can they be mitigated? Common failure points often occur in the pre-analytical phase and include:
- Sample Collection: Incorrect sample type, volume, or collection tube.
- Sample Handling: Improper storage or transportation temperatures, or exceeding allowable processing delays.
- User-Dependent Steps: Deviations from timing or procedural steps by untrained users. Mitigation strategies involve robust user training, clear and simple instructions, and implementing built-in quality controls within the test kit or platform to flag potential errors [99] [101].
Q5: How can we ensure consistency when different sites use different analytical platforms? A robust test should demonstrate platform-agnostic performance. This can be achieved by:
- Cross-Platform Validation: Conducting studies that run a subset of samples on all intended platforms and statistically demonstrating high correlation between results [102].
- Calibration: Using standardized calibrators across all platforms.
- Centralized Data Analysis: Employing a unified algorithm or classifier that can process data generated from different technologies, as seen with the MNP-Flex methylation classifier [103].
Troubleshooting Guide
This guide addresses specific issues that might arise during the experimental use of decentralized tests in a research setting.
Issue 1: Inconsistent or Erratic Results Between Replicates
- Potential Cause: Degraded or poor-quality starting material.
Solution:
- Check the quality control metrics of your sample (e.g., DNA concentration, purity via A260/A280 ratio, RNA Integrity Number) before proceeding with the test. Ensure they meet the minimum requirements specified in the protocol [101].
- Verify that storage conditions (e.g., -80°C for frozen tissue) have been consistently maintained and that freeze-thaw cycles have been minimized.
Potential Cause: Improper storage or handling of test reagents.
- Solution:
- Ensure all reagents are stored at the correct temperature upon receipt and during use.
- Check the expiration dates of all kits and components.
- Allow reagents to equilibrate to the recommended room temperature before use if required.
Issue 2: Test Failure or Control Failure
- Potential Cause: Deviation from the specified protocol, particularly with timing or incubation steps.
Solution:
- Strictly adhere to the manufacturer's instructions. Use a calibrated timer for all steps.
- Review the procedure to ensure all steps were performed in the correct sequence.
Potential Cause: Equipment malfunction.
- Solution:
- Perform and document routine calibration and maintenance on all equipment (e.g., pipettes, centrifuges, scanners) as per CLIA and quality assurance guidelines [99].
- Run instrument-specific quality control checks to verify proper function.
Issue 3: Low Signal or Out-of-Range Readings in Quantitative Tests
- Potential Cause: Sample input below the assay's detection limit.
Solution:
- Accurately quantify the input sample (e.g., using a fluorometer) to ensure it falls within the assay's specified range.
- Concentrate the sample if possible and allowable, or repeat the test with a new sample that has sufficient quantity.
Potential Cause: Lot-to-lot variability of key components.
- Solution:
- When validating a new lot of a critical component (e.g., nitrocellulose membrane in a lateral flow assay), perform a parallel testing with the old and new lots using control samples to ensure performance consistency [104].
Data Presentation: Multicenter Validation Performance
The following table summarizes quantitative data from a recent large-scale, multicenter validation study for context on expected performance metrics.
Table 1: Performance Metrics from a Multicenter Validation of a Multi-Cancer Early Detection Test [102]
| Cohort / Metric | Number of Participants | Sensitivity | Specificity | AUC (Area Under Curve) |
|---|---|---|---|---|
| All Combined Cohorts | 15,122 | 58.4% | 92.0% | 0.829 |
| Symptomatic Cohort | Not Specified | 73.1% | 90.6% | Not Specified |
| Tissue of Origin (TOO) Accuracy | 70.6% (of true positives) | - | - | - |
Note: This table illustrates how key performance indicators can be tracked and reported across diverse study populations in a multicenter validation.
Experimental Protocols: Key Methodologies
This section outlines core methodologies cited in multicenter validation studies.
Methodology: The Rapid-CNS2 workflow utilizes adaptive sampling-based nanopore sequencing on fresh or cryopreserved tumor tissue.
- Tissue Acquisition: Obtain fresh tumor tissue from the operating theatre.
- DNA Extraction: Perform rapid extraction of high-molecular-weight DNA.
- Library Preparation & Sequencing: Prepare sequencing libraries and load onto a portable nanopore sequencer (e.g., MinION). Enable adaptive sampling to enrich for genomically relevant targets in real-time.
- Real-Time Analysis (Intraoperative): Within 30 minutes, perform real-time methylation profiling and copy number variation analysis to provide initial diagnostic information.
- Comprehensive Analysis (Next-Day): Continue sequencing to a higher depth. Analyze for single nucleotide variants (SNVs), small insertions/deletions (Indels), gene fusions, structural variants (SVs), and MGMT promoter methylation status.
- Integrated Reporting: Compile all molecular data into a comprehensive diagnostic report compatible with WHO classifications.
Key Experiment: A prospective, multicenter validation of this workflow on 301 archival and prospective samples demonstrated an average turnaround time of 2 days from tissue receipt to a complete report, compared to 20 days with conventional workflows [103].
Methodology: This protocol is essential for validating the consistency of a test, a critical factor for decentralized use.
- Sample Preparation: Prepare a panel of samples, including a negative sample (blank matrix), a positive sample (high analyte concentration), and samples at critical decision points (e.g., near the clinical cut-off).
- Intra-Assay Precision: Run multiple replicates (e.g., n=20) of each sample in a single run by a single operator.
- Inter-Assay Precision: Run the same panel of samples across different days, different operators, and different lots of reagents.
- Data Analysis: Calculate the mean, standard deviation (SD), and coefficient of variation (%CV) for the results of each sample. A low %CV indicates high reproducibility.
Key Experiment: A study evaluating the reproducibility of a lateral flow assay membrane involved testing multiple rolls from the same manufacturing lot (intra-lot) and rolls from different lots (inter-lot). The results showed very low %CV values, confirming the material's consistency and its suitability for producing reliable, quantitative tests [104].
The Scientist's Toolkit: Research Reagent Solutions
Table 2: Essential Materials for Decentralized Molecular Testing Workflows
| Item | Function / Explanation |
|---|---|
| Nitrocellulose Membranes (e.g., Whatman FF120HP) | The reaction membrane in lateral flow and some solid-phase assays; highly consistent membranes with low intra- and inter-lot variability are critical for achieving reproducible quantitative results [104]. |
| Methylation Classifier (e.g., MNP-Flex) | A platform-agnostic software classifier that analyzes methylation data from various technologies (including arrays and sequencing) to assign a diagnostic class to central nervous system tumors, enabling standardized diagnosis across centers [103]. |
| Liquid Biopsy Panels (e.g., OncoSeek) | A blood-based test that measures a panel of protein tumor markers (PTMs) combined with clinical data and AI to detect multiple cancer types early. Its consistency across different laboratories and platforms makes it suitable for broad deployment [102]. |
| Adaptive Sampling Sequencing Workflows (e.g., Rapid-CNS2) | A nanopore sequencing-based workflow that allows for real-time, selective enrichment of genomic targets. This enables ultra-rapid intraoperative molecular diagnosis and comprehensive next-day reporting, revolutionizing diagnostic turnaround times [103]. |
| Biobanked Tissues with Annotated Clinical Data | Well-characterized, high-quality frozen or FFPE tissue samples with linked clinical outcome data are the foundational resource for discovering and validating new cancer biomarkers [101]. |
Workflow and Relationship Visualizations
Diagram 1: Multicenter Test Validation Workflow
Diagram 2: Sample Quality Impact on Biomarker Analysis
Conclusion
Sample quality remains a pivotal factor in cancer molecular testing, directly influencing research validity and clinical translation. The integration of advanced methodologies like combined RNA-DNA sequencing and liquid biopsy technologies offers promising solutions to traditional sample limitations, while comprehensive validation frameworks and standardized protocols enhance reliability across testing platforms. Future directions should focus on developing more robust quality metrics, implementing AI-driven quality assessment tools, and establishing universal pre-analytical standards to support the growing complexity of precision oncology research. As molecular testing continues to evolve, maintaining rigorous attention to sample quality will be essential for accelerating drug development and realizing the full potential of personalized cancer medicine.
References
- 1. Preanalytical Errors in Clinical Laboratory Testing at a ... [https://pmc.ncbi.nlm.nih.gov/articles/PMC10981510/]
- 2. Understanding Preanalytical Variables and their Effects on ... [https://pmc.ncbi.nlm.nih.gov/articles/PMC6004232/]
- 3. Identification of Clinical Biomarkers for Pre-Analytical ... [https://pmc.ncbi.nlm.nih.gov/articles/PMC3629782/]
- 4. ELISA Troubleshooting Guide [https://www.thermofisher.com/us/en/home/life-science/protein-biology/protein-biology-learning-center/protein-biology-resource-library/pierce-protein-methods/overview-elisa/elisa-troubleshooting-guide.html]
- 5. Troubleshooting Guide: ELISA [https://www.rndsystems.com/resources/troubleshooting-guide-elisa-development]
- 6. Preanalytical Errors - Questions & Answers [https://www.radiometer.com/en/knowledge-center/preanalytical-errors-faq]
- 7. Exploring the influence of pre-analytical variables on gene ... [https://www.nature.com/articles/s41598-025-88756-0]
- 8. Common Lab Issues That Impact Biomarker Data [https://blog.omni-inc.com/blog/common-lab-issues-that-impact-biomarker-data]
- 9. Troubleshooting Immunoassays [https://www.anshlabs.com/resources/immunoassay-troubleshooting/]
- 10. Systematic Assessment of Tumor Purity and Its Clinical ... [https://pmc.ncbi.nlm.nih.gov/articles/PMC7529507/]
- 11. Systematic pan-cancer analysis of tumour purity [https://www.nature.com/articles/ncomms9971]
- 12. a root cause analysis and proposed solutions [https://www.sciencedirect.com/science/article/pii/S2213294525000304]
- 13. Cytology Specimen Utilization: A Proven Approach to Genetic ... [https://news.mayocliniclabs.com/2025/04/09/cytology-specimen-utilization-a-proven-approach-to-genetic-sequencing/]
- 14. Minimizing Sample Failure Rates for Challenging Clinical ... [https://www.sciencedirect.com/science/article/pii/S1525157823000247]
- 15. Molecular Profiling Insights from ASCO 2025 [https://privatehealth.com/molecular-profiling-insights-from-asco-2025-advancing-personalized-cancer-care/]
- 16. Common Problems In Clinical Sample Management And ... [https://genemod.net/blog/common-problems-in-clinical-sample-management-and-how-to-solve-them]
- 17. Troubleshooting Sample Preparation [https://www.chromatographyonline.com/view/troubleshooting-sample-preparation-0]
- 18. Navigating Quality Assessment Hurdles in Clinical Laboratory ... [https://pmc.ncbi.nlm.nih.gov/articles/PMC10929212/]
- 19. OSHA Technical Manual (OTM) - Section II: Chapter 1 [http://www.osha.gov/otm/section-2-health-hazards/chapter-1]
- 20. ASCP explores the cancer biomarker testing navigator as a ... [https://pmc.ncbi.nlm.nih.gov/articles/PMC12159526/]
- 21. Process Optimization Explained - Methods, Benefits & Tools [https://www.processmaker.com/blog/process-optimization-explained/]
- 22. Current challenges and practical aspects of molecular ... [https://link.springer.com/article/10.1007/s00428-023-03651-1]
- 23. Best practices in sample management and molecular ... [https://pubmed.ncbi.nlm.nih.gov/40497693/]
- 24. Quality and practical aspects of pathological and molecular ... [https://pmc.ncbi.nlm.nih.gov/articles/PMC6103235/]
- 25. Analysis of quality metrics in comprehensive cancer ... [https://www.sciencedirect.com/science/article/pii/S2352551724000143]
- 26. How to Troubleshoot Sequencing Preparation Errors (NGS ... [https://www.cd-genomics.com/resource-sequencing-preparation-troubleshooting.html]
- 27. Sample Preparation for NGS – A Comprehensive Guide [https://frontlinegenomics.com/sample-preparation-for-ngs-a-comprehensive-guide/]
- 28. How-to: NGS Quality Control [https://frontlinegenomics.com/how-to-ngs-quality-control/]
- 29. How to Work with Challenging or Limited Genomic ... [https://blog.omni-inc.com/blog/how-to-work-with-challenging-or-limited-genomic-samples-updated-for-2025]
- 30. DNA quality challenges in Breast Cancer samples from ... [https://www.sciencedirect.com/science/article/pii/S2210776225002340]
- 31. Recovering Results from Challenging FFPE Samples [https://www.agenabio.com/resources/article-beyond-ngs-recovering-results-challenging-ffpe-samples/]
- 32. Augmenting precision medicine via targeted RNA-Seq ... [https://www.nature.com/articles/s41698-025-00993-8]
- 33. DNA Sequencing: How to Choose the Right Technology [https://frontlinegenomics.com/dna-sequencing-how-to-choose-the-right-technology/]
- 34. Next-Generation Sequencing: A Review of Its Transformative ... [https://pmc.ncbi.nlm.nih.gov/articles/PMC12523276/]
- 35. Next-Generation Sequencing Technology: Current Trends ... [https://pmc.ncbi.nlm.nih.gov/articles/PMC10376292/]
- 36. Rapid Sequencing Kit V14 - gDNA (SQK-RAD114) [https://nanoporetech.com/document/rapid-sequencing-sqk-rad114]
- 37. Liquid biopsy – a narrative review with an update on current ... [https://pmc.ncbi.nlm.nih.gov/articles/PMC12333414/]
- 38. Liquid biopsy in cancer: current status, challenges and ... [https://www.nature.com/articles/s41392-024-02021-w]
- 39. Cell-free DNA Testing (Liquid Biopsy) for the Management of ... [https://guidelines.carelonmedicalbenefitsmanagement.com/cell-free-dna-testing-liquid-biopsy-for-the-management-of-cancer-2024-11-17-updated-2025-07-01/]
- 40. Liquid Biopsy FAQ [https://www.jax.org/education-and-learning/clinical-and-continuing-education/clinical-topics/tumor-testing/liquidbx]
- 41. International society of liquid biopsy (ISLB) perspective on ... [https://www.sciencedirect.com/science/article/pii/S2950195425000177]
- 42. The role of rapid multiplex molecular syndromic panels in the ... [https://pmc.ncbi.nlm.nih.gov/articles/PMC11687037/]
- 43. PCR Troubleshooting Guide | Thermo Fisher Scientific - US [https://www.thermofisher.com/us/en/home/life-science/cloning/cloning-learning-center/invitrogen-school-of-molecular-biology/pcr-education/pcr-reagents-enzymes/pcr-troubleshooting.html]
- 44. Taq PCR Kit Troubleshooting Guide [https://www.neb.com/en-us/tools-and-resources/troubleshooting-guides/taq-pcr-kit-troubleshooting-guide?srsltid=AfmBOoquM17cS2LYQakh27Udv9NlevpyaD-dODByY6ixz57-Zqm476pN]
- 45. Frontiers | Machine learning-based single- sample classifier... molecular [https://www.frontiersin.org/journals/oncology/articles/10.3389/fonc.2025.1617898/full]
- 46. Identification of blood-derived exosomal tumor RNA signatures as... [https://molecular-cancer.biomedcentral.com/articles/10.1186/s12943-025-02271-4]
- 47. Ten simple rules for providing effective bioinformatics ... [https://pmc.ncbi.nlm.nih.gov/articles/PMC7098546/]
- 48. Current Bioinformatics Tools in Precision Oncology - PMC [https://pmc.ncbi.nlm.nih.gov/articles/PMC12238682/]
- 49. SeqKit - Ultrafast FASTA/Q kit - Wei Shen's Bioinformatic tools [https://bioinf.shenwei.me/seqkit/]
- 50. Refining cancer prediction with DNA sequencing and ... [https://www.nature.com/articles/s41598-025-23359-3]
- 51. Strategies to Address the Clinical Practice Gaps Affecting ... [https://pmc.ncbi.nlm.nih.gov/articles/PMC11638942/]
- 52. Selecting Pathology Specimens for Solid Tumors Next- ... [https://news.mayocliniclabs.com/2020/02/03/selecting-pathology-specimens-for-solid-tumors-next-generation-sequencing/]
- 53. Influence of low tumor content on tumor mutational burden ... [https://pmc.ncbi.nlm.nih.gov/articles/PMC8102856/]
- 54. Optimizing Tissue Biopsy and Disease Staging in Early- ... [https://www.onclive.com/view/optimizing-tissue-biopsy-and-disease-staging-in-early-stage-nsclc]
- 55. FDA-Approved MI Cancer Seek Test Enhances Tumor ... [https://www.oncotarget.com/news/pr/fda-approved-mi-cancer-seek-test-enhances-tumor-profiling-for-precision-oncology/]
- 56. The mutREAD method detects mutational signatures from ... [https://www.nature.com/articles/s41467-020-16974-3]
- 57. Forensic DNA Recovery from FFPE Tissue Using the ... [https://pmc.ncbi.nlm.nih.gov/articles/PMC12469798/]
- 58. Extraction of Nucleic Acids from FFPE Samples [https://www.thermofisher.com/us/en/home/references/ambion-tech-support/rna-isolation/general-articles/extraction-of-nucleic-acids-from-ffpe-samples.html]
- 59. Overcoming challenges in FFPE DNA library prep [https://www.neb.com/en-us/nebinspired-blog/overcoming-challenges-in-ffpe-dna-library-prep?srsltid=AfmBOoq4Dhzl-IEZ61kSyq584_KtlWKtvanj6L_u_Ayakb7yG09VS50r]
- 60. How to Automate DNA and RNA Extraction from FFPE Tissue [https://www.promega.com/resources/technologies/lab-automation-resource-center/how-to-automate-ffpe-extraction/]
- 61. Your FFPE Questions, Answered [https://www.qiagen.com/us/knowledge-and-support/knowledge-hub/science-matters/molecular-biology/ffpe-questions-answers]
- 62. Comparative analysis of library preparation approaches for ... [https://www.nature.com/articles/s41598-025-12992-7]
- 63. Tumor Pre - Analytics in Molecular Pathology: Impact on Protein... [https://link.springer.com/article/10.1007/s40139-018-0179-5]
- 64. Pre-analytical Practices in the Molecular Diagnostic Tests ... [https://pmc.ncbi.nlm.nih.gov/articles/PMC7691716/]
- 65. Reducing Pre-Analytical Errors in Clinical Diagnostics [https://clpmag.com/lab-essentials/quality-systems/quality-control-programs/reducing-pre-analytical-errors-clinical-diagnostics/]
- 66. How to Reduce Medical Lab Errors [https://biomolecularsystems.com/how-can-errors-be-minimised-in-a-medical-lab/]
- 67. Top 5 quality factors that make or break biospecimen ... [https://blog.crownbio.com/top-5-quality-factors-that-make-or-break-biospecimen-research]
- 68. Sample Collection & Processing Best Practices For Labs [https://qbench.com/blog/sample-collection-processing-best-practices-for-labs]
- 69. Tumor Pre - Analytics in Molecular Pathology: Impact on Protein... [https://pubmed.ncbi.nlm.nih.gov/30595971/]
- 70. Pathologist-initiated reflex testing for biomarkers in non- ... [https://pmc.ncbi.nlm.nih.gov/articles/PMC10485396/]
- 71. Reflex ordered testing for molecular biomarkers in lung ... [https://www.probiologists.com/article/reflex-ordered-testing-for-molecular-biomarkers-in-lung-adenocarcinoma-an-update]
- 72. Experts See 17 Laboratory Trends Dominating 2025 [https://clpmag.com/diagnostic-technologies/experts-see-17-laboratory-trends-dominating-2025/]
- 73. Molecular reflex testing in patients with early metastatic ... [https://www.nature.com/articles/s41416-025-03243-7]
- 74. Taking a step back from testing: Preanalytical considerations ... [https://pmc.ncbi.nlm.nih.gov/articles/PMC9729171/]
- 75. Laboratory-Based Reflex Testing and Reflex Sample ... - NCBI [https://www.ncbi.nlm.nih.gov/books/NBK600682/]
- 76. Validation of Laboratory-Developed Molecular Assays for ... [https://pmc.ncbi.nlm.nih.gov/articles/PMC2901657/]
- 77. Guidance for laboratories performing molecular pathology for ... [https://pmc.ncbi.nlm.nih.gov/articles/PMC4215286/]
- 78. Optimising tissue acquisition and the molecular testing ... [https://www.sciencedirect.com/science/article/pii/S0169500222005797]
- 79. QC Practices for Molecular Testing [https://www.westgard.com/lessons/basic-qc-practices-l/qc-molecular-tests.html]
- 80. 101 ELISA Troubleshooting Tips for Research in 2024 [https://www.assaygenie.com/101-elisa-troubleshooting-tips?srsltid=AfmBOoo7XH_2PGuiQcNTDqcOUyJaOuKlH3AiyeX4Nu4kaoErJsq56Xri]
- 81. Clinical and analytical validation of a combined RNA ... [https://www.nature.com/articles/s43856-025-00934-3]
- 82. An accurate DNA and RNA based targeted sequencing ... [https://www.nature.com/articles/s41598-025-91640-6]
- 83. Clinical Validation of Duoseq, a novel assay for ... [https://www.sciencedirect.com/science/article/abs/pii/S1525157825002557]
- 84. Evaluating the Utility of Fresh Tissue in Molecular ... [https://pmc.ncbi.nlm.nih.gov/articles/PMC12651899/]
- 85. Diagnostic Performance of Liquid Biopsy Compared to ... [https://jchr.org/index.php/JCHR/article/view/10903]
- 86. Prospective Multicenter Study Evaluating a Combined ... [https://pubmed.ncbi.nlm.nih.gov/40570258/]
- 87. A Tale of Two Biopsies: Liquid Biopsy vs Tissue Biopsy [https://www.biochain.com/blog/a-tale-of-two-biopsies-liquid-biopsy-vs-tissue-biopsy/]
- 88. Liquid biopsy: current technology and clinical applications [https://jhoonline.biomedcentral.com/articles/10.1186/s13045-022-01351-y]
- 89. Pros: Can tissue biopsy be replaced by liquid biopsy? - Ilié [https://tlcr.amegroups.org/article/view/8950/8064]
- 90. When Tissue is an Issue the Liquid Biopsy is Nonissue [https://pmc.ncbi.nlm.nih.gov/articles/PMC8140006/]
- 91. Digital PCR: from early developments to its future application ... [https://pubs.rsc.org/en/content/articlehtml/2025/lc/d5lc00055f]
- 92. Application of Digital Polymerase Chain Reaction (dPCR) in ... [https://pmc.ncbi.nlm.nih.gov/articles/PMC11940399/]
- 93. Development and application of a highly sensitive ... [https://www.frontiersin.org/journals/microbiology/articles/10.3389/fmicb.2025.1612740/full]
- 94. Absolute quantification of rare gene targets in limited ... [https://www.nature.com/articles/s41598-025-94115-w]
- 95. Digital PCR Support—Troubleshooting [https://www.thermofisher.com/us/en/home/technical-resources/technical-reference-library/real-time-digital-PCR-applications-support-center/digital-pcr-support/digital-pcr-support-troubleshooting.html]
- 96. Reference Materials, Quality Control (QC) [https://www.seracare.com/Controls-Reference-Materials/]
- 97. PCR Troubleshooting Guide [https://www.neb.com/en-us/tools-and-resources/troubleshooting-guides/pcr-troubleshooting-guide?srsltid=AfmBOoonp_FjIPRy4iqKM71lBahFGW-mwzBtPGU7zaN92ygMtClOqPDj]
- 98. Additional NGS Quality Materials [https://www.cdc.gov/lab-quality/php/ngs-quality-initiative/additional-materials.html]
- 99. U.S. quality assurance regulations for decentralized testing [https://acutecaretesting.org/en/articles/us-quality-assurance-regulations-for-decentralized-testing]
- 100. emerging challenges for laboratory medicine network [https://pubmed.ncbi.nlm.nih.gov/40838732/]
- 101. Quality Considerations When Using Tissue Samples for ... [https://pmc.ncbi.nlm.nih.gov/articles/PMC8060748/]
- 102. A large-scale, multi-centre validation study of an AI ... [https://pmc.ncbi.nlm.nih.gov/articles/PMC12508103/]
- 103. Prospective, multicenter validation of a platform for rapid ... [https://www.nature.com/articles/s41591-025-03562-5]
- 104. Delivering Reproducibility in Quantitative Lateral-Flow ... [https://www.mddionline.com/medical-device-markets/delivering-reproducibility-in-quantitative-lateral-flow-assays]