Optimizing Annealing Temperature in ctDNA Assays: A Guide for Enhanced Sensitivity and Specificity in Precision Oncology
The detection of circulating tumor DNA (ctDNA) is transforming precision oncology, but its clinical utility is constrained by the challenge of identifying ultra-low frequency variants against a high background of...
Optimizing Annealing Temperature in ctDNA Assays: A Guide for Enhanced Sensitivity and Specificity in Precision Oncology
Abstract
The detection of circulating tumor DNA (ctDNA) is transforming precision oncology, but its clinical utility is constrained by the challenge of identifying ultra-low frequency variants against a high background of wild-type DNA. This article provides a comprehensive guide for researchers and drug development professionals on optimizing a critical parameter—annealing temperature—within the broader context of ctDNA assay development. We explore the foundational principles of ctDNA biology and its clinical significance, detail methodological approaches from PCR to NGS, and present a focused troubleshooting framework for parameter optimization. Finally, we cover validation strategies and comparative analyses of current technologies, aiming to equip scientists with the knowledge to enhance assay sensitivity, push detection limits below 0.1% variant allele frequency, and accelerate the integration of robust liquid biopsies into clinical trials and practice.
The ctDNA Landscape: Principles, Challenges, and Clinical Imperatives
Core Biology and Origin of ctDNA
What is the fundamental difference between cfDNA and ctDNA?
Cell-free DNA (cfDNA) is a broad term for all fragmented DNA found in the bloodstream. It originates from various processes, including the natural death (apoptosis) of healthy cells, primarily hematopoietic cells [1]. In healthy individuals, cfDNA levels are typically low (<10 ng/mL of plasma) [2] [3]. Circulating tumor DNA (ctDNA) is a specific subset of cfDNA that is derived exclusively from tumor cells and carries tumor-specific genetic alterations, such as single-nucleotide mutations, copy number variations, or epigenetic changes [4] [2] [3]. Therefore, while all ctDNA is cfDNA, only a small fraction of cfDNA in a cancer patient is ctDNA.
From what mechanisms does ctDNA originate?
ctDNA is released into the circulation through several passive and active mechanisms [5] [1] [4]:
- Apoptosis (Programmed Cell Death): This is considered a major source. During apoptosis, DNA is cleaved in a systematic way, resulting in fragments that are typically wrapped around nucleosomes. This produces a "ladder-like" pattern on gel electrophoresis, with a dominant fragment size of approximately 167 base pairs, which corresponds to DNA wrapped around one nucleosome plus a linker region [1] [4].
- Necrosis (Unprogrammed Cell Death): This occurs in the adverse tumor microenvironment (e.g., from hypoxia, metabolic stress) and leads to the uncontrolled release of cellular contents. The resulting ctDNA fragments are often larger and more heterogeneous in size [1] [4].
- Active Secretion: Tumor cells can actively release ctDNA, often packaged inside extracellular vesicles (e.g., exosomes) or bound to proteins, which protects the DNA from degradation in the bloodstream [5] [1]. Some studies suggest that a significant portion of ctDNA is associated with large extracellular vesicles [5].
The following diagram illustrates the primary release mechanisms of ctDNA into the bloodstream.
Key Characteristics and Clearance
What are the key physical characteristics and half-life of ctDNA?
Understanding the physical properties and rapid clearance of ctDNA is critical for designing sensitive detection assays.
- Fragment Size: ctDNA fragments are typically short. While the classic apoptotic fragment is ~167 bp, tumor-derived fragments often show a different fragmentation profile and can be shorter than non-tumor cfDNA [4] [3]. This size difference is a key feature exploited in "fragmentomics" for cancer detection [6].
- Half-Life: ctDNA is cleared very rapidly from the bloodstream, with a half-life ranging from 16 minutes to 2.5 hours [7] [2] [8]. This short half-life makes ctDNA an excellent dynamic biomarker for real-time monitoring of tumor burden and treatment response.
Table 1: Key Quantitative Characteristics of ctDNA
| Characteristic | Details | Research/Clinical Significance |
|---|---|---|
| Half-Life | 16 minutes - 2.5 hours [7] [8] | Enables real-time monitoring of tumor dynamics and treatment response. |
| Typical Fragment Size | ~90-150 base pairs (bp) [9], with a dominant peak at ~167 bp from apoptosis [1]. Tumor-derived fragments can be shorter [6]. | Informs assay design (e.g., library preparation for sequencing) and allows for fragmentomics analysis. |
| Concentration in Plasma | Varies widely; can be >1000 ng/mL in advanced cancer, but often much lower in early-stage disease [5]. | Low concentration in early-stage disease is a major technical challenge for detection. |
| Variant Allele Frequency (VAF) | Can range from <0.01% to >90% of total cfDNA, depending on tumor burden and type [2]. | Defines the required sensitivity for detection assays (e.g., need for ultra-sensitive dPCR/NGS). |
How is ctDNA cleared from the body? The primary clearance routes involve degradation by nucleases in the blood and filtration and removal by the liver and kidneys [5] [2]. The rapid clearance rate underscores the importance of standardized and timely sample processing to prevent the degradation of ctDNA and ensure accurate results.
Frequently Asked Questions (FAQs) & Troubleshooting
Q1: Our ctDNA assay lacks sensitivity for detecting minimal residual disease (MRD). What are some potential strategies to improve this?
A: Low sensitivity in MRD settings is often due to extremely low ctDNA concentrations. Consider these approaches:
- Increase Plasma Input: Process a larger volume of blood (e.g., 20-40 mL instead of the conventional 5-10 mL) to obtain more template molecules. One study detected ctDNA in 100% of pre-treatment samples using 20-40 mL of plasma, compared to only 66.6% with conventional volumes [10].
- Optimize DNA Extraction: Use extraction kits specifically designed for cfDNA to maximize yield from large plasma volumes [10] [3].
- Employ Highly Partitioned Assays: Utilize droplet digital PCR (dPCR) or ultra-deep next-generation sequencing (NGS) to enhance the detection of rare mutant alleles against a background of wild-type DNA [10] [9].
Q2: We observe inconsistent results between replicate samples. What could be the cause?
A: Inconsistency often stems from pre-analytical variables and assay precision.
- Blood Collection Tube Stability: Ensure blood samples are collected in dedicated cfDNA stabilization tubes (e.g., Streck Cell-Free DNA BCT) and adhere to the manufacturer's maximum storage time before processing. Prolonged storage can affect cfDNA concentrations [6].
- Centrifugation Protocol: Follow a strict two-step centrifugation protocol to remove all cellular debris and prevent genomic DNA contamination from white blood cells [6].
- Assay Validation: Perform rigorous validation of your dPCR or NGS assay for repeatability and reproducibility. For dPCR, this includes determining the limit of detection (LOD) and limit of quantification (LOQ) using diluted reference materials [9].
Q3: How does the choice of detection platform (dPCR vs. NGS) impact ctDNA analysis?
A: The choice depends on your research question, as the platforms offer complementary strengths.
- Digital PCR (dPCR): Best for tracking known, specific mutations with ultra-high sensitivity (down to 0.001% VAF) [10] [9]. It provides absolute quantification without standard curves, is cost-effective for a few targets, and is highly reproducible [9] [8].
- Next-Generation Sequencing (NGS): Essential for discovery and hypothesis-free profiling. It allows for the detection of novel mutations, copy number alterations, and fusion genes across a panel of genes or the whole genome [7] [8]. While sensitivity for single mutations can be high, it generally requires deeper sequencing to match dPCR's sensitivity for known targets and is more complex and costly.
Essential Experimental Protocols
Protocol 1: Establishing a dPCR Assay for ctDNA Detection
This protocol outlines key steps for developing and validating a robust droplet digital PCR (dPCR) assay, a common method for detecting low-frequency mutations in ctDNA [9].
- Assay Design: Design primers and hydrolysis probes (e.g., FAM-labeled for mutant allele, HEX/VIC-labeled for wild-type) for your specific target mutation.
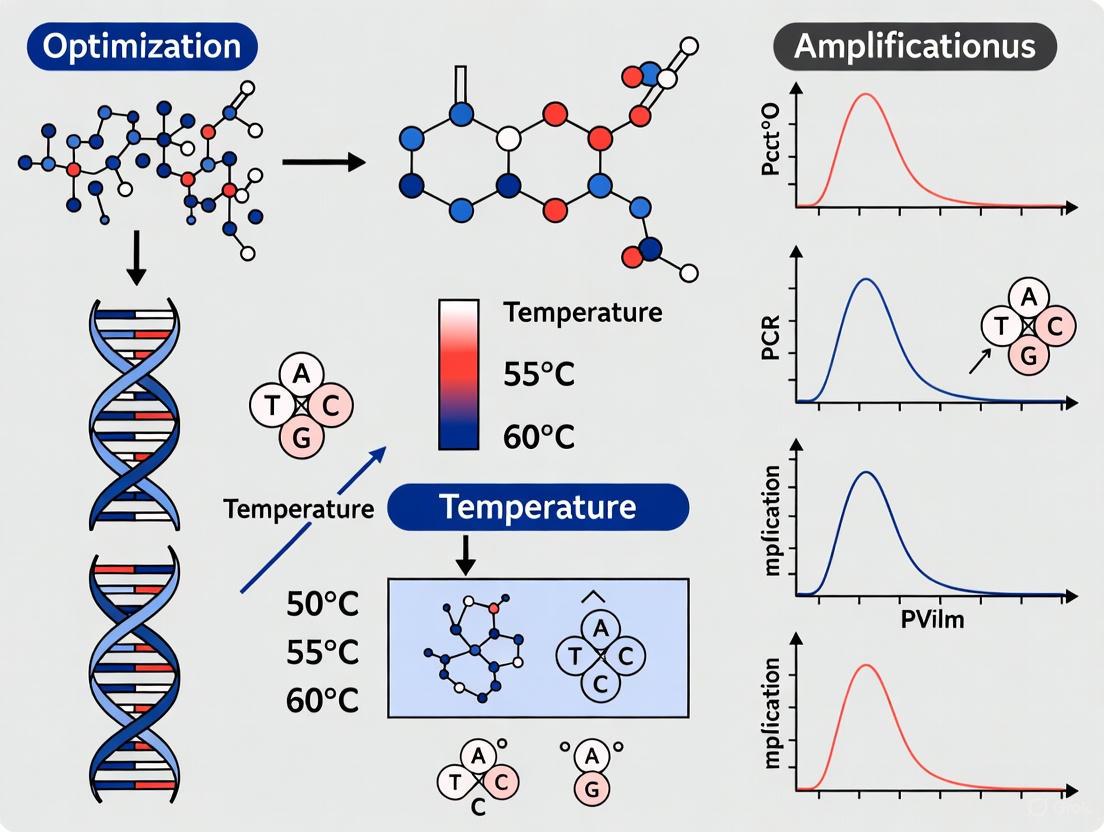
- Thermal Cycling Optimization: Perform a temperature gradient PCR to determine the optimal annealing temperature for your assay. This is a critical step within the thesis context for ensuring high amplification efficiency and specificity [9].
- Reaction Setup:
- Prepare a 20 μL dPCR reaction mix containing: 10 μL of 2x ddPCR Supermix, primers (final concentration ~500 nM each), probes (final concentration ~250 nM each), and template DNA (typically 2-10 ng of cfDNA) [9].
- Generate droplets using a droplet generator (e.g., Bio-Rad QX200).
- PCR Amplification: Run the PCR with the optimized protocol. Example cycling conditions: 95°C for 10 min (enzyme activation); 40 cycles of 94°C for 30 sec and 56-60°C for 1 min (annealing/extension); 98°C for 10 min (enzyme deactivation) [9].
- Droplet Reading and Analysis: Read the plate on a droplet reader and analyze the data with associated software (e.g., QuantaSoft). The software counts the positive and negative droplets for each fluorescence channel to calculate the mutant allele concentration and variant allele frequency (VAF).
Protocol 2: Preparation of ctDNA Reference Material via Enzymatic Digestion
This novel protocol generates high-quality ctDNA reference materials that closely mimic clinical samples by using enzymatic digestion of nucleosomal DNA, superior to mechanical shearing or synthetic DNA [9].
- Cell Culture: Grow cancer cell lines harboring the mutation of interest (e.g., SK-BR-3 for TP53 R175H).
- Nuclei Isolation: Harvest cells and isolate nuclei using a lysis buffer.
- Micrococcal Nuclease Digestion: Digest the chromatin with micrococcal nuclease. This enzyme cleaves DNA between nucleosomes, generating a native fragment profile.
- DNA Purification: Purify the digested DNA using magnetic beads (e.g., with the MagMAX kit) to yield fragments sized similarly to clinical ctDNA. Analysis should show a dominant peak at ~128-143 bp [9].
- Validation: Use the developed dPCR assay to confirm the presence and frequency of the mutation in the reference material.
The Scientist's Toolkit: Key Reagents and Materials
Table 2: Essential Research Reagents for ctDNA Workflows
| Item | Function/Benefit | Example |
|---|---|---|
| cfDNA Blood Collection Tubes | Preserves blood samples by stabilizing nucleated blood cells, preventing lysis and release of genomic DNA that would dilute the ctDNA signal. | Streck Cell-Free DNA BCT [6] |
| Magnetic Bead-based cfDNA Kits | Efficiently isolate and purify short-fragment cfDNA from plasma, with optimized protocols for low analyte concentrations. | MagMAX Cell-Free DNA Isolation Kit [3], QIAamp Circulating Nucleic Acid Kit [6] [10] |
| dPCR Supermix & Reagents | Specialized buffers and enzymes for highly partitioned digital PCR, enabling absolute quantification of mutant alleles with high sensitivity. | ddPCR Supermix for Probes [9] |
| Reference Materials | Crucial for assay validation, quality control, and determining limits of detection. Ideally, they should mimic the fragment size and composition of clinical ctDNA. | Enzymatically digested cell line DNA [9] |
| Target-Specific dPCR Assays | Pre-designed or custom primer/probe sets for detecting specific tumor mutations (e.g., in TP53, PIK3CA, EGFR). | Therascreen PIK3CA RGQ PCR Kit [7] |
The following diagram summarizes the complete workflow from sample collection to data analysis, highlighting key materials and decision points.
Frequently Asked Questions (FAQs) on ctDNA Assay Development
Q1: Why is optimizing annealing temperature critical in ctDNA dPCR assays, and how is it performed? Optimizing the annealing temperature is essential for achieving high specificity and sensitivity, which are required to distinguish true low-frequency variants from background noise in ctDNA analysis. A non-optimal temperature can lead to false positives from non-specific amplification or false negatives from reduced amplification efficiency. The process involves running a gradient dPCR experiment with a standardized template (e.g., wild-type and mutant plasmid controls) across a range of temperatures (e.g., 50°C to 65°C). The optimal temperature is identified as the one that maximizes the fluorescence amplitude difference between positive and negative droplets while minimizing rain (droplets with intermediate fluorescence) [11].
Q2: What are the key sources of false positives and false negatives in ultrasensitive ctDNA sequencing? False positives in ctDNA sequencing primarily arise from sequencing errors, PCR amplification artifacts (such as base substitutions during early PCR cycles), and cross-contamination between samples. False negatives often result from insufficient input DNA, inadequate sequencing depth, inefficient ctDNA extraction, or a variant allele frequency (VAF) that falls below the assay's limit of detection (LOD). For instance, with an input of only 10 mL of blood from a lung cancer patient, the absolute number of mutant DNA fragments may be too low for statistically robust detection [12].
Q3: How does sequencing depth impact the detection of low-frequency variants? The probability of detecting a variant is a function of its VAF and the effective sequencing depth. Achieving a 99% probability of detecting a variant at a 0.1% VAF requires an effective depth of coverage of approximately 10,000x. However, standard commercial panels with a raw coverage of ~15,000x may yield only ~2,000x effective depth after bioinformatic deduplication, which limits the reliable LOD to around 0.5%. Ultra-deep sequencing is therefore necessary for very low VAFs, but it is often prohibitively expensive for routine clinical use [12].
Q4: What is the function of Unique Molecular Identifiers (UMIs) in ctDNA NGS? UMIs are short random nucleotide sequences added to each original DNA fragment during library preparation. They serve as molecular barcodes to track and bioinformatically correct for PCR amplification biases and errors. By grouping reads that share the same UMI, bioinformatics pipelines can collapse them into a single, error-corrected consensus sequence, significantly improving the signal-to-noise ratio and enabling more accurate quantification of true variants present in the original sample [12].
Troubleshooting Guide for Common Experimental Issues
| Issue | Possible Cause | Recommended Solution |
|---|---|---|
| Low Detection Sensitivity | Insufficient input DNA; VAF below assay LOD [12]. | Increase blood draw volume (e.g., 20-30 mL); use ultra-deep sequencing; employ error-corrected NGS or SV-based assays [13] [12]. |
| High Background Noise | PCR errors or sequencing artifacts [12]. | Incorporate UMIs for error suppression; optimize annealing temperature; use bioinformatics filters with "allowed/blocked" variant lists [12]. |
| Inconsistent ctDNA Yield | Pre-analytical variability (blood collection, processing delays) [13]. | Standardize plasma processing within 2-4 hours; use specialized cfDNA blood collection tubes; implement uniform extraction protocols [13]. |
| Poor Assay Reproducibility | Inconsistent library preparation or inadequate quality control [11]. | Use validated reference materials (e.g., enzymatically digested cell line DNA); implement stringent QC metrics for DNA fragmentation and library concentration [11]. |
Experimental Protocols for Key ctDNA Assays
dPCR Assay for TP53 Variants
This protocol is adapted from a study establishing a reference measurement procedure for ctDNA, focusing on the detection of TP53 R175H and R248W hotspot mutations [11].
- Primers and Probes: Use allele-specific primers and TaqMan probes with different fluorescent dyes (e.g., FAM for mutant, VIC for wild-type) and a minor groove binder (MGB) for enhanced specificity. Amplicon lengths should be kept short (84-126 bp) to match the fragmented nature of ctDNA [11].
- Reaction Setup:
- Prepare a 20 µL reaction mixture containing:
- 10 µL of 2x ddPCR Supermix for Probes
- Forward and Reverse Primers (final concentration 500 nM each)
- Wild-Type Probe (final concentration 250 nM)
- Mutation Probe (final concentration 250 nM)
- 2 µL of template DNA (cfDNA extract)
- Nuclease-free water to volume.
- Prepare a 20 µL reaction mixture containing:
- Thermocycling Conditions:
- Enzyme activation: 95°C for 10 minutes.
- 40 cycles of:
- Denaturation: 94°C for 30 seconds.
- Annealing/Extension: 56°C for 1 minute.
- Enzyme deactivation: 98°C for 10 minutes.
- Note: A temperature gradient should be run during assay validation to confirm 56°C as the optimal annealing temperature.
- Data Analysis: Generate droplets and read on a QX200 droplet reader. Analyze data with QuantaSoft software, which automatically calculates the mutant and wild-type concentrations based on Poisson statistics.
Enzymatic Preparation of ctDNA Reference Material
This protocol generates high-quality, size-matched ctDNA reference material from cancer cell lines, overcoming limitations of synthetic or ultrasonicated materials [11].
- Cell Culture: Culture mutant cell lines (e.g., SK-BR-3 for R175H, MIA PaCa-2 for R248W) to 80-90% confluence.
- Nuclei Isolation and Digestion: Harvest cells and isolate nuclei. Digest chromatin with Micrococcal Nuclease to release nucleosome-sized DNA fragments.
- Purification: Purify the digested DNA using magnetic beads. This step enriches for fragments in the 90-150 bp range, mimicking native ctDNA.
- Quality Control: Analyze the size distribution using a Bioanalyzer or TapeStation. The generated fragments should show a dominant peak at ~143 bp (for R248W) or similar, confirming successful nucleosomal digestion.
- Application: Use this reference material to validate the LOD, LOQ, and linearity of dPCR or NGS assays.
Research Reagent Solutions
Essential materials and reagents for developing and running ultrasensitive ctDNA assays include:
| Reagent / Material | Function in ctDNA Research |
|---|---|
| ddPCR Supermix for Probes | Provides the optimized buffer, enzymes, and dNTPs for probe-based digital PCR reactions in platforms like the Bio-Rad QX200 [11]. |
| Allele-Specific TaqMan Probes (FAM/VIC) | Fluorescently-labeled probes that enable the specific detection and quantification of wild-type and mutant alleles in real-time PCR or dPCR assays [11]. |
| Unique Molecular Identifiers (UMIs) | Short random barcodes ligated to DNA fragments pre-amplification to correct for PCR errors and duplicates in NGS, crucial for ultra-low frequency variant calling [12]. |
| Micrococcal Nuclease | An enzyme used to digest chromatin from cancer cell lines to generate physiologically relevant, nucleosome-sized ctDNA reference materials for assay validation [11]. |
| Magnetic Beads (Size-Selective) | Used to purify and size-select cell-free DNA fragments from plasma or enzymatic digests, enriching for the 90-150 bp fraction that is characteristic of ctDNA [13] [11]. |
Workflow and Pathway Visualizations
ctDNA MRD Detection Impact Pathway
ctDNA Assay Development and Optimization
Troubleshooting Guide: Addressing Common ctDNA Analysis Challenges
This guide helps users identify and resolve frequent issues encountered when detecting ultra-low frequency variants in circulating tumor DNA (ctDNA).
Table 1: Common Technical Hurdles and Solutions in ctDNA Analysis
| Problem Area | Specific Challenge | Potential Causes | Recommended Solutions & Optimization Strategies |
|---|---|---|---|
| Sensitivity & Specificity | High false-positive variant calls. | Sequencing errors, clonal hematopoiesis, low input DNA leading to stochastic sampling [12] [14]. | Implement Unique Molecular Identifiers (UMIs) and bioinformatics tools like eVIDENCE to group reads and eliminate PCR/sequencing errors [12] [14]. Use matched white blood cell DNA to filter out clonal hematopoiesis variants [15]. |
| Inability to detect variants below 0.5% VAF. | Insufficient sequencing depth, high background noise, assay's Limit of Detection (LoD) is too high [12]. | Employ ultra-deep sequencing (>15,000x coverage); for a 99% detection probability at 0.1% VAF, ~10,000x coverage is needed [12]. Utilize assays with lower LoDs (e.g., 0.15% for SNVs) [16]. | |
| Sample & Pre-Analytics | Low mutant allele count, leading to stochastic detection failure. | Low tumor shedding, small blood draw volume, early-stage disease [12] [10]. | Increase plasma volume analyzed; studies show 20-40 mL of blood significantly improves detection rates and lowers the minimum VAF detected to 0.003% [10]. |
| Inconsistent yields of cell-free DNA. | Pre-analytical variability: delays in plasma processing, improper centrifugation [17]. | Standardize SOPs: process blood samples within 2 hours of collection using double-centrifugation protocols to ensure platelet-free plasma [17]. | |
| Data Analysis | Differentiating ctDNA from normal cfDNA. | ctDNA is a small, variable fraction of total cfDNA with similar physical properties [15]. | Use tumor-informed (bespoke) assays tailored to a patient's specific tumor mutations for maximal sensitivity in minimal residual disease (MRD) detection [17]. Analyze shorter DNA fragments, which can be enriched for tumor-derived content [15]. |
Frequently Asked Questions (FAQs)
FAQ 1: Our NGS panel has a published LoD of 0.5%. Why can't we reliably detect variants at 0.3% VAF even with adequate coverage?
The published Limit of Detection (LoD) is typically the variant allele frequency (VAF) at which an assay has 95% detection probability. Reliability at any given VAF is a function of both the assay's sensitivity and the absolute number of mutant molecules in your sample. With a standard 10 mL blood draw from a patient with low tumor shedding (e.g., ~5 ng/mL cfDNA), the total number of haploid genome equivalents may be only ~8000. A 0.3% VAF in this case translates to only ~24 mutant molecules, making detection statistically improbable due to sampling noise [12]. Solution: Increase the input plasma volume to increase the number of mutant molecules analyzed, thereby improving the signal-to-noise ratio and reliability [10].
FAQ 2: How can we differentiate true low-VAF somatic variants from errors introduced during PCR amplification and sequencing?
This is a core challenge that requires a multi-faceted wet-lab and bioinformatics approach:
- Wet-lab: Use library preparation kits that incorporate Unique Molecular Identifiers (UMIs). UMIs are short random sequences ligated to each original DNA molecule before amplification, allowing all subsequent PCR duplicates to be tracked back to a single originating molecule [12] [18].
- Bioinformatics: Implement pipelines that perform "deduplication" based on UMIs. True variants will be supported by multiple reads originating from different original molecules (i.e., different UMIs), while PCR errors will only appear in reads from a single UMI family. Advanced filters, like those in the eVIDENCE tool, can further eliminate false positives by examining base quality and family consistency [14].
FAQ 3: What is the clinical relevance of monitoring VAF dynamics in ctDNA over time?
VAF dynamics in serial liquid biopsies provide a powerful, real-time metric for monitoring disease burden and treatment response.
- Clearing ctDNA: In the TRICIA trial for triple-negative breast cancer, the clearance of ctDNA (from detected to non-detected) during adjuvant capecitabine therapy was associated with a good prognosis [17].
- Predicting Relapse: The same study showed that detectable ctDNA after neoadjuvant chemotherapy but before surgery was a strong prognostic marker for relapse, while non-detection was associated with 95% distant-disease relapse-free survival [17].
- Early Response Indicator: Changes in VAF can often occur before radiological evidence of disease progression or shrinkage, allowing for earlier treatment adaptation [15].
FAQ 4: Beyond single-nucleotide variants, what other genomic features in ctDNA can be leveraged for patient stratification?
Copy Number Alteration (CNA) profiles from ctDNA are an emerging biomarker. A machine learning classifier (Support Vector Machine) has been developed to classify CNA profiles from liquid biopsy as Stable (SCP) or Unstable (UCP). In advanced NSCLC, an UCP classification was significantly associated with a higher number of metastatic sites (≥3) and the presence of liver metastases. Longitudinal analysis showed that UCP was linked to early death or hyperprogressive disease on immunotherapy, demonstrating its utility for risk stratification [19].
Experimental Protocols for Ultrasensitive Detection
This protocol outlines a method for processing large blood volumes to significantly enhance the sensitivity of detecting circulating tumor DNA and cells.
- Principle: Analyzing larger volumes of plasma increases the absolute number of tumor-derived molecules and cells available for analysis, overcoming the statistical limitations of low concentrations.
- Workflow:
- Key Reagents and Steps:
- Blood Collection: Draw a minimum of 20 mL of blood per time point into K2-EDTA tubes [17] [10].
- Plasma Processing: Centrifuge within 2 hours at 2500 rpm for 15 minutes. Aliquot the supernatant plasma and perform a second, high-speed centrifugation at 10,000 rpm to ensure removal of all cellular debris [17].
- cfDNA Extraction: Use a manual or automated method to extract cfDNA from the combined 20-40 mL of plasma. This high-volume extraction is critical for obtaining sufficient mutant DNA molecules [10].
- PBMC Isolation: Isolate Peripheral Blood Mononuclear Cells (PBMCs) from the buffy coat. For CTC analysis, target a minimum of 2 vials, each containing 100 million cells [10].
- Droplet Digital PCR (ddPCR): Design a patient-specific ddPCR assay based on a truncal mutation identified from tumor whole-exome sequencing (WES). Use this single assay to independently detect the mutation in both the plasma cfDNA (ctDNA) and the PBMC DNA (CTCs) [10].
- Data Analysis: Positivity is defined by the detection of mutant molecules in either ctDNA or CTCs above a background threshold established by numerous negative controls (e.g., germline DNA) [10].
This protocol describes a bioinformatic workflow to reduce false positives in targeted sequencing data from liquid biopsies.
- Principle: The eVIDENCE workflow uses Unique Molecular Tags (UMTs) to group sequencing reads and applies stringent filters to distinguish true low-frequency variants from technical artifacts.
- Workflow:
- Key Steps:
- Input: Start with a Binary Alignment Map (BAM) file generated from a molecular barcoding library prep kit (e.g., ThruPLEX Tag-seq). The raw data contains UMTs and stem sequences that can cause alignment mismatches.
- Pre-processing: Programmatically remove the UMT and stem sequences from the alignment, create new FASTQ files with UMT information stored in the read name, and re-map these "clean" reads to the reference genome to produce a new BAM file [14].
- Variant Calling and UMT Family Analysis: Perform an initial variant call. For each candidate variant, group all reads covering that genomic position by their UMT, creating "UMT families" that represent single original DNA molecules.
- Consensus Filtering: For each candidate variant, examine every UMT family. Discard the candidate if any UMT family contains two or more reads that do not support the variant allele. This stringent filter effectively removes errors that occurred during the first few PCR cycles or sequencing [14].
- Output: A final list of high-confidence, low-frequency variants. This method has been validated to robustly identify variants with VAFs as low as 0.2% [14].
The Scientist's Toolkit: Essential Research Reagents & Materials
Table 2: Key Reagents and Materials for ctDNA Assay Development
| Item | Function & Utility in ctDNA Research | Example/Note |
|---|---|---|
| K2-EDTA Blood Collection Tubes | Prevents coagulation and preserves cell-free DNA for up to 2 hours before processing. | Standard for liquid biopsy collections; processing within 2 hours is critical [17]. |
| Unique Molecular Index (UMI) Library Prep Kits | Tags each original DNA molecule with a unique barcode pre-amplification, enabling bioinformatic error suppression. | Kits like ThruPLEX Tag-seq are used to distinguish true variants from PCR/sequencing errors [12] [14]. |
| Custom Targeted Capture Panels | Enriches for genomic regions of interest (e.g., cancer-associated genes) to enable deep sequencing. | Panels can range from 70-80 genes (e.g., AVENIO: 77 genes) to larger comprehensive panels [19] [14]. |
| Tumor DNA Reference | Essential for developing "tumor-informed" (bespoke) assays for maximal MRD detection sensitivity. | Obtained from FFPE tissue or a pre-treatment biopsy to identify patient-specific mutations [17]. |
| Droplet Digital PCR (ddPCR) System | Provides absolute quantification of specific mutant alleles without the need for standard curves; highly sensitive for validating low-VAF findings. | Ideal for tracking a single or a few known mutations in longitudinal studies with high partitioning [17] [10]. |
| Matched Germline DNA | Sourced from white blood cells (buffy coat) or PBMCs, it is crucial for filtering out germline polymorphisms and mutations from clonal hematopoiesis. | A critical control to reduce false positives and correctly assign somatic status to variants [15] [10]. |
| Bioinformatics Pipelines | Specialized software for UMI deduplication, variant calling, and false-positive filtering. | Tools like eVIDENCE, "Connor", and commercial software are indispensable for data analysis [12] [14]. |
Technical Comparison of Blood Collection Tubes
Table 1: Comparison of Blood Collection Tube Types and Performance Characteristics
| Tube Type | Additive | Max Storage (RT) before Processing | Key Advantages | Key Limitations | Optimal Use Cases |
|---|---|---|---|---|---|
| K₂EDTA (Standard) | Anticoagulant (K₂EDTA) | ≤ 6 hours [20] | Low cost; widely available [21] | Rapid gDNA release from WBC lysis beyond 4-6 hours [20] [21] | Rapid processing (e.g., within same facility) |
| Cell-Free DNA BCT (Streck) | Cell-stabilizing agent; nuclease inhibitor [20] | Up to 3-14 days [20] | Inhibits WBC lysis & nuclease activity; broad temperature range (6°C–37°C) for shipping [20] | Higher cost than K₂EDTA [21] | Multi-center trials; shipping required; delayed processing |
Standardized Plasma Processing Protocol
The following workflow diagram and detailed methodology outline a standardized, two-step centrifugation protocol for plasma preparation from whole blood collected in cfDNA BCTs, ensuring minimal contamination from white blood cells (WBCs).
Detailed Methodology:
- Blood Collection and Storage: Collect venous blood into Streck cfDNA BCTs, invert 10 times immediately after collection, and store at room temperature (RT) for the intended duration (e.g., up to 3 days) [20].
- First Centrifugation: Centrifuge tubes at 1600 × g for 10 minutes at RT using a swing-out rotor. Apply a smooth braking profile to prevent disturbance of the cell pellet [20].
- Initial Plasma Transfer: Carefully transfer the supernatant (plasma) to a fresh 15 mL tube, leaving approximately 500 µL of plasma above the buffy coat layer to avoid cellular contamination [20].
- Second Centrifugation: Centrifuge the transferred plasma at 6000 × g for 10 minutes at RT (swing-out rotor, smooth brake) to remove any remaining cellular debris [20] [22].
- Final Plasma Aliquot: Transfer the clarified supernatant to a fresh tube, leaving the bottom 300 µL to avoid the pellet. Gently mix the plasma by pipetting and aliquot into cryotubes for storage at -80°C [20].
Centrifugation Speed and Step Comparison
Table 2: Impact of Centrifugation Protocol Variations on cfDNA Yield and Quality
| Experimental Variable | Comparison | Impact on cfDNA Yield | Impact on gDNA Contamination & ctDNA VAF | Recommendation |
|---|---|---|---|---|
| Second Spin Speed [22] | High-speed (16,000 × g) vs. Low-speed (4,100 × g) | No significant difference | No significant difference in KRAS VAF | Lower speed (4,100 × g) is sufficient and more accessible |
| Centrifugation Steps [22] | Two-spin vs. Three-spin protocol | No significant difference | No significant difference in KRAS VAF | Standard two-spin protocol is adequate |
Frequently Asked Questions (FAQs)
Q1: Our samples require shipment to a central lab. What is the maximum allowable hold time for blood in Streck cfDNA BCTs at room temperature without affecting mutation detection?
For clinical oncology samples focused on mutation detection, data supports reliable analysis of KRAS, NRAS, and EGFR mutations for blood stored in Streck cfDNA BCTs for at least 3 days at room temperature. Studies show highly comparable levels of mutational load using BEAMing ddPCR after this storage period [20]. While some studies indicate stability for longer durations (up to 7-14 days), the 3-day window is well-validated for reliable ctDNA analysis in cancer patients [20].
Q2: Does using fresh versus frozen plasma impact the measured concentration of ctDNA and its variant allele frequency (VAF)?
The quantification method influences perceived yield, but the critical VAF metric remains stable. Higher yields are observed from fresh plasma using qPCR and fluorimetry (Qubit), while droplet digital PCR (ddPCR) shows a higher yield from frozen plasma. However, the VAF of tumor-derived mutations (e.g., KRAS) is not significantly different between fresh and frozen plasma. This finding allows for batched testing from frozen plasma archives without biasing allele fraction measurements [22].
Q3: Beyond tube choice, what other pre-analytical patient factors can influence the baseline concentration of cfDNA?
Several biological and physiological variables can affect cfDNA levels prior to sample collection [21]:
- Age: Individuals over 60 show significantly higher cfDNA levels.
- Medical Conditions: Inflammation, exercise, and surgical procedures can increase total cfDNA.
- Cancer Presence: Tumor burden and cell turnover correlate with cfDNA levels.
Researchers should document these factors, as elevated wild-type cfDNA from non-tumor sources can dilute tumor-derived ctDNA, potentially reducing assay sensitivity [21].
The Scientist's Toolkit: Essential Research Reagents & Materials
Table 3: Key Reagents and Kits for cfDNA Pre-Analytical Workflow
| Item | Specific Product Example | Critical Function in Workflow |
|---|---|---|
| Blood Collection Tube | Streck Cell-Free DNA BCT [20] | Stabilizes blood cells and inhibits nucleases for extended storage |
| Plasma cfDNA Extraction Kit | QIAamp Circulating Nucleic Acid Kit (Qiagen) [20] | Isolves short-fragment cfDNA from large plasma volumes |
| cfDNA Quantification Assay | LINE-1 qPCR [20] or Alu repeat-element qPCR [22] | Accurately quantifies cfDNA and assesses gDNA contamination |
| Absolute Quantification Method | Droplet Digital PCR (ddPCR) [22] [23] | Provides absolute count of DNA copies without standard curve; ideal for low-abundance targets |
| Mutation Detection Assay | BEAMing ddPCR [20] or Plate-based Digital PCR [23] | Enables ultrasensitive detection and quantification of specific tumor mutations at low VAF |
From Theory to Bench: ctDNA Detection Technologies and Workflows
In the field of circulating tumor DNA (ctDNA) research, selecting the appropriate analytical platform is a critical first step. The choice between Droplet Digital PCR (ddPCR) and Next-Generation Sequencing (NGS) hinges on the specific goals of your experiment, whether for the ultrasensitive detection of a few known mutations or the broad profiling of a tumor's genomic landscape. This technical support center is designed to help you, the researcher, navigate this decision and troubleshoot common experimental challenges, with a particular focus on the impact of annealing temperature optimization within ctDNA assay development.
Platform Comparison: ddPCR vs. NGS at a Glance
The table below summarizes the core characteristics of ddPCR and NGS to guide your initial platform selection.
Table 1: Key Characteristics of ddPCR and NGS for ctDNA Analysis
| Feature | Droplet Digital PCR (ddPCR) | Next-Generation Sequencing (NGS) |
|---|---|---|
| Primary Principle | Absolute quantification via sample partitioning and Poisson statistics [24] | High-throughput, parallel sequencing of millions of DNA fragments [12] |
| Detection Method | Target-specific fluorescent probes (e.g., TaqMan) [24] | Sequencing by synthesis, ion semiconductor, etc. [12] |
| Typical Limit of Detection (LoD) | Can detect variants at frequencies as low as 0.01% VAF [25] | Typically around 0.1% - 0.5% VAF for ctDNA; lower LoD requires ultra-deep sequencing [12] [26] |
| Throughput | Low-throughput; ideal for tracking a few known mutations | High-throughput; can profile dozens to hundreds of genes simultaneously [25] [26] |
| Quantification | Absolute, without the need for standard curves [24] | Relative; depends on sequencing depth and bioinformatics [12] |
| Cost & Turnaround Time | Lower cost per sample for a few targets; faster turnaround [25] | Higher cost per sample; longer turnaround due to complex data analysis [25] [12] |
| Ideal Application in ctDNA | Monitoring minimal residual disease (MRD) and known resistance mutations [24] | Tumor-uninformed screening, discovery of novel mutations, and comprehensive genomic profiling [25] [12] |
Troubleshooting Common Experimental Issues
Low Sensitivity or Failed Detection
Q: My ctDNA assay is failing to detect variants at expected low frequencies. What could be wrong?
A: This is a common challenge in ctDNA research due to the low abundance of tumor DNA in plasma. The causes differ by platform.
For ddPCR:
- Insufficient Input DNA: Ensure you are using an adequate volume of extracted cfDNA to guarantee enough mutant genome equivalents are present for detection [12].
- Suboptimal Annealing Temperature: This is critical for assay specificity and sensitivity. If the annealing temperature is too high, primer binding is reduced; if too low, non-specific amplification increases. Use a gradient thermal cycler to optimize the temperature in 1-2°C increments [27]. Consider using DNA polymerases with buffers that allow for a universal annealing temperature of 60°C to simplify this process [28].
- Poor Primer/Probe Design: Verify that your assays are specific for the target mutation and that probes have the appropriate melting temperature (Tm) [29].
For NGS:
- Insufficient Sequencing Depth: The probability of detecting a low-frequency variant is directly tied to the number of times a genomic position is sequenced. For a Variant Allele Frequency (VAF) of 0.1%, a deduplicated coverage of ~10,000x may be needed for 99% detection probability, which is often not feasible in routine labs [12].
- Low Input cfDNA Quantity and Quality: The absolute number of mutant DNA fragments is the ultimate constraint. A 10 mL blood draw from a patient with a low-shedding tumor may yield an insufficient number of mutant molecules for statistically robust detection [12].
- Inefficient Library Preparation: Issues during fragmentation, adapter ligation, or PCR amplification can lead to low library complexity and yield, reducing sensitivity [30].
High Background Noise or False Positives
Q: My results show a high background signal or false-positive variant calls. How can I improve specificity?
A: Background noise can obscure true signals and lead to incorrect conclusions.
For ddPCR:
- Optimize Annealing Temperature: As with sensitivity, a suboptimal annealing temperature is a primary culprit. Increase the temperature stepwise to enhance specificity and reduce non-specific amplification [27].
- Check Primer Concentrations: High primer concentrations can promote primer-dimer formation and other artifacts. Optimize concentrations, typically in the 0.1–1 μM range [27].
- Use Hot-Start DNA Polymerases: These enzymes remain inactive until a high-temperature activation step, preventing non-specific amplification during reaction setup [27].
For NGS:
- Sequencing Errors and Duplicates: NGS platforms have inherent error rates. Use Unique Molecular Identifiers (UMIs) during library preparation to tag original DNA molecules, allowing bioinformatics pipelines to differentiate true mutations from PCR or sequencing errors [12].
- Bioinformatics Pipeline Tuning: Employ strategic pipelines with "allowed" and "blocked" lists and adjust variant calling thresholds. For ctDNA, the threshold for supporting reads may be lowered (e.g., to n=3) compared to tissue analysis, but this must be balanced against the risk of false positives [12].
- Adapter Contamination: Inefficient cleanup after library prep can leave excess adapters, leading to sharp ~70-90 bp peaks in electropherograms and poor-quality data [30].
Data Quantification and Reproducibility Issues
Q: I am getting inconsistent results between technical replicates or runs. What steps can I take?
A: Reproducibility is key for reliable data, especially in longitudinal studies.
For ddPCR:
- Ensure Samples are in the "Digital Range": The sample must be sufficiently diluted so that some partitions contain a template and others do not. If the template is too concentrated, the Poisson statistics used for absolute quantification become less accurate [31].
- Accurate DNA Quantification: Use fluorometric methods (e.g., Qubit) for template quantification instead of UV absorbance, which can overestimate concentration by counting contaminants [30].
- Pipetting Consistency: Ensure thorough mixing of reagents and consistent pipetting techniques during droplet generation [30].
For NGS:
- Standardize Input DNA Mass: Reproducibility is highly dependent on the quantity of DNA input. Variations are greatest at lower input amounts [26].
- Control for Extraction Efficiency: Different cfDNA extraction kits and protocols can have variable efficiencies, impacting downstream consistency [26].
- Monitor Sequencing QC Metrics: Track metrics like deduplicated mean depth, on-target rate, and duplicate read rates across runs to identify technical inconsistencies [26].
Experimental Protocols for ctDNA Analysis
Protocol 1: Tumor-Informed ddPCR for MRD Detection
This protocol is ideal for monitoring recurrence or treatment response for a known mutation [25].
- Tissue Sequencing: First, identify somatic mutations in the patient's primary tumor tissue using an NGS panel (e.g., a 50-gene hotspot panel).
- Assay Design: Based on the NGS results, design one or two specific ddPCR assays (primers and TaqMan probes) for the mutation(s) with the highest variant allele frequency.
- Plasma Collection & cfDNA Extraction: Collect patient blood in Streck or similar cell-free DNA BCT tubes. Isolate cfDNA from plasma using a silica-membrane column or bead-based kit.
- ddPCR Reaction Setup:
- Droplet Generation: Generate approximately 20,000 droplets from the reaction mixture using a droplet generator.
- PCR Amplification: Run the PCR protocol with the optimized annealing temperature.
- Droplet Reading and Analysis: Read the droplets on a droplet reader. Use the manufacturer's software to set thresholds and calculate the absolute concentration (copies/μL) of mutant and wild-type DNA in the original sample.
Protocol 2: Tumor-Uninformed NGS for Molecular Profiling
This protocol is used for broad genomic profiling when tumor tissue is unavailable [25] [32].
- Plasma Collection & cfDNA Extraction: As in the ddPCR protocol, collect blood and extract cfDNA.
- Library Preparation:
- DNA Quantification: Accurately quantify cfDNA using a fluorometer.
- Library Construction: If using a hybrid-capture panel, fragment the cfDNA (if necessary), end-repair, A-tail, and ligate sequencing adapters. For amplicon panels, use a targeted PCR approach.
- UMI Incorporation: Incorporate Unique Molecular Identifiers (UMIs) during adapter ligation or in the PCR primers to enable error correction [12].
- Amplification: Amplify the library with an optimal number of cycles (usually 8-14) to avoid over-amplification, which reduces library complexity [30].
- Library Cleanup and Quantification: Purify the library using magnetic beads to remove adapter dimers and short fragments. Quantify the final library by qPCR for accurate sequencing loading.
- Sequencing: Pool libraries and sequence on an NGS platform to a high raw depth (e.g., >15,000x) to achieve a sufficient deduplicated depth for low-VAF variant calling.
- Bioinformatic Analysis:
- Data Demultiplexing: Assign reads to respective samples.
- UMI Processing: Group reads by their UMI to generate consensus sequences and remove duplicates.
- Alignment and Variant Calling: Map reads to a reference genome and call variants using a sensitive caller calibrated for low-VAF detection.
The following workflow diagram visualizes the key decision points and steps for these two main approaches in ctDNA analysis.
The Scientist's Toolkit: Essential Research Reagents
Table 2: Key Reagents and Materials for ctDNA Experiments
| Item | Function | Considerations |
|---|---|---|
| Cell-Free DNA Blood Collection Tubes (e.g., Streck) | Preserves blood sample and prevents white blood cell lysis, which would release genomic DNA and dilute the ctDNA fraction [25] [32]. | Critical for accurate pre-analytical results; allows for longer sample transport times. |
| Silica-Membrane/ Magnetic Bead cfDNA Kits | Isolation of high-purity, short-fragment cfDNA from plasma. | Efficiency of extraction varies and can impact final assay sensitivity [26]. |
| Hot-Start DNA Polymerases | Enzyme remains inactive until a high-temperature step, preventing non-specific amplification and primer-dimer formation [27]. | Essential for both ddPCR and NGS library amplification to improve specificity and yield. |
| Universal Annealing Buffer | A specially formulated PCR buffer that allows primers with different Tms to bind specifically at a universal temperature (e.g., 60°C) [28]. | Simplifies PCR optimization, saves time, and enables co-cycling of different assays. |
| Unique Molecular Identifiers (UMIs) | Short random nucleotide sequences added to each DNA fragment before PCR amplification in NGS [12]. | Allows bioinformatics to correct for PCR amplification biases and sequencing errors, improving variant calling accuracy. |
| NGS Hybrid-Capture or Amplicon Panels | Target enrichment systems to focus sequencing on genes of interest. | Panel size and design (e.g., hotspot vs. comprehensive) should align with research objectives [26]. |
The Role of Unique Molecular Identifiers (UMIs) in Error Correction
UMI Troubleshooting FAQs
Q1: My ctDNA assay has low sensitivity after UMI deduplication. What could be the cause?
A: Low post-deduplication sensitivity typically stems from insufficient starting material or sequencing depth. In ctDNA analysis, a deduplication yield of approximately 10% is common under optimal conditions [33]. This means a depth of coverage (DoC) of 20,000× before deduplication yields only about 2,000× afterward, which may be insufficient for detecting variants at ultra-low frequencies (<0.1%) [33]. Ensure adequate input DNA (minimum 60 ng recommended, equivalent to ~18,000 haploid genome equivalents) and increase raw sequencing depth accordingly [33].
Q2: How can I distinguish true low-frequency variants from PCR/sequencing errors when using UMIs?
A: UMIs enable bioinformatics pipelines to differentiate true variants from technical errors by tracking original molecules. True variants will appear consistently across multiple reads with different UMIs originating from the same original DNA fragment, while PCR errors typically appear in only one UMI family [34]. Strategic bioinformatics pipelines utilizing "allowed" and "blocked" lists can further enhance accuracy while minimizing false positives [33].
Q3: What are the key considerations for UMI design and implementation in ctDNA assays?
A: Effective UMI implementation requires: (1) Incorporating UMIs during library preparation before PCR amplification to tag original molecules [34]; (2) Using sufficient UMI complexity to avoid tagging different molecules with the same identifier; (3) Implementing UMI-aware bioinformatics pipelines for read assembly and error correction [34] [35]; (4) Calibrating sequencing depth based on expected variant allele frequencies and desired limit of detection [33].
Technical Specifications for UMI-Based Error Correction
Table 1: Coverage Requirements for Variant Detection at Different VAFs
| Variant Allele Frequency (VAF) | Required Coverage for 99% Detection Probability | Recommended UMI-Deduplicated Coverage |
|---|---|---|
| 1.0% | ~1,000× | ~2,000× |
| 0.5% | ~2,000× | ~4,000× |
| 0.1% | ~10,000× | ~20,000× |
Data adapted from clinical ctDNA NGS analysis recommendations [33]
Table 2: UMI-Based Error Correction Performance Metrics
| Parameter | Typical Range | Impact on Assay Performance |
|---|---|---|
| UMI Deduplication Yield | ~10% (optimal conditions) | Determines effective coverage after processing [33] |
| Input DNA Requirement | ≥60 ng (≥18,000 GE) | Ensures sufficient molecular diversity for accurate variant calling [33] |
| Limit of Detection (LoD) Improvement | 0.5% to 0.1% with UMIs | Increases alteration detection from 50% to ~80% [33] |
| Minimum Supporting Reads | 3 (vs. 5 for tissue) | Enhances sensitivity for low-frequency variants [33] |
Experimental Protocols for UMI Implementation
Protocol 1: UMI-Based Library Preparation for ctDNA Assays
Materials: UMI adapter mix, library preparation kit, ctDNA sample, magnetic beads, PCR reagents [34] [33].
- DNA Quantification: Precisely quantify input ctDNA using fluorometric methods (minimum 60 ng recommended) [33].
- UMI Ligation: Ligate UMI-containing adapters to each DNA fragment. This step uniquely tags original molecules before amplification [34].
- Library Amplification: Perform PCR amplification using primers compatible with your sequencing platform.
- Library Quantification: Quantify the final library and assess quality before sequencing.
- Sequencing: Sequence at sufficient depth (refer to Table 1 for guidance based on target VAF).
Protocol 2: Bioinformatics Processing of UMI-Tagged Data
Tools: UMI-tools [35], Salmon [36], or specialized UMI processing pipelines [37].
- UMI Extraction: Extract UMIs from read headers or sequences using tools like
umis fastqtransform[37] or UMI-tools [35]. - Read Alignment: Map reads to reference genome using aligners like Bowtie [38] or Salmon [36].
- UMI Deduplication: Group reads by genomic coordinates and UMIs to identify PCR duplicates using
umi_tools dedup[35]. - Variant Calling: Perform variant calling on deduplicated reads using specialized ctDNA variant callers.
- Error Correction: Apply UMI-based error correction to distinguish true variants from artifacts [34] [33].
Research Reagent Solutions
Table 3: Essential Reagents for UMI-Based ctDNA Research
| Reagent/Tool | Function | Application Notes |
|---|---|---|
| UMI Adapters | Uniquely tags each original DNA molecule before amplification | Critical for molecular tracking; ensure sufficient complexity [34] |
| High-Fidelity Polymerase | Amplifies libraries with minimal errors | Reduces introduction of novel variants during PCR [33] |
| Target Enrichment Panels | Captures genomic regions of interest | Tumor-informed panels improve sensitivity for MRD detection [39] |
| UMI-Aware Bioinformatics Tools | Processes UMI-tagged data for error correction | UMI-tools, Salmon, or custom pipelines [35] [36] [37] |
| ctDNA Reference Standards | Controls with known mutation frequencies | Essential for validating assay sensitivity and specificity [33] |
Workflow Visualization
Diagram 1: UMI Error Correction Workflow - This illustrates the complete process from initial sample preparation to final variant calling.
Diagram 2: UMI-Based Error Correction Process - This shows how UMIs distinguish true biological variants from technical errors.
FAQ: Core Design Principles for ctDNA Assays
1. How do I choose between a tumor-informed and a tumor-agnostic assay design?
The choice hinges on the clinical application and the required sensitivity. The table below compares the two core approaches.
Table 1: Comparison of Tumor-Informed and Tumor-Agnostic Assay Approaches
| Feature | Tumor-Informed Assay | Tumor-Agnostic Assay |
|---|---|---|
| Principle | Patient-specific; requires primary tumor tissue analysis to identify unique mutations for custom test design [40]. | Computational; uses algorithms to estimate ctDNA proportion without prior tumor tissue analysis [40]. |
| Sensitivity | Generally higher sensitivity, preferable for early-stage cancer or MRD detection where ctDNA is minimal [40]. | Considered less sensitive than tumor-informed assays [40]. |
| Turnaround Time | Longer due to two-step process (tumor sequencing + custom assay design) [41]. | Shorter and simpler, as no pre-analysis of tumor tissue is required [41]. |
| Ideal Clinical Context | Therapy de-escalation trials or MRD detection requiring ultra-sensitive detection [40]. | Situations where tumor tissue is unavailable or for monitoring known, common mutations [41]. |
2. What are the key considerations for selecting the size of a gene panel?
Panel size is a balance between comprehensiveness and analytical performance. The decision should be guided by the biological and clinical goals.
- Small, Targeted Panels: These are ideal for tracking a predefined set of mutations (e.g., in known driver genes like KRAS, EGFR, BRAF). They allow for deeper sequencing coverage, which increases the sensitivity for detecting low-frequency variants [42] [41]. PCR-based methods are often used here and are valued for their sensitivity and cost-effectiveness [41].
- Large, Comprehensive Panels (NGS): Next-generation sequencing (NGS) panels enable broad cancer genotyping and the identification of novel or unexpected actionable mutations [42] [41]. Techniques like CAPP-Seq use a "selector" of recurrently mutated regions to cover a wide genomic space efficiently [42]. While comprehensive, they may require more input DNA and sophisticated data analysis.
3. What are the best practices for amplicon design and dealing with complex genomic regions?
Robust amplicon design is critical for assay success, especially with the challenging, fragmented nature of ctDNA.
- Address PCR Errors: Amplicon-based NGS is susceptible to errors introduced during PCR amplification. Using Unique Molecular Identifiers (UMIs) is essential. UMIs are molecular barcodes tagged onto DNA fragments before amplification, allowing bioinformatic filtering to distinguish true mutations from sequencing artefacts [42].
- Handle Low-Input and Fragmented DNA: ctDNA is highly fragmented. Amplicon-based assays must be optimized for short template lengths. Ensure your design accommodates the typical cfDNA fragment size of ~167 bp [42].
- Manage Complex Targets: For GC-rich regions or sequences with secondary structures:
Troubleshooting Guide: Common Experimental Issues
Table 2: Troubleshooting Common Issues in ctDNA Assay Workflows
| Observation | Possible Cause | Recommended Solution |
|---|---|---|
| Low or No Amplification | Suboptimal annealing temperature | Recalculate primer Tm and test a gradient, typically starting 3–5°C below the primer Tm [27]. |
| Poor template quality or quantity | Re-quantify cfDNA and ensure integrity. Increase the number of PCR cycles if input is low [27]. | |
| Presence of PCR inhibitors | Re-purify cfDNA to remove contaminants like phenol or salts [27]. | |
| Multiple or Non-Specific Bands | Annealing temperature too low | Increase the annealing temperature stepwise to improve specificity [27] [43]. |
| Excess primer concentration | Optimize primer concentration, typically in the range of 0.1–1 µM [27] [43]. | |
| Mispriming due to poor primer design | Verify primers have no additional complementary regions within the template. Use hot-start polymerases [27] [43]. | |
| High Background Noise (NGS) | PCR-induced errors and artefacts | Implement a robust UMI system for error correction, such as Duplex Sequencing or SaferSeqS [42]. |
| Clonal hematopoiesis (CH) | Sequence matched white blood cells to identify and filter out CH-related mutations [41]. |
The Scientist's Toolkit: Essential Research Reagent Solutions
Table 3: Key Reagents and Kits for ctDNA Analysis
| Reagent / Kit | Function / Application | Example Use-Case |
|---|---|---|
| QIAamp Circulating Nucleic Acid Kit | Extraction of cell-free nucleic acids (cfDNA) from plasma samples [44]. | Standardized isolation of high-quality cfDNA from patient plasma for downstream NGS or dPCR. |
| Oncomine Lung cfTNA Assay | Target enrichment via amplicon-based NGS for lung cancer mutations from liquid biopsy samples [44]. | Multiplexed detection of mutations, fusions, and CNVs in a single assay from low-input cfDNA. |
| Ion Torrent S5 System | Next-generation sequencing platform for semiconductor-based sequencing [44]. | Running amplicon-based NGS libraries, such as those prepared with the Oncomine kit. |
| High-Fidelity DNA Polymerase (e.g., Q5, Phusion) | PCR enzyme with superior accuracy to reduce amplification errors [43]. | Critical for any PCR step where sequence fidelity is paramount, such as library amplification for NGS. |
| Hot-Start DNA Polymerase | Polymerase inactive at room temperature to prevent non-specific amplification during reaction setup [27] [43]. | Improving specificity in all PCR-based ctDNA assays, especially those with multiple primer pairs. |
Experimental Workflow for an Amplicon-Based NGS Study
The following protocol, adapted from a clinical study on Non-Small Cell Lung Cancer (NSCLC), outlines a typical workflow for analyzing ctDNA using amplicon-based NGS [44].
Protocol: ctDNA Analysis for Treatment Monitoring in NSCLC
1. Sample Collection and Plasma Separation
- Collect blood samples (e.g., 5 mL) into K2 EDTA tubes.
- Process within 2 hours at room temperature.
- Centrifuge twice: first at 1,200 x g for 10 minutes to separate plasma, then at 16,000 x g for 10 minutes to remove residual cells.
- Aliquot and store plasma at -80°C or proceed immediately to cfDNA extraction.
2. cfDNA Extraction and Quantification
- Extract cfDNA from 2 mL of plasma using a specialized kit (e.g., QIAamp Circulating Nucleic Acid Kit).
- Quantify the extracted cfDNA using a fluorescence-based method (e.g., Qubit dsDNA HS Assay Kit).
3. Library Preparation and Target Enrichment
- Use 20 ng of isolated cfDNA as input for library preparation.
- Utilize a targeted amplicon-based panel (e.g., Oncomine Lung cfTNA Research Assay) for multiplexed PCR amplification of genes of interest.
- This step simultaneously amplifies targets and attaches barcodes (UMIs and sample indices) in a single-tube reaction.
4. Library Quantification and Template Preparation
- Quantify the final libraries accurately using a qPCR-based kit (e.g., Ion Library TaqMan Quantification Kit).
- Dilute libraries to a standardized concentration (e.g., 30 pM) and pool them for multiplexed sequencing.
- Prepare the sequencing template using an automated system (e.g., Ion Chef instrument) which loads the pooled libraries onto a sequencing chip (e.g., Ion 530 chip).
5. Sequencing and Data Analysis
- Sequence the chip on a compatible platform (e.g., Ion Torrent S5 System).
- Process the raw data through analysis suites (e.g., Torrent Suite and Ion Reporter Software) using specific filters for molecular coverage and variant allele frequency.
- Quality Control Parameters: Ensure total mapped reads >3 million, median read depth >25,000x, and molecular coverage >2,500x. Set a minimum variant allele frequency cutoff (e.g., 0.035%) for reporting [44].
Diagram 1: ctDNA Analysis Workflow
Critical Signaling Pathways in Common Cancers for Target Selection
Selecting targets for a ctDNA panel requires knowledge of key driver pathways in the cancer types of interest. The following diagram illustrates common mutations and their pathways.
Diagram 2: Key Mutations by Cancer Type
Integrating Annealing Temperature Optimization into Library Preparation Protocols
Frequently Asked Questions (FAQs)
How do I calculate the optimal annealing temperature for my primers?
The optimal annealing temperature (Ta) can be determined using established formulas and empirical methods. One recommended calculation is: Ta Opt = 0.3 × (Tm of primer) + 0.7 × (Tm of product) – 14.9 where Tm of primer is the melting temperature of the less-stable primer-template pair, and Tm of product is the melting temperature of the PCR product [45]. Alternatively, you can set the Ta no more than 2–5°C below the lower Tm of the primer pair being used [45] [46]. For the highest accuracy, use a gradient PCR to determine the optimal temperature empirically [46].
Why is annealing temperature critical for ctDNA detection assays?
Annealing temperature is particularly crucial for ctDNA assays due to the need to detect rare mutant alleles against a high background of wild-type DNA. Using too low an annealing temperature promotes nonspecific binding and primer-dimer formation, which can lead to false positives in detecting low-frequency variants [47]. Conversely, too high an annealing temperature reduces primer binding efficiency, potentially causing false negatives and missing low-abundance ctDNA molecules [46] [47]. Proper optimization ensures sufficient sensitivity and specificity for detecting mutations present at very low allele frequencies.
What factors influence annealing temperature in complex library prep reactions?
Multiple reaction components affect melting temperature and thus optimal annealing conditions [46]:
- Magnesium and dNTPs: Free magnesium ion concentration determines DNA duplex melting temperature, but magnesium can be sequestered by dNTPs, primers, and DNA
- Primer concentration: The DNA species in molar excess (should be primers) determines melting temperature
- Monovalent cations (Na+, K+): Support DNA duplex stability and compete with magnesium for DNA binding
- PCR additives or co-solvents (DMSO, formamide): Weaken primer binding to the target, potentially requiring adjustment of annealing temperatures [47]
How does annealing temperature optimization differ for digital PCR-based ctDNA assays?
Digital PCR applications for ctDNA detection, such as droplet digital PCR (ddPCR), require especially stringent annealing optimization due to their exceptional sensitivity. For example, in HPV16 detection using ddPCR, researchers determined an optimal annealing temperature of 56.5°C based on the fluorescence signal difference between positive and negative controls and the number of plasmids detected [48]. This precision enables detection of mutant alleles at frequencies below 0.001% in a wild-type background [48].
Troubleshooting Guide: Annealing Temperature Issues
Common Symptoms and Solutions
| Symptom | Possible Causes | Recommended Solutions |
|---|---|---|
| No amplification or low yield | Ta too high [46] [47]Poor primer design [47]Insufficient Mg2+ concentration [47] | Decrease Ta by 2-3°C increments [47]Verify primer specificity and design [47]Optimize Mg2+ concentration [47] |
| Non-specific amplification or high background | Ta too low [46] [47]Excess Mg2+ concentration [47]High primer quantity [47] | Increase Ta by 1-2°C increments [47]Reduce Mg2+ concentration [47]Optimize primer concentrations (0.1–1 μM typical) [47] |
| Primer-dimer formation | Ta too low [46]Primers with complementary 3' ends [47]High primer concentration [47] | Increase annealing temperature [47]Redesign primers to avoid complementarity [47]Use hot-start DNA polymerases [47] |
| Inconsistent results between replicates | Nonhomogeneous reagents [47]Inaccurate temperature calibrationPlate position effects in thermal cycler | Mix reagent stocks thoroughly before use [47]Verify thermal cycler calibrationUse a thermal gradient to identify optimal Ta [46] |
Advanced Troubleshooting for Complex Templates
For challenging templates like GC-rich sequences in ctDNA assays:
- Use PCR additives such as GC enhancers to help denature GC-rich DNA and sequences with secondary structures [47]
- Increase denaturation time and/or temperature to efficiently separate double-stranded DNA templates [47]
- Choose DNA polymerases with high processivity which display high affinity for difficult DNA templates [47]
- Employ touchdown PCR to enhance specificity when working with low-abundance targets [47]
Experimental Protocol: Annealing Temperature Optimization for ctDNA ddPCR Assays
Background
This protocol is adapted from the TRICIA trial which validated digital PCR-based ctDNA detection for risk stratification in residual triple-negative breast cancer [17]. The approach can be applied to various ctDNA detection applications requiring high sensitivity and specificity.
Materials Needed
- Purified cfDNA from plasma samples
- QX200 Droplet Digital PCR System (Bio-Rad) or equivalent
- ddPCR Supermix for Probes
- Tumor-informed primers and probes
- Thermal cycler with gradient functionality
Step-by-Step Procedure
Primer Design and Tm Calculation
- Design primers specific to your target mutation
- Calculate theoretical Tm using oligo analysis software
- For the TRICIA trial, tumor-informed digital droplet PCR assays were developed based on DNA sequencing of each tumor [17]
Gradient PCR Setup
- Prepare master mix according to ddPCR manufacturer instructions
- Dispense equal volumes into individual tubes or plates
- Set up thermal cycler with a gradient spanning at least 10°C range (e.g., 50-60°C)
- Include appropriate positive and negative controls
Thermal Cycling Parameters
- Initial denaturation: 95°C for 10 minutes
- 40 cycles of:
- Denaturation: 94°C for 30 seconds
- Annealing: Gradient temperatures for 1 minute
- Extension: 72°C for 1 minute
- Final extension: 72°C for 10 minutes
- Hold at 4°C
Analysis and Optimal Temperature Selection
- Analyze results based on fluorescence signal difference between positive and negative controls
- Consider the number of target molecules detected [48]
- Select the temperature that provides the highest signal-to-noise ratio with minimal non-specific amplification
Validation
- Confirm optimal temperature with replicate samples
- Verify specificity with wild-type-only controls
- For ctDNA applications, ensure sensitivity meets required detection thresholds (e.g., 0.1% variant allele frequency)
Workflow Diagram: Annealing Temperature Optimization
Research Reagent Solutions
Essential materials for annealing temperature optimization in ctDNA research:
| Reagent/Equipment | Function in Optimization |
|---|---|
| Gradient Thermal Cycler | Enables testing multiple annealing temperatures simultaneously in a single run [46] |
| Hot-Start DNA Polymerases | Prevents non-specific amplification at low temperatures, improving specificity [47] |
| Tm Calculation Software (e.g., OligoAnalyzer, NEB Tm Calculator) | Provides initial Tm estimates considering buffer components that affect melting temperatures [45] [46] |
| Digital PCR Systems (e.g., QX200) | Enables absolute quantification without standard curves, critical for low-abundance ctDNA [48] |
| Fluorometric Quantification (e.g., Qubit) | Accurately measures DNA concentration compared to UV spectrophotometry [30] |
| Magnetic Bead Purification Systems | Efficiently removes contaminants that could inhibit PCR and affect annealing efficiency [49] |
Mastering Assay Precision: A Strategic Framework for Parameter Optimization
Annealing Temperature as a Critical Lever for Specificity and Sensitivity
Frequently Asked Questions (FAQs)
FAQ 1: Why is annealing temperature so critical in ctDNA assay development? The annealing temperature is a fundamental determinant of primer binding specificity and efficiency. In ctDNA analysis, where the target mutant DNA molecules can be as rare as 0.1% of the total cell-free DNA (cfDNA), an optimally set annealing temperature is essential. It ensures that primers bind perfectly to their intended mutant sequences while minimizing non-specific binding and amplification of the abundant wild-type DNA. Even minor deviations can lead to false positives from off-target amplification or false negatives from failed amplification of low-concentration targets, directly impacting the assay's limit of detection [23] [50].
FAQ 2: How do I determine the optimal annealing temperature for my ctDNA assay? The optimal annealing temperature is determined empirically for each primer set. While bioinformatics software provides a theoretical melting temperature (Tm), validation is mandatory. A robust method is to perform a temperature gradient PCR using your specific primers and a template that contains the target mutation, ideally in a background of wild-type DNA. The optimal temperature is the highest one that yields a strong, specific amplification product. This should be followed by testing on wild-type-only samples to confirm the absence of non-specific amplification at the chosen temperature [50]. For highly sensitive applications like droplet digital PCR (ddPCR), this optimization is a prerequisite for achieving published concordance rates of over 90% between different digital PCR platforms [23].
FAQ 3: What are the consequences of a suboptimal annealing temperature? A suboptimal annealing temperature directly compromises assay performance, as summarized in the table below.
Table 1: Impact of Suboptimal Annealing Temperatures
| Temperature | Primary Effect | Impact on Sensitivity | Impact on Specificity |
|---|---|---|---|
| Too Low | Reduced primer binding stringency; increased off-target binding | May appear high initially (more amplification) | Severely reduced (high false-positive rate) |
| Too High | Reduced primer binding efficiency; failed amplification | Severely reduced (high false-negative rate) | May appear high (little amplification) |
FAQ 4: My assay has low sensitivity. Could annealing temperature be a factor? Yes, absolutely. An annealing temperature that is too high can prevent primers from efficiently binding to the low-copy-number ctDNA fragments, leading to failed amplification and thus low sensitivity. Furthermore, the sensitivity of your overall workflow is also dependent on other factors, including the input plasma volume, cfDNA extraction efficiency, and the analytical sensitivity of the detection platform (e.g., NGS depth or digital PCR) [51] [50]. You should systematically troubleshoot each step, starting with verifying your annealing temperature and primer design.
FAQ 5: How does primer design for ctDNA assays influence annealing temperature optimization? Primer design dictates the theoretical melting temperature and is the starting point for optimization. For ctDNA assays, primers must be designed to generate amplicons of ~100 base pairs to match the fragmented nature of ctDNA (typically 70-200 bp) [52]. This shorter amplicon length influences the primer's Tm and thus the optimal annealing temperature. The use of tumor-informed, patient-specific panels often requires the design of multiple primer sets, each of which must be individually optimized for annealing temperature to ensure uniform performance across the panel [52] [53].
Troubleshooting Guide
Table 2: Common Annealing Temperature-Related Issues and Solutions
| Problem | Potential Causes | Recommended Solutions |
|---|---|---|
| High Background/False Positives | • Annealing temperature too low.• Primer-dimer formation.• Primers binding to non-target sequences. | • Increase annealing temperature in 1-2°C increments.• Redesign primers to avoid self-complementarity.• Use a BLAST search to check for unique sequence binding. |
| Low or No Signal/False Negatives | • Annealing temperature too high.• Primer sequences contain errors.• Poor cfDNA input quality/quantity. | • Decrease annealing temperature in 1-2°C increments.• Verify primer sequences and re-synthesize.• Quantify cfDNA yield and integrity. |
| Inconsistent Replicates | • Inconsistent thermal cycler temperature calibration.• Poor PCR reaction mix homogeneity. | • Calibrate the thermal cycler block.• Ensure master mix is thoroughly mixed and aliquoted correctly. |
| Assay Works on Synthetic DNA but Fails on Plasma cfDNA | • PCR inhibitors co-purified with cfDNA.• Amplicon size too large for fragmented ctDNA. | • Dilute cfDNA or use cleanup columns.• Redesign primers to ensure amplicon size is ~100 bp [52]. |
Experimental Protocols & Workflows
Protocol: Annealing Temperature Optimization using Gradient PCR
This protocol is a critical first step in validating any new ctDNA assay.
Objective: To empirically determine the optimal annealing temperature for a primer set targeting a specific somatic mutation in ctDNA.
Materials:
- Thermostable DNA polymerase and corresponding buffer (e.g., HotStarTaq Master Mix [54])
- Forward and reverse primers, resuspended in nuclease-free water.
- Template DNA:
- Positive Control: Synthetic oligonucleotide with the target mutation or DNA from a mutation-positive cell line.
- Negative Control: Wild-type genomic DNA or cfDNA from healthy donors.
- Real-time PCR machine with gradient functionality.
Method:
- Prepare Reaction Mix: On ice, prepare a master mix for n+2 reactions. Each reaction should contain:
- 1X PCR Buffer
- 200 µM of each dNTP
- 0.2-0.5 µM of each forward and reverse primer
- 0.5-1.0 U of DNA polymerase
- Nuclease-free water to volume.
- Aliquot and Template Addition: Aliquot the master mix into PCR tubes. Add template DNA (e.g., 5-20 ng of control DNA or 5-10 µL of extracted cfDNA) to each tube. Include a no-template control (NTC) with water.
- Set Up Gradient PCR Program:
- Initial Denaturation: 95°C for 5-10 minutes.
- 35-40 Cycles of:
- Denaturation: 95°C for 30 seconds.
- Annealing: Gradient from 55°C to 65°C for 30 seconds. (Set the gradient based on the primer Tm).
- Extension: 72°C for 30-60 seconds.
- Final Extension: 72°C for 5-10 minutes.
- Analysis:
- For real-time PCR, the optimal temperature is the one that gives the lowest Cq value for the positive control with no signal in the negative control.
- For conventional PCR, run the products on a high-resolution gel (e.g., 3-4% agarose). The optimal temperature yields a single, bright band of the expected size with no primer-dimer or non-specific bands.
Workflow: Integrated ctDNA Analysis from Blood Draw to Detection
The following diagram illustrates the complete workflow for a tumor-informed, personalized ctDNA assay, highlighting where annealing temperature optimization is critical.
The Scientist's Toolkit: Essential Research Reagents
Table 3: Key Reagents for ctDNA Assay Development and Optimization
| Reagent / Kit | Function / Application | Key Consideration |
|---|---|---|
| cfDNA Blood Collection Tubes (e.g., Streck, PAXgene) | Stabilizes nucleated blood cells to prevent genomic DNA contamination during sample transport [51]. | Allows for room temperature storage for several days, crucial for multi-center studies. |
| cfDNA Extraction Kits (e.g., Qiagen Circulating Nucleic Acid Kit) | Isolate and purify short-fragment cfDNA from plasma [52] [51]. | Silica-membrane-based kits are noted for high yield. Elution volume should be small to concentrate cfDNA. |
| Digital PCR Master Mixes (for ddPCR or plate-based dPCR) | Enables absolute quantification of mutant allele frequency with high sensitivity [23]. | Must be compatible with the chosen digital PCR platform and hydrolysis probe chemistry. |
| High-Fidelity DNA Polymerase (for NGS library prep) | Amplifies cfDNA for sequencing while minimizing introduction of errors [53] [42]. | Low error rate is critical for distinguishing true low-frequency variants from polymerase mistakes. |
| Unique Molecular Identifiers (UMIs) | Short random nucleotide sequences added to each DNA fragment pre-amplification to tag and track original molecules [53] [42]. | Essential for error correction in NGS workflows; allows bioinformatic removal of PCR and sequencing errors. |
The Scientist's Toolkit: Essential Research Reagent Solutions
The following reagents and materials are critical for executing precise temperature gradient experiments in ctDNA analysis [55].
| Reagent/Material | Function in the Experiment |
|---|---|
| Cell-free DNA Blood Collection Tubes | Specialized tubes (e.g., PAXgene) that stabilize blood cells to prevent lysis, preserving the integrity of plasma and preventing the release of genomic DNA that would dilute the ctDNA signal [55]. |
| Thermostable DNA Polymerase | Enzyme responsible for synthesizing new DNA strands during PCR amplification. It must withstand high temperatures during the denaturation steps of thermal cycling [56]. |
| Optimized Primer Pairs | Short, single-stranded DNA sequences designed to bind complementary to a specific target region within the genomic DNA. Their melting temperature (( T_m )) is central to annealing temperature optimization [56]. |
| NGS Library Preparation Kit | Reagents for converting isolated cfDNA into a sequencing-ready library by adding platform-specific adapters and performing amplification [55]. |
Foundation: Annealing Temperature in ctDNA Assays
In polymerase chain reaction (PCR) techniques, including those used to analyze circulating tumor DNA (ctDNA), DNA is amplified through repeated cycles of temperature-dependent steps: denaturation, primer-template annealing, and DNA synthesis [56]. The purity and yield of the amplification products are critically dependent on several parameters, with the annealing temperature (( T_a )) being one of the most important [56].
Optimizing the ( Ta ) is especially critical when the substrate is total genomic DNA or when long DNA products are synthesized [56]. Within the context of ctDNA research, this is magnified because ctDNA fragments are typically present in low abundance in a high background of wild-type DNA, making specific amplification paramount [55]. A sub-optimal ( Ta ) can lead to reduced product yield and the formation of non-specific products, which can confound sequencing results and lead to false positives or negatives in mutation detection [56] [55].
Troubleshooting Guide: Temperature Gradient Experiments
FAQ: Why is my amplification yield low or non-specific, even after running a temperature gradient?
Potential Cause 1: Inaccurate primer melting temperature (( T_m )) estimation.
- Solution: The ( Tm ) calculated by simple formulas can be inaccurate. Experimentally determine the optimal annealing temperature (( TaOPT )) using the gradient function on your thermocycler. A method has been developed where the ( T_aOPT ) is a function of the melting temperatures of the less stable primer-template pair and of the PCR product itself [56].
Potential Cause 2: Low abundance of ctDNA target.
- Solution: In ctDNA assays, the fraction of tumor-derived DNA can be very low, especially in early-stage disease. This leads to a low variant allele frequency (VAF), making detection difficult. To compensate, use highly sensitive methods like next-generation sequencing (NGS) with high sequencing depth (number of reads covering a base) to confidently identify low-frequency variants [55].
Potential Cause 3: Non-optimal cycling conditions for complex samples.
- Solution: For synthesizing DNA fragments shorter than 1 kilobase, using a variable annealing temperature that increases in each consecutive cycle can significantly improve amplification efficiency [56].
FAQ: How do I interpret the results from my temperature gradient gel?
Observation: A smear of non-specific products across many wells.
- Interpretation: This indicates that the primers are binding non-specifically to non-target DNA sequences. The optimal ( T_a ) is likely at the higher end of the tested gradient, where fewer primer mismatches are tolerated.
Observation: A clear, specific band in one or a few adjacent wells, with no product in others.
- Interpretation: This is the ideal result. The well with the brightest, most specific band at the expected size indicates the ( T_aOPT ). The absence of product at higher temperatures is due to insufficient primer annealing, while non-specific products at lower temperatures are from excessive primer mismatching.
Observation: No product in any well.
- Interpretation: The annealing temperature range may be set too high overall, preventing any stable primer-template hybridization. Broaden the gradient to include lower temperatures. Also, verify reagent integrity and sample quality.
Experimental Protocol: Empirical ( T_a ) Determination
Objective: To experimentally determine the optimal annealing temperature (( T_aOPT )) for a PCR assay targeting a specific genomic locus, suitable for ctDNA analysis.
Methodology:
- Reaction Setup: Prepare a master mix containing all necessary PCR components: thermostable DNA polymerase, dNTPs, reaction buffer, primers, and nuclease-free water. Aliquot the master mix into individual PCR tubes or a multi-well plate.
- Temperature Gradient Programming: On your thermocycler, set the annealing step of the PCR cycle to a gradient that spans a range of temperatures. A typical range might be from 55°C to 65°C, centered around the calculated ( T_m ) of your primers.
- Amplification: Run the PCR protocol with the programmed gradient.
- Product Analysis: Analyze the PCR products using gel electrophoresis. Visualize the DNA fragments under UV light.
- Interpretation: Identify the annealing temperature that produces the strongest amplification of the desired product with the absence of non-specific bands. This temperature is your empirically determined ( T_aOPT ).
Data Interpretation Table: The following table summarizes how to interpret the results from the temperature gradient gel [56]:
| Gel Electrophoresis Result | Interpretation | Recommended Action |
|---|---|---|
| A single, bright band of the expected size at a specific temperature. | Successful amplification at the optimal ( T_a ). | Use this temperature for all subsequent assays. |
| A bright specific band accompanied by fainter, non-specific bands. | Sub-optimal ( T_a ); primers are binding non-specifically. | Increase the ( T_a ) by 1-2°C or re-design primers. |
| A smear of DNA across multiple lanes. | Severe non-specific binding; ( T_a ) is too low. | Significantly increase the ( T_a ) gradient range. |
| No visible bands in any lane. | ( T_a ) is too high, or PCR has failed. | Lower the ( T_a ) gradient and check reagent integrity. |
Visualizing the Workflow: From Blood Sample to Analysis
The following diagram illustrates the complete workflow for a ctDNA assay, highlighting the stage where temperature gradient optimization is critical.
Decision Logic for Temperature-Related Amplification Issues
When faced with poor amplification results, the following logic flow can help diagnose and resolve the issue.
Frequently Asked Questions (FAQs)
FAQ 1: How do Mg2+ concentration and primer design interact to influence PCR bias in methylation-specific assays? The interaction is critical for detecting rare methylated DNA targets. The PCR bias (preferential amplification of methylated vs. unmethylated sequences) can be finely tuned by using primers that cover CpG sites and optimizing the MgCl2 concentration and annealing temperature. For instance, using a primer pair covering four CpG sites, a PCR bias of 100% for methylated DNA was achieved at an MgCl2 concentration of 1.5 mM and annealing temperatures above 55.1°C. Conversely, with the same primer, lowering the annealing temperature and increasing MgCl2 concentration beyond 3.5 mM can shift the bias to preferentially amplify unmethylated DNA [57].
FAQ 2: My qPCR shows low yield or unusually late Ct values. Could template quality be the issue, and how can I resolve it? Yes, this is a common symptom. Poor RNA quality, the presence of inhibitors in the template material, or inaccurate template dilution can lead to poor reaction efficiency, low yield, and late Ct values [58] [59]. Corrective steps include [58] [60]:
- Diluting the template: This dilutes potential inhibitors to a concentration where they no longer affect the reaction.
- Optimizing sample preparation: Ensure high-quality RNA purification and perform appropriate clean-up procedures.
- Adding BSA: Including 0.4 – 4.4 mg/ml BSA in the reaction can help counteract inhibition.
- Checking samples and reagents: Use carefully quantified controls and fresh stock solutions to verify assay performance.
FAQ 3: Why are my technical replicates in qPCR highly variable (Cq difference > 0.5 cycles)? This is often caused by pipetting errors, insufficient mixing of reaction solutions, or the use of low template concentrations where stochastic effects are magnified [58]. To improve reproducibility:
- Calibrate pipettes and use positive-displacement pipettes with filtered tips.
- Mix all solutions thoroughly during reaction preparation.
- Hold pipettes vertically when aspirating and dispensing solutions.
- If possible, increase the sample input to achieve a lower, more reliable Cq [58]. Automating liquid handling can also significantly enhance precision and reduce human error [59].
Troubleshooting Guide
The following table summarizes common issues, their potential causes, and corrective actions related to Mg2+ concentration, primer design, and template quality.
| Observation | Potential Causes | Corrective Steps |
|---|---|---|
| Low signal or failed detection of rare ctDNA targets | Suboptimal PCR bias; inefficient amplification of low-abundance targets against high wild-type background [57]. | Optimize primer design to cover 1-4 CpG sites and systematically adjust MgCl2 concentration and annealing temperature to favor target amplification [57]. |
| Non-specific amplification or primer-dimer formation | Poor primer specificity; primer-template mismatches; annealing temperature too low [58] [59]. | Redesign primers using specialized software, optimize primer concentrations and annealing temperature, and ensure primers have similar Tm and 30-50% GC content [58] [59]. |
| Irreproducible data & poor amplification efficiency | Inhibitors present in the template; poor primer design leading to efficiency below 88%; inaccurate dilutions [58]. | Redesign primers; dilute template to reduce inhibitors; repeat experiment with fresh, high-quality reagents; check sample concentrations [58] [60]. |
| High noise or jagged amplification plot | Poor amplification or weak signal; mechanical error; unstable reagents [58]. | Ensure sufficient probe concentration; mix master mix thoroughly; try a fresh batch of probe; contact equipment technician [58]. |
Quantitative Data for Experimental Optimization
Table: Optimizing PCR Bias for Methylated DNA Detection Data adapted from a study on detecting methylated tumor DNA, demonstrating how primer design and buffer composition can be tuned to achieve desired amplification bias [57].
| Primer Pair (CpGs Covered) | MgCl2 Concentration | Annealing Temperature | Final Fractional Abundance (Methylated DNA) | Key Finding |
|---|---|---|---|---|
| MIP (0 CpGs) | 1.5 - 8.0 mM | 50.0 - 63.0 °C | 4.8% ± 1.6% | Strong bias towards unmethylated DNA, unaffected by Mg2+/Temp. |
| PL-161 bp (1 CpG) | 1.5 mM | > 55.1 °C | ~70% | Significant bias towards methylated DNA achievable. |
| PL-150 bp (2 CpGs) | 2.5 mM | 63.0 °C | >90% | Strong, Mg2+/Temp-dependent bias for methylated DNA. |
| PL-133 bp (4 CpGs) | 1.5 mM | > 55.1 °C | 100% | Maximum bias for methylated DNA. |
| 3.5 mM | < 52.6 °C | <50% | Conditions can be tuned to bias towards unmethylated DNA. |
Detailed Experimental Protocols
Protocol 1: OBBPA-ddPCR for Ultrasensitive Methylated DNA Detection
This protocol, known as Optimized Bias-Based Pre-amplification-digital droplet PCR, is designed to identify rare methylated tumor DNA fragments against a high background of unmethylated DNA [57].
- Primer Design: Design methylation-independent primers (MIP) or primers covering 1 to 4 CpG sites within the sequence of interest.
- Pre-amplification:
- Set up a pre-amplification PCR reaction using the designed primers and the cfDNA sample.
- Critical Optimization: Systematically vary the MgCl2 concentration (e.g., 1.5 mM to 8.0 mM) and the annealing temperature (50.0°C to 63.0°C) to establish conditions that create a strong PCR bias (85-95%) toward the methylated DNA sequence. Refer to the table above for guidance.
- Run for 15 cycles.
- Droplet Digital PCR (ddPCR):
- Use the pre-amplified product as the template for a ddPCR reaction.
- The highly partitioned nature of ddPCR allows for absolute quantification of the methylated and unmethylated sequences without competition.
- Analysis: Calculate the copy numbers of methylated and unmethylated DNA. The optimized pre-amplification conditions will significantly enhance the signal-to-noise ratio for the rare methylated targets.
Protocol 2: Troubleshooting Workflow for Late Ct/Poor Yield in qPCR
This is a general protocol for diagnosing and resolving common qPCR issues related to the parameters in this article [58] [59] [60].
- Assess Template Quality and Quantity:
- Check RNA integrity or DNA purity via spectrophotometry/electrophoresis.
- Action: If quality is poor, re-purify the template. If inhibitors are suspected, dilute the template 1:10 and 1:100 and re-run the assay. A decrease in Ct with dilution indicates the presence of inhibitors.
- Verify Primer Design and Reaction Efficiency:
- Check primer specifications: Ensure Tm values are within 2-5°C of each other and GC content is 30-50%.
- Action: If efficiency is low (<90%) or non-specific bands are present, redesign primers using dedicated software and validate with a standard curve.
- Optimize Reaction Conditions:
- Test a gradient of annealing temperatures (e.g., ± 5°C from calculated Tm) to find the optimum.
- Consider titrating Mg2+ concentration (if using a master mix without pre-optimized Mg2+).
- Action: Implement the temperature and Mg2+ conditions that give the lowest Cq, highest fluorescence, and cleanest melt curve.
- Include Appropriate Controls:
- Always run a no-template control (NTC) to check for contamination and positive controls to confirm reagent functionality.
The Scientist's Toolkit: Research Reagent Solutions
Table: Essential Reagents for ctDNA Assay Optimization
| Item | Function in Assay Optimization |
|---|---|
| MgCl2 Solution | A critical cofactor for DNA polymerase; its concentration is a key variable for adjusting PCR stringency, efficiency, and bias in methylation assays [57]. |
| Methylation-Specific & Methylation-Independent Primers | Primers are designed to cover CpG sites to selectively amplify methylated sequences or avoid CpGs to amplify both equally. The design is fundamental to controlling PCR bias [57]. |
| Bovine Serum Albumin (BSA) | Added to the PCR reaction (0.4-4.4 mg/ml) to bind and neutralize common inhibitors found in nucleic acid samples, thereby improving reaction efficiency and Ct values [60]. |
| Digital Droplet PCR (ddPCR) Reagents | Used for absolute quantification of nucleic acids without a standard curve. Essential for ultrasensitive detection of rare targets (e.g., mutant ctDNA) and for precisely measuring PCR bias and assay sensitivity [57] [48]. |
| High-Purity cfDNA Extraction Kits | Designed to isolate cell-free DNA from plasma or serum with high yield and purity, minimizing the carryover of PCR inhibitors which is crucial for robust and reproducible ctDNA assays [48]. |
Optimization Workflow and Parameter Synergy
The diagram below illustrates the interconnected relationship and optimization workflow for Mg2+ concentration, primer design, and template quality in ctDNA assay development.
Strategies for Overcoming Low Input and Enhancing Limit of Detection (LOD)
The analysis of circulating tumor DNA (ctDNA) has emerged as a transformative tool in oncology, enabling non-invasive cancer diagnosis, monitoring treatment response, and detecting minimal residual disease. However, researchers consistently face two fundamental challenges: the low abundance of ctDNA in total cell-free DNA (cfDNA), particularly in early-stage cancers, and the technical limitations in achieving sufficiently sensitive detection. This technical support guide addresses these challenges by providing evidence-based strategies to overcome low input limitations and enhance the limit of detection (LOD) in ctDNA research, framed within the broader context of optimizing ctDNA assays.
Core Challenges in ctDNA Analysis
The Sensitivity Barrier in ctDNA Detection
The fundamental challenge in ctDNA analysis stems from the minute quantities of tumor-derived DNA fragments circulating in blood. In early-stage cancers, ctDNA can represent less than 0.01% of total cfDNA, creating a "needle in a haystack" scenario that demands exceptional analytical sensitivity [61] [62]. This low variant allele frequency (VAF) pushes conventional detection methods beyond their operational limits, necessitating specialized approaches.
Impact of Pre-analytical Variables
Pre-analytical factors significantly influence input DNA quality and quantity, directly affecting assay sensitivity. Key variables include:
- Blood collection timing: ctDNA concentrations fluctuate with treatment response, requiring strategic timing of blood draws [63].
- Sample processing delays: Leukocyte lysis in EDTA tubes within 4-6 hours increases background wild-type DNA, diluting the ctDNA fraction [63].
- Plasma versus serum: Plasma is superior to serum for ctDNA analysis due to reduced wild-type DNA contamination from leukocyte degradation during clotting [63].
Troubleshooting Guide: Addressing Common Experimental Issues
Problem 1: Insufficient ctDNA Input
Symptoms: Inconsistent detection, high sample failure rate, poor assay sensitivity.
Solutions:
- Increase blood collection volume: Collect additional blood tubes to increase plasma yield. Studies demonstrate that processing larger blood volumes (20-40mL versus conventional 5-10mL) significantly improves detection rates. One study detected ctDNA in 100% of pre-treatment samples using 20-40mL blood versus only 66.66% with conventional volumes [10].
- Optimize plasma processing: Implement a two-step centrifugation protocol (800-1,600×g followed by 14,000-16,000×g, both at 4°C for 10 minutes) to maximize cell-free plasma yield while minimizing cellular contamination [63].
- Enhance cfDNA extraction efficiency: Utilize manual extraction protocols that achieve higher purity and lower germline contamination, enabling more efficient recovery of the scarce ctDNA fraction [10].
Problem 2: Inadequate Detection Sensitivity
Symptoms: Failure to detect known variants, inconsistent variant calling, inability to monitor low-VAF mutations.
Solutions:
- Implement molecular barcoding: Use unique molecular identifiers (UMIs) to tag original DNA molecules before amplification, enabling bioinformatic correction of PCR and sequencing errors [61] [64].
- Employ tumor-informed approaches: Sequence the tumor tissue first to identify patient-specific mutations, then design personalized assays that track these specific variants in plasma, dramatically reducing background noise [64] [62].
- Increase genomic breadth: Expand the number of genomic targets tracked. The NeXT Personal platform tracks ~1,800 somatic variants per patient, enabling detection sensitivity down to 1-3 parts per million (ppm) [62].
- Utilize advanced bioinformatics: Apply molecular consensus methods to distinguish true tumor-derived fragments from technical artifacts, a key feature of ultrasensitive platforms [62].
Problem 3: High Background Noise
Symptoms: Elevated false-positive rates, interference from clonal hematopoiesis, reduced signal-to-noise ratio.
Solutions:
- Sequence paired PBMCs: Include peripheral blood mononuclear cell sequencing to identify and filter variants arising from clonal hematopoiesis of indeterminate potential (CHIP) [64].
- Optimize partitioning strategies: In ddPCR assays, increase the number of reactions and sample volume loading. One optimized protocol increased sample volume loading by 22-fold and total cfDNA amount tested by 1200-fold without restriction enzyme digestion [48].
- Leverage fragmentomics: Exploit size differences between ctDNA (typically shorter) and non-tumor cfDNA by selecting fragments between 90-150bp to enrich for tumor-derived content [64].
Frequently Asked Questions (FAQs)
Q1: What is the minimum blood volume recommended for MRD detection studies? For optimal minimal residual disease (MRD) detection, collect at least 20mL of blood drawn into appropriate collection tubes. Studies demonstrate that higher blood volumes (20-40mL) significantly improve detection sensitivity compared to conventional 10mL draws, with some protocols utilizing up to 40mL for ultrasensitive applications [64] [10].
Q2: How long can blood samples be stored before processing? For EDTA tubes, process within 4-6 hours of collection when stored at 4°C or room temperature. When using cell preservation tubes, samples can be stored for 5-7 days at room temperature. For long-term storage, plasma should be kept at -80°C [63].
Q3: What LOD should I target for early-stage cancer detection? For early-stage cancers, target LOD of 0.01% VAF or lower. Advanced platforms like NeXT Personal achieve 1-3 ppm (0.0001-0.0003%) with 99.9% specificity, enabling detection in 81% of early-stage lung adenocarcinoma patients, including 57% of stage I patients [62].
Q4: How can I reduce costs associated with ultrasensitive ctDNA detection? Consider direct ddPCR detection without cfDNA extraction for specific applications. One optimized workflow demonstrated 55.6-95.8% concordance with purified cfDNA across different sample types, significantly reducing processing time and costs [48].
Q5: What is the difference between tumor-informed and tumor-naïve approaches? Tumor-informed assays sequence tumor tissue first to identify patient-specific mutations, then track these in plasma, offering higher sensitivity (LOD 0.001-0.01% VAF). Tumor-naïve approaches use fixed panels without prior tumor sequencing, offering faster turnaround but generally lower sensitivity (LOD ~0.1% VAF) [64] [50].
Experimental Protocols for Enhanced Sensitivity
Protocol 1: High-Volume Plasma Processing for Ultrasensitive Detection
This protocol adapts methodology from increased blood draw studies that achieved detection at 0.003% VAF [10]:
- Blood Collection: Draw 20-40mL blood into cell-stabilizing tubes (e.g., PAXgene ccfDNA tubes)
- Plasma Separation:
- First centrifugation: 800-1,600×g, 10 minutes, 4°C
- Transfer supernatant to new tube, avoiding buffy coat
- Second centrifugation: 14,000-16,000×g, 10 minutes, 4°C
- Plasma Storage: Aliquot and store at -80°C until DNA extraction
- cfDNA Extraction: Use manual extraction protocols optimized for high-volume processing (20mL plasma)
- Quality Assessment: Visually inspect plasma for hemolysis (avoid orange/red samples) and measure cfDNA concentration
Protocol 2: Tumor-Informed Personalized Detection Assay
Adapted from the NeXT Personal platform achieving 1-3 ppm sensitivity [62]:
- Tumor Sequencing: Perform whole-genome or whole-exome sequencing of tumor and matched normal tissue
- Variant Selection: Identify ~1,800 high-quality somatic variants with optimal signal-to-noise ratio
- Panel Design: Create patient-specific hybridization capture panel targeting selected variants
- Library Preparation: Extract cfDNA from plasma and prepare sequencing libraries with molecular barcodes
- Target Enrichment & Sequencing: Hybridize libraries with custom panel, followed by ultra-deep sequencing (>100,000x coverage)
- Bioinformatic Analysis:
- Apply molecular consensus to suppress noise
- Aggregate signal across all tracked variants
- Calculate tumor fraction using proprietary algorithms
Quantitative Comparison of Detection Strategies
Table 1: Performance Comparison of ctDNA Detection Technologies
| Technology | LOD (VAF) | Genomic Breadth | Input Requirements | Best Application |
|---|---|---|---|---|
| ddPCR | 0.003%-0.01% [10] | Single to few mutations | 5-20mL blood [10] | Tracking known mutations |
| Tumor-informed NGS | 0.001%-0.01% [64] | ~1,800 variants [62] | Tumor tissue + 20mL blood [64] | MRD detection |
| Tumor-naïve NGS | ~0.1% [64] | Predefined gene panels | Plasma only | Advanced cancer profiling |
| Ultrasensitive WGS | 1-3 ppm [62] | Genome-wide | Tumor tissue + 20-30mL blood | Early-stage detection |
Table 2: Impact of Blood Volume on Detection Sensitivity
| Blood Volume | Detection Rate | Minimum VAF Detected | Recommended Use |
|---|---|---|---|
| 5-10mL (Standard) | 66.66% [10] | 0.07% [10] | Advanced cancer monitoring |
| 20mL (High) | 90.47% [10] | 0.01% [10] | MRD detection |
| 40mL (Very High) | 100% [10] | 0.003% [10] | Early-stage detection |
Research Reagent Solutions
Table 3: Essential Materials for Sensitive ctDNA Analysis
| Reagent/Category | Specific Examples | Function | Considerations |
|---|---|---|---|
| Blood Collection Tubes | Cell preservation tubes (e.g., PAXgene), K2/K3-EDTA tubes [63] | Stabilize blood cells, prevent lysis | Preservation tubes enable longer processing windows |
| DNA Extraction Kits | QIAamp Circulating Nucleic Acid Kit [48] | Isolve cfDNA from plasma | Manual protocols can improve yield from large volumes |
| Library Preparation | Molecular barcode adapters [61] [62] | Tag original molecules, reduce errors | Essential for distinguishing true variants from artifacts |
| Enrichment Systems | Hybridization capture panels [64] [62] | Target genomic regions of interest | Custom panels enable tumor-informed approaches |
| Detection Chemistry | ddPCR supermixes, NGS library prep kits [10] [48] | Amplify and detect target sequences | Optimized mixes improve sensitivity for rare variants |
Workflow Visualization
Optimizing ctDNA detection requires a multifaceted approach addressing pre-analytical, analytical, and post-analytical phases. The strategies outlined here—increasing input material through larger blood volumes, implementing advanced detection technologies with molecular barcoding and tumor-informed sequencing, and applying sophisticated bioinformatic noise suppression—enable researchers to achieve detection sensitivities required for demanding applications like MRD detection and early-stage cancer diagnosis. As the field evolves, continued refinement of these approaches will further expand the utility of ctDNA analysis in both research and clinical settings.
Ensuring Rigor: Analytical Validation, Benchmarking, and Clinical Translation
Establishing Analytical Sensitivity and Specificity with Standard Reference Materials
Frequently Asked Questions (FAQs)
FAQ 1: Why is establishing analytical sensitivity and specificity critical for ctDNA assays? ctDNA represents a very small fraction (often ≤ 0.1%) of the total cell-free DNA in plasma, especially in early-stage cancers [23]. Its low concentration and high fragmentation render it a challenging analyte [54]. Establishing rigorous analytical sensitivity and specificity ensures that your assay can reliably distinguish true mutant signals from background noise and wild-type DNA, which is fundamental for applications in early cancer detection, treatment monitoring, and recurrence prediction [65] [49].
FAQ 2: What are the key parameters to define for a ctDNA assay? The core parameters are Limit of Blank (LOB), Limit of Detection (LOD), and linearity [66]. The LOB establishes the background signal in negative controls. The LOD defines the lowest mutant allele concentration that can be reliably detected. Linearity confirms that the assay provides accurate quantification across a range of mutant allele frequencies.
FAQ 3: How does annealing temperature optimization impact assay specificity? Optimizing the annealing temperature is crucial for maximizing specificity and minimizing the formation of spurious amplification products. Using a predicted primer Tm without empirical optimization for your specific reaction buffer can lead to failed experiments. It is recommended to perform gradient PCR to identify the optimal temperature, which is typically 5°C below the lowest primer's Tm, often in the 50-60°C range [67]. For highly specific applications like detecting single-nucleotide variants, even finer optimization may be required [66].
FAQ 4: What are some advanced techniques to enhance sensitivity in ctDNA detection?
- Increased Blood Volume: Processing larger plasma volumes (e.g., 20 mL instead of 5 mL) can significantly improve detection rates by increasing the absolute number of mutant DNA molecules available for analysis [10].
- Efficient Enrichment: Using streptavidin-coated magnetic beads to specifically capture and purify target sequences post-amplification can efficiently separate them from non-amplified DNA and reaction impurities, thereby enhancing the signal-to-noise ratio [49].
- Digital PCR: Platforms like droplet-digital PCR (ddPCR) and plate-based digital PCR (pdPCR) partition samples into thousands of individual reactions, allowing for absolute quantification and sensitive detection of rare mutant alleles in a wild-type background [23] [66].
Troubleshooting Guide
Problem 1: High Background or False Positives
- Potential Cause: Non-specific amplification or probe cross-reactivity.
- Solutions:
- Re-optimize Annealing Temperature: Test higher annealing temperatures in 1-2°C increments to enhance stringency and reduce non-specific binding [67].
- Evaluate Reaction Additives: Incorporate additives like bovine serum albumin (BSA), glycerol, and formamide in the preamplification or PCR reaction mix. One study demonstrated these could reduce nonspecific PCR products by about 1000-fold [68].
- Verify LOB: Determine the Limit of Blank (LOB) for your assay using healthy donor plasma or wild-type DNA. Any signal below this threshold should be considered background [66]. For example, one study established LOBs for various mutations, which ranged from 0 to 5.2 copies per reaction [66].
- Hot-Start Polymerase: Use a hot-start DNA polymerase to minimize primer-dimer formation and non-specific amplification during reaction setup [67].
Problem 2: Low Sensitivity or False Negatives
- Potential Cause: The mutant allele frequency is below the assay's detection limit, or the reaction efficiency is low.
- Solutions:
- Increase Input Material: As demonstrated in a study on breast cancer, analyzing 20 mL of plasma instead of 5 mL increased ctDNA detection from 66.66% to 100% in pre-treatment samples [10].
- Verify LOD and Preamplification Efficiency: Ensure your assay's Limit of Detection (LOD) is sufficient for your target variant allele frequency (e.g., ≤0.1%) [23]. For preamplification steps, note that efficiency, reproducibility, and specificity depend on the number of template molecules present [68].
- Check DNA Polymerase Performance: The amount and type of DNA polymerase can significantly influence results. For difficult templates or high-specificity needs, consider using a high-fidelity or highly selective polymerase [67].
Problem 3: Inconsistent Results Between Replicates
- Potential Cause: Inconsistent partitioning, pipetting errors, or suboptimal primer concentrations.
- Solutions:
- Standardize Pipetting and Workflow: Use calibrated pipettes and master mixes to minimize volumetric errors.
- Optimize Primer Concentration: In targeted preamplification, a large number of primer pairs in the pool can improve performance, but the concentration of each primer (often 40 nM) must be carefully optimized to avoid competition and maintain efficiency [68].
- Confirm Partitioning Quality: In digital PCR, ensure the number of partitions (droplets or wells) is stable and sufficient for reliable statistics [23].
Performance Metrics of Digital PCR Platforms for ctDNA Analysis
The following table summarizes a comparative study of two digital PCR systems for detecting ctDNA in early-stage breast cancer patients [23].
Table 1: Comparison of Digital PCR Platforms for ctDNA Detection
| Feature | QX200 Droplet Digital PCR (ddPCR) | Absolute Q Digital PCR (pdPCR) |
|---|---|---|
| Technology | Droplet-based | Plate-based |
| Sensitivity | Comparable to pdPCR; capable of detecting mutant allele frequencies ≤ 0.1% | Comparable to ddPCR |
| Concordance | >90% with pdPCR in ctDNA positivity | >90% with ddPCR in ctDNA positivity |
| Key Findings | Higher variability between replicates; longer workflow | More stable number of compartments; less hands-on time |
| Best For | Laboratories already integrated with droplet-based systems | Labs seeking a more automated and stable workflow |
Experimental Protocol: Determining LOD and LOB for a ctDNA Assay
This protocol outlines the steps to establish the analytical sensitivity and specificity of a dPCR-based ctDNA assay, using the methodology from a study on melanoma as a guide [66].
1. Determine the Limit of Blank (LOB)
- Objective: Establish the background signal of your assay in the absence of the target mutant DNA.
- Procedure:
- Obtain plasma from healthy donors or use genomic DNA confirmed to be wild-type for your target mutation.
- Process a minimum of 20 replicates of this negative material through your entire workflow (DNA extraction, dPCR).
- Analyze the data and calculate the number of mutant copies per reaction for each replicate.
- The LOB is defined as the 95th percentile of the mutant copies measured in the negative samples. In practice, this means fewer than 5% of your negative controls should show a false-positive signal above this threshold [66].
2. Determine the Limit of Detection (LOD)
- Objective: Find the lowest concentration of mutant DNA that can be reliably distinguished from the LOB.
- Procedure:
- Prepare a serial dilution of synthetic mutant DNA (or DNA from a mutant cell line) into a background of wild-type DNA. The mutant allele frequency should range from 1% down to 0.01%.
- Run a minimum of 24 replicates at the lowest dilution point (e.g., 0.1% mutant allele frequency).
- The LOD is the lowest concentration at which ≥95% of the replicates (e.g., 23 out of 24) return a positive result [66].
- Validate the linearity of your assay by plotting the expected versus the measured mutant allele frequency across all dilutions; a robust assay will have a coefficient of determination (R²) >0.99 [66].
Research Reagent Solutions
Table 2: Essential Reagents for ctDNA Assay Development
| Reagent | Function | Example & Notes |
|---|---|---|
| Streptavidin-Coated Magnetic Beads | Efficient capture and purification of biotin-labeled DNA products from amplification reactions, reducing background interference [49]. | Used in magnetic bead-assisted biosensor systems to isolate ligation products. |
| Digital PCR Master Mix | A chemical formulation optimized for highly partitioned PCR, ensuring efficient amplification in droplets or nano-wells. | Commercial master mixes are available from suppliers like Bio-Rad and Thermo Fisher Scientific. |
| Hot-Start DNA Polymerase | A polymerase that is inactive at room temperature, preventing non-specific amplification and primer-dimer formation during reaction setup, thereby increasing specificity [67]. | Often a component of commercial dPCR or qPCR kits. |
| Cell Line DNA with Known Mutations | Serves as a positive control and reference material for assay optimization and determining LOD [66]. | e.g., UACC62 (BRAF V600E), SKMEL103 (NRAS Q61R). |
| Plasma/Serum from Healthy Donors | Serves as a negative control and wild-type DNA background for determining LOB and assessing specificity [66]. | Essential for establishing a baseline for your assay in a biologically relevant matrix. |
Workflow Diagrams
Diagram 1: ctDNA Assay Validation Workflow
Diagram 2: Magnetic Bead-Assisted ctDNA Detection
In circulating tumor DNA (ctDNA) research, droplet digital PCR (ddPCR) is renowned for its high sensitivity and absolute quantification capabilities, allowing for the detection of mutant allele frequencies as low as 0.01% [24] [69]. However, the reliability of its results hinges on rigorous benchmarking against orthogonal methods. This process is not merely a procedural formality but a fundamental component of assay validation, ensuring that the data generated are accurate, reproducible, and clinically meaningful. For researchers focused on optimizing critical parameters like annealing temperature, establishing this validated baseline is the essential first step. This guide provides targeted troubleshooting and foundational protocols to navigate the challenges of ddPCR method validation.
Experimental Protocols: Core Workflows for Validation
Basic Protocol: ddPCR TaqMan Assay for Variant Quantification
This protocol is adapted for the validation of low-frequency variants, such as single-nucleotide mutations in ctDNA, and is the foundation for the experiments described in this guide [70].
- Reaction Preparation: In a 20 µL reaction volume, combine the following components:
- 10 µL of ddPCR Supermix for Probes (No dUTP)
- 1 µL of 5 µM forward primer
- 1 µL of 5 µM reverse primer
- 1 µL of 2.5 µM FAM-labeled mutation probe
- 1 µL of 2.5 µM HEX/VIC-labeled wild-type probe
- 5 units of an appropriate restriction enzyme (e.g., HaeIII, MseI) to fragment long genomic DNA
- 25–100 ng of input genomic DNA or cfDNA
- Nuclease-free water to 20 µL
- Droplet Generation: Load the reaction mixture into a DG8 cartridge alongside droplet generation oil. Process it in a QX200 Droplet Generator to create thousands of nanoliter-sized droplets.
- PCR Amplification: Transfer the droplets to a 96-well PCR plate and seal. Perform PCR with the following cycling conditions, which require optimization of the annealing temperature (Tm):
- 95°C for 10 minutes (enzyme activation)
- 40 cycles of:
- 94°C for 30 seconds (denaturation)
- Tm for 1 minute (annealing/extension) <<< Key parameter to optimize
- 98°C for 10 minutes (enzyme deactivation)
- 4°C hold
- Droplet Reading and Analysis: Read the plate on a QX200 Droplet Reader. Use QuantaSoft software to quantify the target concentration based on the fraction of positive and negative droplets, applying Poisson statistics.
Protocol for Annealing Temperature Optimization
A critical step in assay development is optimizing the annealing temperature to ensure maximal specificity and efficiency.
- Materials: Your optimized ddPCR reaction mixture from the basic protocol.
- Method:
- Prepare a master mix containing all reaction components.
- Aliquot the mix into multiple tubes.
- Set up a thermal gradient PCR run that tests a range of annealing temperatures (e.g., from 50°C to 65°C in 1-2°C increments).
- Process all samples through droplet generation, PCR, and reading.
- Analysis:
- The optimal annealing temperature is identified by the condition that yields the highest number of positive droplets for the target while maintaining a clear cluster separation between positive and negative populations and a low number of rain droplets (droplets with intermediate fluorescence) [11].
The following diagram illustrates the logical workflow for validating a ddPCR assay, from initial setup to final analysis, highlighting key decision points.
The Scientist's Toolkit: Key Research Reagent Solutions
The table below details essential reagents and their critical functions in ddPCR assay development and validation, as referenced in the search results.
Table 1: Essential Reagents for ddPCR Assay Development and Validation
| Reagent/Material | Function | Examples & Notes |
|---|---|---|
| ddPCR Supermix | Provides core components for PCR (polymerase, dNTPs, buffer) in a format optimized for droplet stability [70]. | Bio-Rad ddPCR Supermix for Probes (No dUTP). |
| TaqMan Probes | Sequence-specific hydrolysis probes that provide fluorescent signal upon amplification. Critical for allele discrimination [70] [11]. | Use FAM for mutant allele, HEX/VIC for wild-type. LNA (Locked Nucleic Acid) bases can enhance specificity for SNP detection [70]. |
| Restriction Enzyme | Fragments long genomic DNA to ensure efficient encapsulation into droplets and prevent bias [71] [70]. | HaeIII, MseI, HindIII. Must not cut within the amplicon. |
| Additives (Betaine/EDTA) | Improves amplification efficiency of difficult targets, such as GC-rich sequences, by reducing secondary structures and stabilizing polymerase [71]. | Used in TERT promoter mutation assays [71]. |
| Reference Materials | Provides a quality control standard for assessing assay accuracy, sensitivity, and limit of detection (LOD) [11]. | Cell line DNA (e.g., SK-BR-3 for TP53 R175H), synthetic ctDNA controls. |
Troubleshooting Guides & FAQs
Low Sensitivity or High Limit of Detection
- Problem: The assay fails to detect mutant alleles at the expected low frequencies (e.g., above 0.1%).
- Q: My assay's limit of detection is not sensitive enough for MRD detection. What can I optimize?
- A: First, review your input DNA quality and quantity. Use a fluorometer for accurate cfDNA quantification. Second, optimize the annealing temperature using a gradient PCR to ensure maximum efficiency and specificity. Third, consider the use of additives like betaine (5M stock) for challenging, GC-rich targets, as demonstrated in TERT promoter assays [71]. Finally, verify that your restriction enzyme does not cut your amplicon.
Poor Cluster Separation and "Rain"
- Problem: The fluorescence plot shows poor separation between positive and negative droplet clusters, with many intermediate-signal "rain" droplets.
- Q: I have excessive rain between my positive and negative clusters. How can I improve discrimination?
- A: This is frequently a issue of probe and primer specificity.
- Re-optimize Annealing Temperature: This is the most common solution. A suboptimal Tm is a primary cause of non-specific amplification and rain [11].
- Check Probe Design: Ensure your TaqMan probes are specific and have a Tm 7–10°C higher than the primers. For SNP discrimination, shorter probes (<20 bp) with LNA modifications can be highly effective [70].
- Validate Primer Specificity: Use in silico tools (e.g., BLAST) to check for off-target binding.
- A: This is frequently a issue of probe and primer specificity.
Discordant Results with Orthogonal Methods
- Problem: Your ddPCR results do not match the results from a different detection method (e.g., NGS or Sanger sequencing).
Q: My ddPCR results show a mutation, but Sanger sequencing does not. Is this a false positive?
- A: Not necessarily. This often highlights the superior sensitivity of ddPCR. Sanger sequencing typically has a detection limit of ~15-20% mutant allele frequency, while ddPCR can reliably detect below 0.1% [71] [69]. In a study of TERT promoter mutations, ddPCR detected mutations in plasma that were not called by Sanger sequencing of tumor tissue, which were later confirmed by more sensitive orthogonal methods like SNaPShot [71]. To investigate, use a third, highly sensitive method (like a different ddPCR assay or ultra-deep sequencing) for arbitration.
Q: How do I validate my ddPCR assay against another method, and what concordance is acceptable?
- A: A well-validated assay should show high concordance with other validated methods. The table below summarizes performance metrics from recent studies.
Table 2: Benchmarking ddPCR Performance Against Orthogonal Methods
| Study Context | Orthogonal Method(s) | Key Performance Metrics | Citation |
|---|---|---|---|
| TERT Promoter Mutations (Melanoma) | Sanger sequencing, SNaPShot | 100% concordance in tumor tissue (32/32 FFPE samples); LOD: 0.051%-0.062% MAF [71]. | [71] |
| TP53 Mutations (Reference Material) | Sanger Sequencing | LOD: 0.092%-0.143% MAF; Excellent linearity (R² > 0.998) across 0.1%-50% MAF [11]. | [11] |
| Early-Stage Breast Cancer (ctDNA) | Plate-based Digital PCR (Absolute Q) | >90% concordance in ctDNA positivity between the two dPCR platforms [23]. | [23] |
| Oral Cancer (Copy Number Alterations) | CGH/SNP Arrays | High correlation with array data (R = 0.92-0.95) for copy number changes [72]. | [72] |
Assay Reproducibility and Precision
- Problem: High variability between technical replicates or different experiment runs.
- Q: How can I ensure my ddPCR results are reproducible?
- A: For a precise and reproducible assay, focus on:
- Standardized Pre-analytical Protocols: Inconsistent blood processing, plasma separation, and DNA extraction are major sources of variability. Use consistent centrifugation steps (e.g., 1600 × g for 10 min, then 16,000 × g for 10 min) and specialized blood collection tubes if processing is delayed [71] [69].
- Reaction Mix Consistency: Precise pipetting and thorough mixing of the reaction cocktail are critical before droplet generation.
- Include Controls: Run positive controls with known mutant allele frequencies and no-template controls in every batch to monitor assay performance and contamination [11]. A well-optimized assay can achieve a coefficient of variation below 5-10% [11].
- A: For a precise and reproducible assay, focus on:
Comparative Analysis of Commercial Assays (e.g., Guardant360, FoundationOne Liquid CDx)
Commercial ctDNA Assays at a Glance
The table below summarizes the key features of two leading FDA-approved comprehensive liquid biopsy assays.
| Feature | FoundationOne Liquid CDx | Guardant360 CDx |
|---|---|---|
| Manufacturer | Foundation Medicine [73] [74] | Guardant Health [73] |
| Approved Genes | 311 genes (FDA-approved); over 324 genes as professional service [74] | Over 60 genes [73] |
| Key Biomarkers | MSI-H, bTMB, tumor fraction (reported as professional service) [74] | Not specified in search results |
| Companion Diagnostic Examples | NSCLC (ALK, EGFR, MET), Prostate Cancer (BRCA), Breast Cancer (PIK3CA) [74] | NSCLC (EGFR) [73] |
| Sample Input | Two 8.5 mL blood tubes [74] | Not specified in search results |
| Reported Turnaround Time | Not specified in search results | Less than 7 days [75] |
Troubleshooting Common Experimental Challenges
Low ctDNA Tumor Fraction and False Negatives
Q: Our lab is observing negative liquid biopsy results in some patients with advanced cancer. What could be causing these false negatives, and how should we proceed?
A: A negative liquid biopsy result does not necessarily mean the target genomic alterations are absent. A primary cause of false negatives is low circulating tumor DNA (ctDNA) tumor fraction—the amount of ctDNA as a fraction of total cell-free DNA [74].
- Confirm with Tissue Biopsy: The FDA recommends that a negative result from either Guardant360 CDx or FoundationOne Liquid CDx be confirmed with a traditional tissue biopsy [73] [76].
- Utilize Tumor Fraction Metrics: Some assays, like FoundationOne Liquid CDx, report ctDNA tumor fraction as a professional service. When results are negative and the reported tumor fraction is low, reflexing to a tissue-based test can identify previously missed actionable alterations. One study found that reflexing to tissue testing found actionable alterations in 52% of driver-negative NSCLC liquid biopsy samples with low tumor fraction [74].
- Increase Blood Volume: For early-stage cancer research where ctDNA levels are minimal, increasing the plasma volume analyzed can enhance sensitivity. One study detected ctDNA in 100% of pre-treatment early breast cancer samples using 20-40 mL of plasma, compared to only 66.66% using a conventional 5 mL volume [10].
Sample Processing and Bioinformatics Failures
Q: Our NGS analysis pipeline for a ctDNA assay has failed. What are the initial steps to diagnose the problem?
A: Failures can occur during wet-lab or bioinformatics steps. The following workflow outlines a systematic troubleshooting approach, based on the DRAGEN TSO 500 ctDNA analysis pipeline [77]:
Specific Sample Sheet Issues:
- Format: Ensure the sample sheet is in the required version (e.g., v2 for TSO 500). A v1 sample sheet is not compatible [77].
- Indexes: Validate that the index sets used are correct for your specific assay and sequencer combination (e.g., TSO 500 ctDNA uses UP1-UP16) [77].
- Fields: For analysis starting from FASTQ files, ensure the
Sample_IDcolumn contains unique values. If starting from BCL files, ensure theLanecolumn is properly filled or removed [77].
Validation with Reference Materials
Q: How can we use commercial reference materials to validate our in-house ctDNA assay's performance, especially for low VAFs?
A: Commercially available reference materials are critical for benchmarking assay sensitivity, specificity, and limit of detection.
Recommended Reference Material Usage:
- Formats: Available as purified DNA/RNA "Mutation Mixes" or full-process "Reference Materials" in FFPE or plasma-like formats to validate the entire workflow from extraction to sequencing [78].
- VAF Ranges: Select materials that match your assay's intended detection limit. Available VAFs can be as low as 0.1% or 0.125% [78].
- Application: These materials should be treated like patient samples and run through your entire NGS process. Use the provided Certificate of Analysis (CoA) with dPCR-verified VAFs to orthogonally confirm your assay's results [78].
Detailed Experimental Protocols
Protocol: Ultrasensitive ctDNA/CTC Co-detection Using Increased Blood Volumes
This protocol, adapted from a study on early breast cancer, is designed for maximal sensitivity in detecting residual disease [10].
1. Patient-Specific Assay Design:
- Perform Whole Exome Sequencing (WES) on tumor tissue and matched germline DNA to identify truncal somatic mutations.
- Select one high-confidence truncal mutation per patient as a biomarker.
- Design and optimize a droplet-digital PCR (ddPCR) assay for the selected mutation.
2. Sample Collection and Processing:
- Collect a minimum of 20 mL of blood per time point into EDTA or CellSave tubes.
- Process blood within a strict timeframe (e.g., within 4 hours for CTC analysis).
- Centrifuge blood to separate plasma and peripheral blood mononuclear cells (PBMCs).
- For plasma: Perform a second centrifugation to remove residual cells.
- For PBMCs: Isulate using Ficoll density gradient centrifugation.
3. DNA Extraction:
- Plasma ctDNA: Extract cell-free DNA from a large plasma volume (e.g., 20 mL) using a manual or automated column-based method. The cited study used a custom procedure to achieve higher purity and lower germline contamination [10].
- CTC DNA: Extract genomic DNA from the PBMC pellet (e.g., from two vials of 100 million PBMCs each) using a standard kit.
4. Droplet Digital PCR:
- Run the extracted DNA from both plasma and PBMC samples using the patient-specific ddPCR assay.
- Include a minimum of 337 negative controls (using patient germline DNA) to eliminate false positives and ensure ultrasensitive detection.
- For CTC quantification, use a pre-established linear regression model from a cell-spiking mimicry experiment to infer CTC count per mL of blood from the ddPCR results [10].
5. Data Analysis:
- ctDNA: Calculate the variant allele frequency (VAF) for the mutation in plasma.
- CTCs: Use the ddPCR results and the linear model to calculate the number of CTCs per mL of blood.
- Residual Disease: The combined detection of ctDNA and/or CTCs post-treatment indicates residual disease.
The Scientist's Toolkit: Essential Research Reagents
The table below lists key materials used in the featured experiments for developing and validating ctDNA assays.
| Item | Function | Example Use Case |
|---|---|---|
| Seraseq ctDNA Mutation Mix [78] | Purified, biosynthetic ctDNA with known mutations at defined VAFs (e.g., 0.1%-5%). | Validating the limit of detection and analytical sensitivity of a lab-developed NGS assay. |
| Seraseq ctDNA Reference Material [78] | ctDNA variants encapsulated in a plasma-like material. | Benchmarking the entire clinical workflow, from sample extraction to final variant calling. |
| GM24385 Cell Line (HG002)[citation:] | Genomically characterized wild-type background DNA/RNA. | Serves as a wild-type control or background matrix for blending synthetic mutant constructs. |
| Patient-Specific ddPCR Assay [10] | Ultrasensitive mutation detection and quantification for a single genomic locus. | Orthogonal confirmation of NGS results and monitoring specific mutations in ctDNA/CTCs. |
| High-Volume Blood Collection Tubes [10] | Enables collection of 20 mL+ of blood per tube for increased plasma yield. | Maximizing input material for ultrasensitive detection of ctDNA in early-stage cancers. |
Navigating Guidelines for Clinical Lab Implementation and Regulatory Approval
Regulatory and Quality Assurance Framework
What are the key regulatory pathways for clinical lab assays?
Navigating the regulatory landscape is crucial for the successful implementation and approval of clinical laboratory assays. The requirements vary by region and the specific nature of your test.
Table: Key Regulatory Pathways and Requirements
| Region/Authority | Pathway/Program | Key Requirements & Focus Areas | Timeline/Deadline Considerations |
|---|---|---|---|
| United States (FDA) | Premarket Approval (PMA), 510(k), De Novo [79] | Rigorous demonstration of safety and effectiveness; Clinical Preclinical studies must follow Good Laboratory Practice (GLP); Biocompatibility (ISO 10993) [79]. | Q-Submission program recommended for pre-study feedback (75-day FDA response) [79]. |
| Europe (EMA) | In Vitro Diagnostic Regulation (IVDR) | Performance evaluation, clinical evidence, and post-market surveillance. | Varies based on device classification. |
| China (NMPA) | Innovative Device Review, Priority Review [80] | Supports "innovative" and "priority" devices; Requires testing in NMPA-certified labs [81]. | Incentives for fast-tracking; Reduced testing timelines (e.g., 60-90 days) [80]. |
| United Kingdom (MHRA) | New Clinical Trial Regulations (Effective April 2026) [82] | Streamlined processes focusing on patient safety and enabling innovation. | 12-month rollout period for new regulations [82]. |
How should we manage bioanalytical data quality in clinical trials?
Adherence to standardized guidelines for bioanalytical laboratories is non-negotiable for generating reliable data. In China, laboratories performing bioanalysis for clinical trials must comply with the newly updated "Guideline for the Management of Drug Clinical Trial Bioanalytical Laboratories," which came into effect in 2025 and replaces the previous trial version [83]. This highlights a global expectation for robust quality management systems, standardized procedures, and rigorous data integrity practices in labs handling clinical samples.
What are the ethical considerations for preclinical and clinical research?
Ethical conduct is a cornerstone of research. For preclinical studies involving animal models, the "3Rs" principle (Replacement, Reduction, and Refinement) is a critical ethical and regulatory framework. Researchers should strive to replace animal models with non-animal methods where possible, reduce the number of animals used without compromising scientific validity, and refine procedures to minimize pain and distress [79].
In clinical trials, particularly Phase I studies on healthy volunteers, ethics committees pay special attention to the justification of the participant population, the scientific validity of the protocol, comprehensive risk control measures, and clear principles for participant compensation [81].
Experimental Protocols and Optimization
What is a detailed protocol for optimizing annealing temperature in ctDNA ddPCR assays?
Optimizing the annealing temperature ((T_a)) is critical for the specificity and sensitivity of ddPCR assays used in ctDNA detection. The following workflow provides a systematic approach.
Step-by-Step Methodology:
- Primer/Probe Design and Initial Setup: Design primers and probes targeting your specific mutation. The predicted melting temperature ((T_m)) serves as a starting point. For example, one study targeting HPV16 DNA used primers for the E6 region and determined an optimal annealing temperature of 56.5°C through validation [48].
- Gradient ddPCR Run: Prepare the ddPCR reaction mixture according to the manufacturer's instructions (e.g., using Bio-Rad's QX200 system with ddPCR Supermix for Probes). Set a thermal cycler gradient spanning a range around the predicted (T_m) (e.g., from 55°C to 65°C).
- Post-Run Data Analysis: Analyze the results from the gradient run by examining:
- Amplification Plots: Identify the temperature that produces the cleanest separation between positive and negative amplification signals, with minimal non-specific amplification or primer-dimer formation.
- Droplet Count and Clarity: Ensure the number of generated droplets is sufficient and that they are well-defined across all temperatures.
- Selection of Optimal (Ta): The optimal (Ta) is typically the highest temperature that yields a strong, specific fluorescence amplitude and a high mutant copy count. This maximizes specificity.
- Validation: Confirm the selected (T_a) using well-characterized positive controls (e.g., synthetic DNA with the target mutation) and negative controls (wild-type DNA or no-template controls) to ensure specificity and sensitivity.
How can we enhance sensitivity for detecting low-frequency variants in ctDNA?
The sensitivity of ctDNA detection is a major challenge, especially in early-stage cancers where variant allele frequency (VAF) can be ≤ 0.1% [23]. Key strategies include:
- Increasing Input Blood Volume: Research shows that analyzing larger plasma volumes (e.g., 20-40 mL instead of the conventional 5 mL) significantly improves detection rates. One study achieved a 100% detection rate in pre-treatment early breast cancer samples using high-volume plasma, with a minimum VAF of 0.01% [10].
- Optimizing cfDNA Extraction and Loading: Technical optimizations in the lab can drastically improve sensitivity. This includes:
- Concentrating the extracted cfDNA by using a lower elution volume.
- Maximizing the amount of cfDNA loaded into a single ddPCR reaction. One optimized protocol increased the sample volume loading by 22-fold and the total cfDNA tested by 1200-fold without the need for restriction enzyme digestion [48].
- Platform Selection: Both droplet-digital PCR (ddPCR) and plate-based digital PCR (pdPCR) show high concordance (>90%) and are suitable for ctDNA analysis in early-stage cancer, with ddPCR being the current gold standard [23].
Troubleshooting Common Technical Issues
What should I do if my ddPCR assay shows poor droplet generation or low amplitude separation?
Problem: The ddPCR readout shows a low number of total droplets, rain (events between positive and negative clusters), or poor separation between clusters.
Solutions:
- Check Sample Quality and Purity: Inhibitors from the sample or cfDNA extraction process can disrupt droplet formation or PCR efficiency. Ensure cfDNA is of high purity. As an alternative, a rapid direct-ddPCR assay using heat-treated, unpurified cfDNA has been developed, which may bypass extraction-related issues, though with a potential trade-off in concordance (55.6-95.8% depending on the sample type) [48].
- Optimize Reaction Mix: Verify that the concentrations of primers, probes, and DNA template are optimal. Degraded reagents can cause low amplitude.
- Verify Thermal Cycler Conditions: Ensure the thermal cycler blocks are calibrated and the protocol, especially the annealing temperature, is correctly set. Re-optimize the (T_a) as per the protocol above if necessary.
How can I address high background noise or false positives in my ctDNA assay?
Problem: The assay detects signal in negative controls or shows an implausibly high VAF.
Solutions:
- Verify Primer/Probe Specificity: Use BLAST or similar tools to check for off-target binding sites. Consider designing new primers if specificity is poor.
- Increase Annealing Temperature: A higher (Ta) can increase stringency and reduce non-specific amplification. Re-run the (Ta) gradient optimization at a higher range.
- Include Comprehensive Controls: Always run multiple negative controls, including no-template controls (NTC) and wild-type DNA controls, to identify contamination or probe-related artifacts. One study utilized 337 negative controls to eliminate false positives and ensure ultra-sensitive detection [10].
The Scientist's Toolkit: Essential Research Reagent Solutions
Table: Key Reagents and Materials for ctDNA ddPCR Assays
| Item | Function/Description | Example & Note |
|---|---|---|
| ddPCR System | Partitions samples into thousands of nanodroplets for absolute quantification of nucleic acids. | QX200 Droplet Digital PCR System (Bio-Rad) is a widely used gold standard [10] [23]. |
| ddPCR Supermix | A ready-to-use reaction mix optimized for probe-based ddPCR. | Bio-Rad's ddPCR Supermix for Probes (Cat. No. 1863024) is commonly cited [48]. |
| cfDNA Extraction Kit | Isolves cell-free DNA from plasma or other liquid biopsies. | QIAamp Circulating Nucleic Acid Kit (Qiagen) is a standard method [10] [48]. |
| Target-Specific Primers/Probes | Binds to and detects the specific mutant allele of interest. | Must be designed for a truncal somatic mutation; validated for specificity and efficiency [10]. |
| Reference DNA (Wild-type) | Serves as a negative control to establish a baseline for mutant allele detection. | Essential for distinguishing signal from noise and calculating VAF. |
| Positive Control (Mutation-bearing DNA) | Synthetic or cell-line-derived DNA with the target mutation. | Used during assay development/optimization to confirm performance. |
Navigating International Collaboration and Data Security
Are there restrictions on international transfer of biological samples for clinical trials?
Yes, regulations are becoming increasingly strict regarding the international transfer of sensitive biological materials, such as human cells and genetic data. The U.S. FDA has halted new clinical trials that involve exporting American citizens' living cells to certain countries (including China) for genetic engineering and subsequent re-infusion, citing concerns over participant consent and the potential misuse of sensitive genetic data by foreign governments [82]. If your research involves international collaboration, it is critical to ensure full transparency with participants, obtain explicit ethical consent for the international transfer and manipulation of biological material, and consider domestic handling of sensitive samples to avoid regulatory roadblocks.
Conclusion
Optimizing annealing temperature is not an isolated technical step but a pivotal component of a holistic strategy to enhance ctDNA assay performance. As summarized from the four intents, success hinges on a deep understanding of ctDNA biology, careful selection of technological platforms, systematic optimization of reaction parameters, and rigorous analytical validation. The ongoing convergence of advanced methods—such as error-corrected NGS, fragmentomics, and methylation profiling—with refined PCR protocols promises to push detection limits further, potentially to attomolar levels. For researchers and drug developers, mastering these optimizations is key to unlocking the full potential of liquid biopsy, enabling earlier detection of residual disease, more accurate monitoring of treatment response, and the timely identification of resistance mechanisms, thereby fundamentally advancing the goals of precision oncology.
References
- 1. Circulating tumor nucleic acids: biology, release mechanisms ... [https://molecular-cancer.biomedcentral.com/articles/10.1186/s12943-022-01710-w]
- 2. Circulating Tumor DNA (ctDNA) vs. Cell-free DNA (cfDNA) [https://www.cd-genomics.com/resource-ctdna-vs-cfdna.html]
- 3. Cell-Free DNA (cfDNA) vs. Circulating Tumor DNA (ctDNA) ... [https://www.thermofisher.com/blog/life-in-the-lab/cfdna-vs-ctdna/]
- 4. Circulating tumor DNA: a promising biomarker in the liquid ... [https://pmc.ncbi.nlm.nih.gov/articles/PMC5217053/]
- 5. Life and death of circulating cell-free DNA - PMC [https://pmc.ncbi.nlm.nih.gov/articles/PMC6606043/]
- 6. A Novel Cell-Free DNA Fragmentomic Assay and Its ... [https://pmc.ncbi.nlm.nih.gov/articles/PMC12606779/]
- 7. Clinical Circulating Tumor DNA Testing for Precision ... [https://www.e-crt.org/journal/view.php?number=3469]
- 8. Genetic profiling of cancer with circulating tumor DNA ... [https://www.sciencedirect.com/science/article/abs/pii/S1673852718300201]
- 9. Establishment of Reference Measurement Procedure for ... [https://www.mdpi.com/2073-4425/16/5/576]
- 10. Increased blood draws for ultrasensitive ctDNA and CTCs ... [https://www.nature.com/articles/s41523-024-00642-6]
- 11. Establishment of Reference Measurement Procedure for ... [https://pmc.ncbi.nlm.nih.gov/articles/PMC12110974/]
- 12. Real-World Technical Hurdles of ctDNA NGS Analysis [https://pmc.ncbi.nlm.nih.gov/articles/PMC12564474/]
- 13. Monitoring and Assessment of Circulating Tumor DNA in ... [https://pmc.ncbi.nlm.nih.gov/articles/PMC12550271/]
- 14. eVIDENCE: a practical variant filtering for low-frequency ... [https://www.nature.com/articles/s41598-019-51459-4]
- 15. Variant Allele Frequency Analysis of Circulating Tumor DNA ... [https://pmc.ncbi.nlm.nih.gov/articles/PMC10887123/]
- 16. Validation of a liquid biopsy assay with increased ... [https://www.sciencedirect.com/science/article/pii/S2950195425000384]
- 17. Clinical Validation of Digital PCR-based ctDNA detection ... [https://www.medrxiv.org/content/10.1101/2025.07.02.25330747v1.full-text]
- 18. Strategies for improving detection of circulating tumor DNA ... [https://www.sciencedirect.com/science/article/pii/S0305737223000889]
- 19. Binary classification of copy number alteration profiles in ... [https://www.nature.com/articles/s41598-024-68229-6]
- 20. Pre-Analytical Evaluation of Streck Cell-Free DNA Blood ... [https://pmc.ncbi.nlm.nih.gov/articles/PMC10093569/]
- 21. The impact of preanalytical variables on the analysis of cell ... [https://pmc.ncbi.nlm.nih.gov/articles/PMC11111958/]
- 22. Optimization of Sources of Circulating Cell-Free DNA ... [https://pmc.ncbi.nlm.nih.gov/articles/PMC8647427/]
- 23. Comparative study of droplet-digital PCR and absolute Q ... [https://www.sciencedirect.com/science/article/pii/S0009898123004758]
- 24. Digital PCR: from early developments to its future application ... [https://pubs.rsc.org/en/content/articlehtml/2025/lc/d5lc00055f]
- 25. Performance Comparison of Droplet Digital PCR and Next ... [https://pmc.ncbi.nlm.nih.gov/articles/PMC12062871/]
- 26. Analytical evaluation of circulating tumor DNA sequencing ... [https://www.nature.com/articles/s41598-024-54361-w]
- 27. PCR Troubleshooting Guide | Thermo Fisher Scientific - US [https://www.thermofisher.com/us/en/home/life-science/cloning/cloning-learning-center/invitrogen-school-of-molecular-biology/pcr-education/pcr-reagents-enzymes/pcr-troubleshooting.html]
- 28. How to Simplify PCR Optimization Steps for Primer ... [https://www.thermofisher.com/us/en/home/brands/thermo-scientific/molecular-biology/molecular-biology-learning-center/molecular-biology-resource-library/spotlight-articles/pcr-annealing-optimization-universal-annealing.html]
- 29. An optimized protocol for stepwise optimization of real-time RT ... [https://pmc.ncbi.nlm.nih.gov/articles/PMC8325682/]
- 30. How to Troubleshoot Sequencing Preparation Errors (NGS ... [https://www.cd-genomics.com/resource-sequencing-preparation-troubleshooting.html]
- 31. Digital PCR Support—Troubleshooting [https://www.thermofisher.com/us/en/home/technical-resources/technical-reference-library/real-time-digital-PCR-applications-support-center/digital-pcr-support/digital-pcr-support-troubleshooting.html]
- 32. A comparative study of four cell-free DNA assays for ... [https://pmc.ncbi.nlm.nih.gov/articles/PMC12217890/]
- 33. Real-World Technical Hurdles of ctDNA NGS Analysis [https://www.mdpi.com/2079-9721/13/10/312]
- 34. 唯一分子标记(UMIs) | 确保测序的准确性 [https://www.illumina.com.cn/techniques/sequencing/ngs-library-prep/multiplexing/unique-molecular-identifiers.html]
- 35. UMI-tools:精准量化基因表达和UMIs处理利器 [https://blog.csdn.net/yangl7/article/details/146930796]
- 36. salmon工具:UMIs技术下的基因表达量精准估算 [https://blog.csdn.net/yangl7/article/details/146394838]
- 37. 开源项目推荐:UMIs处理工具 [https://blog.csdn.net/gitblog_00432/article/details/144671686]
- 38. 第7 页– IN LEARNING WE TRUST - 子夜星河 [https://zfangcs.wordpress.com/page/7/]
- 39. Circulating tumour DNA assays in focus: highlights from ASCO ... [https://pmc.ncbi.nlm.nih.gov/articles/PMC12449440/]
- 40. Tumor-Informed vs Tumor-Agnostic ctDNA: A Deep Dive ... [https://www.targetedonc.com/view/tumor-informed-vs-tumor-agnostic-ctdna-a-deep-dive-into-mrd-assay-selection]
- 41. Circulating Tumor DNA detection in cancer - PubMed Central [https://pmc.ncbi.nlm.nih.gov/articles/PMC12450317/]
- 42. Circulating tumor DNA to monitor treatment response in ... [https://www.nature.com/articles/s41698-025-00876-y]
- 43. PCR Troubleshooting Guide [https://www.neb.com/en-us/tools-and-resources/troubleshooting-guides/pcr-troubleshooting-guide?srsltid=AfmBOorNwH79eoYeKfSYJ0scx4GXh4PMnDdVdCG8iBtfRTn46phHebW-]
- 44. Clinical utility of ctDNA by amplicon based next generation ... [https://www.nature.com/articles/s41598-024-73046-y]
- 45. Annealing temperature FAQs | IDT [https://www.idtdna.com/page/support-and-education/decoded-plus/annealing-temperature-faqs/]
- 46. FAQ: How should I determine the appropriate annealing ... [https://www.neb.com/en/faqs/2023/07/27/how-should-i-determine-the-appropriate-annealing-temperature-for-my-reaction?srsltid=AfmBOor695Up_vn4KQTj5FR-U3dka7DedoTVVJbzkJbnLov3PX1meCrX]
- 47. PCR Troubleshooting Guide | Thermo Fisher Scientific - BR [https://www.thermofisher.com/br/en/home/life-science/cloning/cloning-learning-center/invitrogen-school-of-molecular-biology/pcr-education/pcr-reagents-enzymes/pcr-troubleshooting.html]
- 48. Rapid and Sensitive Digital Droplet PCR Assays for ... [https://pmc.ncbi.nlm.nih.gov/articles/PMC11683180/]
- 49. Detection of circulating tumor DNA (ctDNA) using a ... [https://www.sciencedirect.com/science/article/abs/pii/S0026265X25030152]
- 50. A clinician's handbook for using ctDNA throughout the patient ... [https://molecular-cancer.biomedcentral.com/articles/10.1186/s12943-022-01551-7]
- 51. Improvement of the sensitivity of circulating tumor DNA-based ... [https://pmc.ncbi.nlm.nih.gov/articles/PMC12332530/]
- 52. Personalized tumor-specific DNA junctions to detect ... [https://pmc.ncbi.nlm.nih.gov/articles/PMC8192008/]
- 53. Patient-specific sequencing panels enable sensitive ... [https://www.nature.com/articles/s41698-025-01147-6]
- 54. Rapid Multiplex Strip Test for the Detection of Circulating ... [https://www.mdpi.com/2079-6374/12/2/97]
- 55. A clinician's handbook for using ctDNA throughout the patient ... [https://pmc.ncbi.nlm.nih.gov/articles/PMC8935823/]
- 56. Optimization of the annealing temperature for DNA amplification in vitro - PubMed [https://pubmed.ncbi.nlm.nih.gov/2243783/]
- 57. Identification of rare levels of methylated tumor DNA ... [https://pmc.ncbi.nlm.nih.gov/articles/PMC6281424/]
- 58. Troubleshooting qPCR: Interpreting Amplification Curves [https://blog.biosearchtech.com/thebiosearchtechblog/bid/63622/qpcr-troubleshooting]
- 59. qPCR Troubleshooting: How to Ensure Successful ... [https://dispendix.com/blog/qpcr-troubleshooting]
- 60. General troubleshooting for low product or late Ct values [https://pcrbio.com/resources/faqs/lyo-ready-probe-1-step-kit/general-troubleshooting-for-low-product-or-late-ct-values-2/]
- 61. Strategies for improving detection of circulating tumor DNA ... [https://pubmed.ncbi.nlm.nih.gov/37390697/]
- 62. Ultrasensitive ctDNA detection for preoperative disease ... [https://www.nature.com/articles/s41591-024-03216-y]
- 63. Clinical Practice Guideline for Blood-based Circulating Tumor ... [https://pmc.ncbi.nlm.nih.gov/articles/PMC10813828/]
- 64. Commercial ctDNA assays for minimal residual disease ... [https://pmc.ncbi.nlm.nih.gov/articles/PMC9016631/]
- 65. Circulating Tumor DNA—A Novel Biomarker of Tumor ... [https://pmc.ncbi.nlm.nih.gov/articles/PMC9775401/]
- 66. Circulating tumor DNA (ctDNA) detection is associated with ... [https://www.nature.com/articles/s41598-020-75792-1]
- 67. Optimization of Annealing Temperature and other PCR ... [https://www.genaxxon.com/shop/en/blog/optimization-of-annealing-temperature-and-other-pcr-parameters]
- 68. Properties of targeted preamplification in DNA and cDNA ... [https://pmc.ncbi.nlm.nih.gov/articles/PMC4673511/]
- 69. Circulating tumor DNA laboratory processes and clinical ... [https://www.frontiersin.org/journals/oncology/articles/10.3389/fonc.2025.1520733/full]
- 70. Validation of single-nucleotide mosaic variants through ... [https://pmc.ncbi.nlm.nih.gov/articles/PMC11115377/]
- 71. Development of Novel Mutation-Specific Droplet Digital PCR ... [https://pmc.ncbi.nlm.nih.gov/articles/PMC6419583/]
- 72. Detection of clinically relevant copy number alterations in ... [https://www.nature.com/articles/s41598-017-11201-4]
- 73. FDA Approves Blood Tests That Can Help Guide Cancer Treatment - NCI [https://www.cancer.gov/news-events/cancer-currents-blog/2020/fda-guardant-360-foundation-one-cancer-liquid-biopsy]
- 74. FoundationOne Liquid CDx [https://www.foundationmedicine.com/test/foundationone-liquid-cdx]
- 75. Guardant Complete® for Early and Advanced Stage Cancer [https://guardanthealth.com/products/tests-for-patients-with-early-and-advanced-stage-cancer/]
- 76. The Evolution of Liquid Biopsy in Cancer Care - The ASCO Post [https://ascopost.com/issues/october-10-2021/the-evolution-of-liquid-biopsy-in-cancer-care/]
- 77. Troubleshooting [https://help.connected.illumina.com/tso500/dragen-tso-500-ctdna-guides/dragen-tso-500-ctdna-v2.6/troubleshooting]
- 78. Clinical Genomics Frequently Asked Question [https://digital.seracare.com/cg-faq]
- 79. FDA医疗器械临床前研究要求指南 [https://namsa.com/zh-CN/resources/blog/guide-fda-preclinical-study-requirements-for-medical-devices/]
- 80. 北京市经济和信息化局等六部门关于印发《北京市促进医疗 ... [https://www.ncsti.gov.cn/zcfg/zcwj/202511/t20251125_229963.html]
- 81. 药物I期临床试验管理指导原则-2025年6月 [http://www.szsdsrmyy.com/kxyj/gjywlcsyjg/zcfg/content/post_1578652.html]
- 82. Regulatory Express_July 2025 - CQAF [http://cqaf.org/news/info?news_id=222]
- 83. 关于发布《药物临床试验生物样品分析实验室管理指南》的通告- [http://www.cjpi.org.cn/zryyxxw/yaop/cfdatz/webinfo/2025/11/1759928677621502.htm]